




















FFSS2615TP1 Frigidaire Refrigerator - Instructions
Keep searches simple. Use keywords, e.g. "leaking", "pump", "broken" or "fit".
Switch would not allow door to close.
Removed screws holding unit and removed unit. Removed switch from connectors in unit. Replaced unit without switch. On day switch arrived (delivery was prompt) my wife replaced switch by attaching the two connectors and slipping into unit without having to remove entire unit. How easy was that!!!
Parts Used:

-
Charles from Front Royal, VA
-
Difficulty Level:Really Easy
-
Total Repair Time:Less than 15 mins
-
Tools:Nutdriver, Screw drivers
7 of 8 people
found this instruction helpful.
Was this instruction helpful to you?
Thank you for voting!
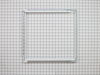
Cracked in the middle
Slid the meat pan out of the fridge, popped the glass from under and removed it, popped the front of shelf upward and then slid it out, and for the new one I did everything in reverse that’s it took me less than 10 minuets.
Parts Used:
-
robert from compton, CA
-
Difficulty Level:Really Easy
-
Total Repair Time:Less than 15 mins
7 of 8 people
found this instruction helpful.
Was this instruction helpful to you?
Thank you for voting!
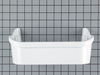
bins have been broken for several years
The parts arrived much quicker than expected. The parts were exact matches and they snapped into place within minutes.
Parts Used:
-
William from Spokane, WA
-
Difficulty Level:Really Easy
-
Total Repair Time:Less than 15 mins
8 of 11 people
found this instruction helpful.
Was this instruction helpful to you?
Thank you for voting!
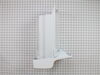
The Ice Crusher Did Not Work And The Bin Was Carroded From A Previous Owner
I removed the ice container found the part # on the bottom ordered a new one and installed it. It just slipped right in to place.
Parts Used:
-
Imogene from Truth or Consequences, NM
-
Difficulty Level:Really Easy
-
Total Repair Time:Less than 15 mins
7 of 9 people
found this instruction helpful.
Was this instruction helpful to you?
Thank you for voting!
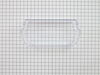
I dropped and cracked the door bin
2 steps; 1. I removed the broken door bin 2. I slid the new door bin in place, Am I a genius or what!
Parts Used:
-
Melissa from Huntersville, NC
-
Difficulty Level:Really Easy
-
Total Repair Time:Less than 15 mins
7 of 9 people
found this instruction helpful.
Was this instruction helpful to you?
Thank you for voting!
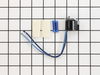
Frost build up on evaporator
Remove the bottom freezer drawer. Remove back metal evaporator panel. Wire in new defrost terminationT-stat. Reassemble evap panel. Good to go.
Parts Used:
-
B J from Dillingham, AK
-
Difficulty Level:Really Easy
-
Total Repair Time:15 - 30 mins
-
Tools:Nutdriver
12 of 24 people
found this instruction helpful.
Was this instruction helpful to you?
Thank you for voting!
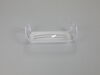
One of the fridge bins snapped as I used one finger to pull ithe door shut
!st bin that came was broken when it arrived. It was only wrapped in a plastic bag inside the box. The second bin survived although wrapped the same way.....15 seconds to get it snapped in. Do NOT pull the fridge door shut with one finger on the bin!! LOL
Parts Used:
-
Tracy from LA CYGNE, KS
-
Difficulty Level:Really Easy
-
Total Repair Time:Less than 15 mins
7 of 9 people
found this instruction helpful.
Was this instruction helpful to you?
Thank you for voting!
plastic frame broke in front needed replaced
Well I’ve been cleaning refrigerators for 50 years... so have experience removing shelves etc., for cleaning....I removed shelf and then glass and put new one in........easy peasy
Parts Used:
-
Roxie from PORT ST LUCIE, FL
-
Difficulty Level:Very Easy
-
Total Repair Time:Less than 15 mins
6 of 6 people
found this instruction helpful.
Was this instruction helpful to you?
Thank you for voting!
I took the shelf out to wash it and it broke in a million pieces

-
Beverly from PHILADELPHIA, PA
-
Difficulty Level:Very Easy
-
Total Repair Time:Less than 15 mins
6 of 6 people
found this instruction helpful.
Was this instruction helpful to you?
Thank you for voting!
Freezer door gasket became loose
Followed instructions for this part from this site and things went well.
Parts Used:

-
Jerome from Detroit, MI
-
Difficulty Level:Easy
-
Total Repair Time:30 - 60 mins
6 of 6 people
found this instruction helpful.
Was this instruction helpful to you?
Thank you for voting!
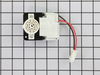
EVAPORATOR FAN MOTOR & BLADE
The service manual diagram shows the 149 complete fan shroud in a vertical (upright) position. Misleading! Of course.
The actual mounting of the lay in fan shroud fully assembled is in the horizontal position laying in a tray area just above the evaporator coil cage assembly. The entire shroud assembly can be installed incorrectly by the diagram and will still fit. BUT... no cold air will flow or be forced into the ice maker vent nor the refrigerator vent. I found this out the hard way by trial & error.
If the drawing had shown it in the horizontal position for both removal and reinstallation... it would have saved a lot of time and headaches. Also, the diagram does not show the (2) plastic angle supports on the shroud, another scratch your head event. Parts included on drawing... 149, 5, 8, 9, 13, 14 on CTFFHS2611PF4 diagram page of service manual.
ALSO, the (4) lower cabinet plate screws have to be removed, and the first left hand screw counting up to allow the next upper panel to swing out enough to lay the shroud in correctly (horizontal) on top of the evaporator coil cage. BOTTOM LINE... THE AIR FLOW HAS TO BE UP IN ORDER TO WORK PROPERLY.
The actual mounting of the lay in fan shroud fully assembled is in the horizontal position laying in a tray area just above the evaporator coil cage assembly. The entire shroud assembly can be installed incorrectly by the diagram and will still fit. BUT... no cold air will flow or be forced into the ice maker vent nor the refrigerator vent. I found this out the hard way by trial & error.
If the drawing had shown it in the horizontal position for both removal and reinstallation... it would have saved a lot of time and headaches. Also, the diagram does not show the (2) plastic angle supports on the shroud, another scratch your head event. Parts included on drawing... 149, 5, 8, 9, 13, 14 on CTFFHS2611PF4 diagram page of service manual.
ALSO, the (4) lower cabinet plate screws have to be removed, and the first left hand screw counting up to allow the next upper panel to swing out enough to lay the shroud in correctly (horizontal) on top of the evaporator coil cage. BOTTOM LINE... THE AIR FLOW HAS TO BE UP IN ORDER TO WORK PROPERLY.
Parts Used:

-
Glen from HENDERSONVLLE, NC
-
Difficulty Level:Easy
-
Total Repair Time:30 - 60 mins
-
Tools:Nutdriver, Screw drivers
6 of 6 people
found this instruction helpful.
Was this instruction helpful to you?
Thank you for voting!
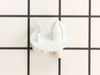
chrisper drawer jammed found supports were broken
Looked at video on how to remove and reinstall support and followed the instruct ions
Parts Used:
-
ROMAN from COLTON, CA
-
Difficulty Level:Really Easy
-
Total Repair Time:15 - 30 mins
-
Tools:Screw drivers
6 of 7 people
found this instruction helpful.
Was this instruction helpful to you?
Thank you for voting!
Water dripped from water outlet on door
-
Douglas from Denver, IN
-
Difficulty Level:Easy
-
Total Repair Time:15 - 30 mins
-
Tools:Nutdriver
6 of 7 people
found this instruction helpful.
Was this instruction helpful to you?
Thank you for voting!
Support stude for both vegetable crispers broken off
Support studs have an expansion fitting - center post has to be pushed through to allow expansion joint to collapse for removal. After installation, this post can be pushed in or pulled out to secure the stud and be the proper length to hold the bins.
None of this was obvious - an online tip from another member was invaluable.
None of this was obvious - an online tip from another member was invaluable.
Parts Used:
-
RANDY from NORTH CHARLESTON, SC
-
Difficulty Level:A Bit Difficult
-
Total Repair Time:30 - 60 mins
-
Tools:Pliers, Screw drivers
6 of 7 people
found this instruction helpful.
Was this instruction helpful to you?
Thank you for voting!
Broken parts
-
Mervin from THONOTOSASSA, FL
-
Difficulty Level:Really Easy
-
Total Repair Time:Less than 15 mins
7 of 10 people
found this instruction helpful.
Was this instruction helpful to you?
Thank you for voting!