




















FFLG2022MW2 Frigidaire Washer Dryer Combo - Instructions
Keep searches simple. Use keywords, e.g. "leaking", "pump", "broken" or "fit".
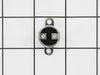
Dryer would not turn on, no power. Since i already have replaced thermal limiter switch, i knew exactly what to do and also how to shorten installation
Remove 2 screws from back of unit, remove top by lifting and pulling up, set aside. Using pliers,needle-nose, remove the 2 wires from switch, then using a magitized philips screw driver, remove 2 screws holding switch to back of unit, replace switch, reassemble everything. 20 minutes, boom, ur done, dry some clothes now
Parts Used:
-
Daniel from SAN ANTONIO, TX
-
Difficulty Level:Very Easy
-
Total Repair Time:15 - 30 mins
-
Tools:Pliers, Screw drivers
2 of 2 people
found this instruction helpful.
Was this instruction helpful to you?
Thank you for voting!
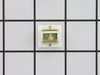
Door catch broken
Popped in the new door catch! Tightened the hinge screws( which work loose and allow the door to droop. The reason the catch broke!) Also put red Loctite on the screws in an attempt to keep them from backing out again! Working great so far!!!
Parts Used:
-
TJ from SCOTT DEPOT, WV
-
Difficulty Level:Very Easy
-
Total Repair Time:Less than 15 mins
2 of 2 people
found this instruction helpful.
Was this instruction helpful to you?
Thank you for voting!
The striker that signals that the lid is closed broke
The striker is attached with two Phillips screws. All you do is unscrew the broken one and screw on the new one, and you have saved yourself from an expensive service call.
Parts Used:
-
John from SILVER SPRING, MD
-
Difficulty Level:Very Easy
-
Total Repair Time:Less than 15 mins
-
Tools:Screw drivers
2 of 2 people
found this instruction helpful.
Was this instruction helpful to you?
Thank you for voting!
May not have to take out the whole drum to replace the limiter!
After lifting the dryer top and finding the location of the thermal limiter on the back of the dryer, where it is difficult to get at, I carefully cut through the dryer cabinet with the multimaster on three sides to form a 'flap' upon which the limiter was mounted. By prying this flap open from the back, the two wires and two screws are easily accessible to replace the limiter, without having to remove the whole drum. Afterwards, I just bent the flap back into place and taped the seams. If it ever blows again, the fix will take all of about two minutes.
Parts Used:
-
Timothy from CRANBURY, NJ
-
Difficulty Level:Really Easy
-
Total Repair Time:15 - 30 mins
-
Tools:Pliers, Screw drivers
2 of 2 people
found this instruction helpful.
Was this instruction helpful to you?
Thank you for voting!
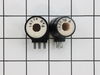
Gas flame turns off after a while, dryer keeps turning but no heat is generated.
Before this fix which worked beautifully, I tried replacing the flame sensor which did not work. To read that story, search under part number PS459818 (Flame Sensor). Our model is a Westinghouse, so access to the unit is a bit different than the other stories. It's a stacked front-loader sitting on top of a washing machine.
1. Open the little front door (lower left side) by unscrewing the little screw right below it. The door will pivot and slide out vertically.
2. Disconnect the electrical main lead coming from the back of the unit (just in case).
3. Close the gas switch lever on main gas pipe coming from the back on left side (just in case).
2. Remove 2 phillips screws on top of the metal bracket holding the two coils. The screws have to be removed completely along with the bracket. It's easy, they are right in front and there is room for the screwdriver. Use a thin long one instead of one with multiple bits to better align with the screws, which are very close to the coils.
3. The two coils slide right out and are very different so it's easy to keep them straight. Remove electrical connectors before or after removing the coils (I marked the plastic on top with a sharpie to keep them in the right orientation).
4. Drop in the two new coils and reconnect them to the electrical leads.
5. Reconnect main electrical lead from back (match wire colors)
6. Reopen gas lever on gas pipe.
7. Drop in front cover at an angle, tilt vertically and put screw back underneath. Use magnetized screwdriver or a piece of scotch tape to hold the screw or it might fall off the screwdriver.
8. Voila'. It worked.
This website is great. Our dryer is a Westinghouse bought in 1991 (almost 20 years old!) and with this fix it's just like new. In 1994 we used parts bought here to fix our washing machine (Westinghouse LT350RXW1). That machine is now 15 years old and still going!
1. Open the little front door (lower left side) by unscrewing the little screw right below it. The door will pivot and slide out vertically.
2. Disconnect the electrical main lead coming from the back of the unit (just in case).
3. Close the gas switch lever on main gas pipe coming from the back on left side (just in case).
2. Remove 2 phillips screws on top of the metal bracket holding the two coils. The screws have to be removed completely along with the bracket. It's easy, they are right in front and there is room for the screwdriver. Use a thin long one instead of one with multiple bits to better align with the screws, which are very close to the coils.
3. The two coils slide right out and are very different so it's easy to keep them straight. Remove electrical connectors before or after removing the coils (I marked the plastic on top with a sharpie to keep them in the right orientation).
4. Drop in the two new coils and reconnect them to the electrical leads.
5. Reconnect main electrical lead from back (match wire colors)
6. Reopen gas lever on gas pipe.
7. Drop in front cover at an angle, tilt vertically and put screw back underneath. Use magnetized screwdriver or a piece of scotch tape to hold the screw or it might fall off the screwdriver.
8. Voila'. It worked.
This website is great. Our dryer is a Westinghouse bought in 1991 (almost 20 years old!) and with this fix it's just like new. In 1994 we used parts bought here to fix our washing machine (Westinghouse LT350RXW1). That machine is now 15 years old and still going!
Parts Used:
-
Giuseppe from San Francisco, CA
-
Difficulty Level:Easy
-
Total Repair Time:15 - 30 mins
-
Tools:Screw drivers
3 of 5 people
found this instruction helpful.
Was this instruction helpful to you?
Thank you for voting!
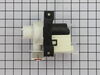
Impellar was broken on the washer drain pump.
Removed front panel and unplugged wire connector to drain pump. Loosened two hose clamps and removed hoses the unbolted drain pump from washer frame. Simple removal and even simplier installation of new drain pump.
Parts Used:
-
Michael from IOWA PARK, TX
-
Difficulty Level:Really Easy
-
Total Repair Time:15 - 30 mins
-
Tools:Pliers, Screw drivers
2 of 2 people
found this instruction helpful.
Was this instruction helpful to you?
Thank you for voting!
Dryer not heating
UNPLUG DRYER (this is key) Removed the top of dryer. used screwdriver and pliers to remove two screws and electrical connections then reinstalled new part stick the magnet behind the part to the back of the dryer to help control the small screws.
Parts Used:
-
Steve from COVINGTON, KY
-
Difficulty Level:Easy
-
Total Repair Time:15 - 30 mins
-
Tools:Pliers, Screw drivers
2 of 2 people
found this instruction helpful.
Was this instruction helpful to you?
Thank you for voting!
High pitched squeal from dryer during use...
Followed directions of another website...had to replace ball and socket joint that attached the drum to the back frame of the dryer...removed top outside metal cover of dryer to facilitate attaching ball/socket kit to the drum...this allowed us to secure the ball/socket kit to the drum without cross threading the screws...with the top of dryer removed this allows you to lift the drum to fit into the plastic bracket...dryer had been in use for over ten years before repair...extreme amount of lint debris throughout internal area of dryer...lint was everywhere...spent a large amount of time vacuuming lint...duct connection from lint trap to lint fan/impeller was very loose and over the years lint seeped out from connection...suggest using duct tape or wood/composite shims to hold the lint duct to the fan/impeller...make sure you remove lint from the back of drum crevice and around the area of the heating element for electric dryers...for sanity's sake this should be a two person job...for this repair we replaced the upper and lower drum felt strip, installed a complete and new ball/socket kit, replaced drum belt, and vacuumed and damp wiped the entire interior of the dryer...
Parts Used:
-
Robert from OCEAN SPRINGS, MS
-
Difficulty Level:A Bit Difficult
-
Total Repair Time:More than 2 hours
-
Tools:Screw drivers, Socket set
2 of 3 people
found this instruction helpful.
Was this instruction helpful to you?
Thank you for voting!
loud squeeling noise
After changing the drum support bearing, and the front felt ring, the noise continued. It turned out to be the tensioner pully. The harmonic vibration travels throughout the dryer box like an instrument so you can't tell where the sound is comming from. Before you do anything, spray a little wd40 between the bushing and the shaft on the belt tenioner pully. If the squeel goes away, you have found your smoking gun.
Parts Used:
-
Lewis from Thornton, CO
-
Difficulty Level:Really Easy
-
Total Repair Time:Less than 15 mins
-
Tools:Nutdriver, Pliers, Screw drivers
2 of 3 people
found this instruction helpful.
Was this instruction helpful to you?
Thank you for voting!
Our door catch got lost inside the dryer after the door was slammed to hard
I took the new door catch out of the packaging and just snapped it in place it was easy peasy and took less time than opening the package
Parts Used:
-
Joyce from PORTAL, GA
-
Difficulty Level:Very Easy
-
Total Repair Time:Less than 15 mins
2 of 3 people
found this instruction helpful.
Was this instruction helpful to you?
Thank you for voting!
E66 Error code, Door Open. Dryer shuts off on high temperature
Unplugged dryer. Removed top panel (2 screws top back of dryer). Removed control panel ( Unplugged from control board and 2 screws) Removed front panel with door ( Unplugged light from control board, door switch at connector, and 4 screws) Removed Control Thermister from dryer exhaust blower housing located bottom front of dryer ( Unplugged 2 wires and removed 2 screws ) Installed new Control Thermister and replaced all screws and panels in reverse order. Note: Noticed connector for door switch seemed a little loose when connected correctly. Used electrical tape to reinforce connection. Plugged dryer back in and checked operation. Dryer has been used approximately 10 times since repair with no issues.
Parts Used:
-
Michael from Baltimore, MD
-
Difficulty Level:Easy
-
Total Repair Time:15 - 30 mins
-
Tools:Screw drivers
2 of 3 people
found this instruction helpful.
Was this instruction helpful to you?
Thank you for voting!
Latch on dryer no longer worked
So easy! I ordered the part on the website. Received it 24 hours later. And popped it in place. Good as new.
Parts Used:
-
chris from dallas, TX
-
Difficulty Level:Really Easy
-
Total Repair Time:Less than 15 mins
2 of 3 people
found this instruction helpful.
Was this instruction helpful to you?
Thank you for voting!
door catch wasn't working and screws in door were loose.
-
NICOLE from WEST JORDAN, UT
-
Difficulty Level:Really Easy
-
Total Repair Time:Less than 15 mins
-
Tools:Screw drivers
10 of 27 people
found this instruction helpful.
Was this instruction helpful to you?
Thank you for voting!
Very loud squeaking
Opened top, removed front cover, removed belt, took out drum, replaced bearing on drum and bearing guide on back of dryer. Reinstalled drum and belt, then replaced drum glides and upper felt,let glue set with clamps over night.
Parts Used:


-
william from hackettstown, NJ
-
Difficulty Level:Easy
-
Total Repair Time:15 - 30 mins
-
Tools:Nutdriver, Screw drivers
2 of 3 people
found this instruction helpful.
Was this instruction helpful to you?
Thank you for voting!
Noisy dryer
Followed instructions for removal and installation.
Parts Used:
-
Timothy from OWINGS MILLS, MD
-
Difficulty Level:Easy
-
Total Repair Time:30 - 60 mins
2 of 3 people
found this instruction helpful.
Was this instruction helpful to you?
Thank you for voting!