




















FBS15RCKMRWW General Electric Refrigerator - Instructions
Keep searches simple. Use keywords, e.g. "leaking", "pump", "broken" or "fit".
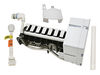
Failed Icemaker
Shut off power to the refrige. Removed old icemaker, using large hammer. Installed new unit.
Parts Used:
-
GARY from PARRISH, FL
-
Difficulty Level:Easy
-
Total Repair Time:30 - 60 mins
-
Tools:Nutdriver, Screw drivers, Wrench set
35 of 62 people
found this instruction helpful.
Was this instruction helpful to you?
Thank you for voting!
Light would not work when I opened door.
I lifted the old switch with a flat screwdriver, attached wires, and popped into place. Saved 80 bucks for a repair call.
Parts Used:
-
joe from spartanburg, SC
-
Difficulty Level:Really Easy
-
Total Repair Time:Less than 15 mins
-
Tools:Nutdriver
23 of 29 people
found this instruction helpful.
Was this instruction helpful to you?
Thank you for voting!
refrigerator would not defrost
Look were timer was located, in my refigerator is next to the dial to ajust the temperature. used a screwdriver to get panel off. replaced timer then used a straight screwdriver to advance timer to turn on compessor . monitor temperature . checked out.
Parts Used:
-
Donald from worthington, OH
-
Difficulty Level:A Bit Difficult
-
Total Repair Time:15 - 30 mins
-
Tools:Screw drivers
21 of 23 people
found this instruction helpful.
Was this instruction helpful to you?
Thank you for voting!
I accidentally broke the shelf glass
-
Karen from COON RAPIDS, MN
-
Difficulty Level:Really Easy
-
Total Repair Time:Less than 15 mins
23 of 30 people
found this instruction helpful.
Was this instruction helpful to you?
Thank you for voting!
Replace ice maker
New ice maker only used 2 screws and the old one had 3. This was no problem. The old ice maker had already been removed. Just loosen the 3 screws and unplug the cord to ice maker. Only problem with ice maker was with the cord, which I had to use the supplied adapter. It was too long and in the way when reinstalling the ice bin. The ice bin had a small notch area on the bottom left. I used a plastic tie to bundle the cord into the notch. Carefully placed ice bin and no problem. The first part I received was damaged and was replaced 2 days later by a brand new part. Customer service charged for the replacement part but said they would credit my charge card within 2 to 3 weeks for the damaged part. Its been a week and if they follow thru like the said I woild give Part Select 5 Stars for service and Parts.
Parts Used:
-
Gary from Glendale, AZ
-
Difficulty Level:Easy
-
Total Repair Time:15 - 30 mins
-
Tools:Screw drivers
21 of 28 people
found this instruction helpful.
Was this instruction helpful to you?
Thank you for voting!
Stripper on the icemaker broke into pieces.
Remove the two nuts holding the top of the unit to the side of the freezer using a 1/4 in nutdriver. Pull the unit out and unplug it from the back of the freezer. Remove all pieces of the broken stripper. The replacement part fits onto a peg on the back of the icemaker and into a slot. Bend into place and slide into position.
Parts Used:
-
Tracy from Yuba City, CA
-
Difficulty Level:Really Easy
-
Total Repair Time:Less than 15 mins
-
Tools:Nutdriver
18 of 23 people
found this instruction helpful.
Was this instruction helpful to you?
Thank you for voting!
Broken shelf glass
It was a perfect fit at 13 1/8 x 22 3/4 inches.
The glass must be forced under the white plastic drawer housing. Otherwise it will appear to be too long at the back. A gentle nudge will seat it properly.
The glass must be forced under the white plastic drawer housing. Otherwise it will appear to be too long at the back. A gentle nudge will seat it properly.
Parts Used:
-
John from SARASOTA, FL
-
Difficulty Level:Very Easy
-
Total Repair Time:Less than 15 mins
14 of 14 people
found this instruction helpful.
Was this instruction helpful to you?
Thank you for voting!
ice maker not making ice
just unscrewed the 3 screws, attached the rounded plug that came with the unit and screwed back only 2 screws. ice magic in about a couple of hours
Parts Used:
-
Cristina from Los Angeles, CA
-
Difficulty Level:Really Easy
-
Total Repair Time:Less than 15 mins
-
Tools:Screw drivers
16 of 22 people
found this instruction helpful.
Was this instruction helpful to you?
Thank you for voting!
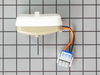
we had a power surge that killed the fan motor
I removed the fan housing , this was the hardest part , this took loosining two screws and snapping the housing loose , and there it was , settin there Idle and the coils were all ice , I let the coils thaw while I unscrewed the fan mount from the back wall of the freezer , then pulled the fan and mount out far enough to snap the wire connector loose, then I removed the two screws that hold the motor to the mount , the new fan motor comes without the blade so the blade is removed by pulling fairly had on the center off the shaft , the old motor is taken out of the mount , the new one replaces it perfectly , then the screws are replaced and tightenen , then the blade is pushed back on the shaft , the motor and mount are placed back on the back wall of the freezer department and screwed in place , the wires connected , then the housing is snapped back in place and the screws tightened , turn the dial to cool or number 2 or 3 and " bingo " it,s just like new , I can thank part select for speedy service and delivery
Parts Used:
-
Richard from Wellsboro, PA
-
Difficulty Level:Really Easy
-
Total Repair Time:Less than 15 mins
-
Tools:Screw drivers
13 of 14 people
found this instruction helpful.
Was this instruction helpful to you?
Thank you for voting!
icemaker developed a leak and froze over
My husband did the repair, and even though our refrigerator is roughly 20+ years old, he was able to adapt it to work in all the right spots and we now have ice cubes! I'm very happy we did not have to spend $2000 on a comparable refrigerator.
Parts Used:
-
debbie from chino hills, CA
-
Difficulty Level:Easy
-
Total Repair Time:15 - 30 mins
18 of 30 people
found this instruction helpful.
Was this instruction helpful to you?
Thank you for voting!
Ice maker ot making ice
First I replaced the double valve because the ice maker was not filling with water. It still did not work. Then I replaced the ice maker itself. This worked and was relatively easy to replace. I had to use the water fill "slide" from the old ice maker. The new one was too narrow and it leaked water into the freezer.
Parts Used:
-
Barry from Phoenix, AZ
-
Difficulty Level:Easy
-
Total Repair Time:15 - 30 mins
-
Tools:Nutdriver
18 of 31 people
found this instruction helpful.
Was this instruction helpful to you?
Thank you for voting!
Internal light switch was sticking
Two tabs hold the switch in place. I used a plastic wedge to remove the switch. Removed and replaced the two connectors held in by friction. Painless.
Parts Used:
-
John from Vallejo, CA
-
Difficulty Level:Really Easy
-
Total Repair Time:Less than 15 mins
-
Tools:Screw drivers
13 of 16 people
found this instruction helpful.
Was this instruction helpful to you?
Thank you for voting!
Fan Motor stopped working
Not only was finding the part rediculously easy for a person who has never done this type of thing...the repair was a sinch!! I will always return to this company for help with home equipment repairs. I saved so much money doing it this way. :) thanks guys!
Parts Used:
-
connie from omaha, AR
-
Difficulty Level:Really Easy
-
Total Repair Time:Less than 15 mins
-
Tools:Screw drivers
12 of 13 people
found this instruction helpful.
Was this instruction helpful to you?
Thank you for voting!
Broken Switch
Just pop the old one out, careful not to lose the wiring inside the ref wall & popped the new one in.
Parts Used:
-
ron from hermitage, TN
-
Difficulty Level:Really Easy
-
Total Repair Time:Less than 15 mins
12 of 14 people
found this instruction helpful.
Was this instruction helpful to you?
Thank you for voting!
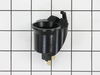
Light in the refrigerator went out
After I bought what I thought I needed for the repair. I asked a friend to come over and look at it. He changed the
the light socket and put the same light bulb in and it works great. I am returning the light switch but decided to keep the light bulb.
Getting on the internet was so easy. This was really very simple. Thank you for making what I thought would be a big ordeal into something very simple.
Paulette Johnson
the light socket and put the same light bulb in and it works great. I am returning the light switch but decided to keep the light bulb.
Getting on the internet was so easy. This was really very simple. Thank you for making what I thought would be a big ordeal into something very simple.
Paulette Johnson
Parts Used:
-
Paulette B. from Santa Ana, CA
-
Difficulty Level:Really Easy
-
Total Repair Time:15 - 30 mins
13 of 18 people
found this instruction helpful.
Was this instruction helpful to you?
Thank you for voting!