




















FBS15RCKJRWW General Electric Refrigerator - Instructions
Keep searches simple. Use keywords, e.g. "leaking", "pump", "broken" or "fit".
Can of fruit fell from shelf and broke the switch cover.
Removed broken switch with plastic scraper (press tension latch on bottom), moved two wire terminals to the new switch and pressed the new switch into the hole.
Parts Used:

-
James from KNOXVILLE, TN
-
Difficulty Level:Really Easy
-
Total Repair Time:Less than 15 mins
3 of 3 people
found this instruction helpful.
Was this instruction helpful to you?
Thank you for voting!
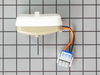
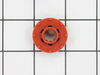
the evaporator fan motor was making noise sometimes, but not all the time during the cooling cycle
after watching how easy it was to get to the evaporator fan motor on u-tube, I took out the motor to inspect it......the motor had about 1/8 inch shaft end play and a slight amount of play on the shaft, the rubber grommets looked OK.....I then put it back together......since the motor was the only moving part in this location I figured it had to be the part making the noise, so I ordered a motor and 2 grommets …...the replacement motor also had 1/8 inch end play on the shaft, but no play on the shaft....I installed the new parts and it has been a week now and no noise.....SUCCESS!...….the shaft on the motor protrudes from the motor, and the fan is mounted about 1 1/4 inch away from the bearing in the motor and the fan is unsupported, so I ASSUME that the slight amount of play on the shaft caused some harmonics which caused it to make noise some of the time, but not all of the time......
Parts Used:
-
Kenneth from SEATTLE, WA
-
Difficulty Level:Really Easy
-
Total Repair Time:15 - 30 mins
-
Tools:Socket set
3 of 3 people
found this instruction helpful.
Was this instruction helpful to you?
Thank you for voting!
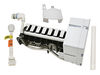
Ice maker filled too full and ice froze in the basket and a piece was broke on the icemaker itself.f
-
Karen from SAN ANTONIO, TX
-
Difficulty Level:Really Easy
-
Total Repair Time:15 - 30 mins
-
Tools:Screw drivers
3 of 3 people
found this instruction helpful.
Was this instruction helpful to you?
Thank you for voting!
My ice breaker started leaking and making noise anf the stripper broke.
I ended up needing to order a new ice maker because the one I had is discontinued. I'm a 65yr old grandma and I did it myself!!!! The hardest part was finding the tool to loosed the nuts. I took the old one out and just put the new one right in it's place. Easy as pie.
Parts Used:
-
Marie from Elk Grove Village, IL
-
Difficulty Level:Really Easy
-
Total Repair Time:15 - 30 mins
-
Tools:Nutdriver
4 of 6 people
found this instruction helpful.
Was this instruction helpful to you?
Thank you for voting!
Refrigerator door gasket ripped
gasket is pressed fit into a groove on the refrigerator door replacement only takes 5-10 minutes.
Parts Used:

-
Alan from LEICESTER, NC
-
Difficulty Level:Really Easy
-
Total Repair Time:30 - 60 mins
3 of 3 people
found this instruction helpful.
Was this instruction helpful to you?
Thank you for voting!
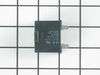
The lights were on inside however the the water/ice dispenser did not work and the fridge and freezer side was not cooling
Simply take off the back panel. Remove the old run capacitor which is attached to the compressor by a white part. It pulls right off. You will have to unplug two wires. I took a pic to ensure I plugged the wires back up the correct way. Then I attached the new capacitor to the white part and put on the sleeve that was included, plugged it back into the compressor and zip tied the excess part of the sleeve. Once done plug fridge back up (always unplug electric devices when doing maintenance) to check before replacing back panel. It may take a few minutes before it kicks on.
Parts Used:
-
Rickey from DUMAS, AR
-
Difficulty Level:Really Easy
-
Total Repair Time:30 - 60 mins
-
Tools:Socket set
4 of 6 people
found this instruction helpful.
Was this instruction helpful to you?
Thank you for voting!
noisy fan
removed cover over fan, four screws. removed two screws ,that holds fan in place,removed two more screws that holds fan in bracket,then reinstalled
Parts Used:
-
ronald from springfield, VT
-
Difficulty Level:Easy
-
Total Repair Time:30 - 60 mins
-
Tools:Nutdriver, Screw drivers
4 of 6 people
found this instruction helpful.
Was this instruction helpful to you?
Thank you for voting!
Someone (my wife) accidentally broke the glass shelf on the refrigerator in a rental cabin.
I crossed my fingers an hoped the part would get to our remote cabin in Oquossic, Maine. It arrived by Fed Ex during our second week. I unpacked it and slid it into place. No harm/no foul! Whew! Imagine what the rental company would have charged for the repair. I paid $36 with shipping.
Parts Used:
-
Ed from OQUOSSOC, ME
-
Difficulty Level:Very Easy
-
Total Repair Time:Less than 15 mins
3 of 3 people
found this instruction helpful.
Was this instruction helpful to you?
Thank you for voting!
Replace disintegrating original freezer gasket on GE refrigerator
Want to thank Haley, and Steve in Parts Select, for assisting me in replacing the GE freezer gasket, which was a very EASY process, took all of two minutes! The video did help.
Parts Used:
-
ELKIN from PORT ROYAL, SC
-
Difficulty Level:Very Easy
-
Total Repair Time:Less than 15 mins
3 of 3 people
found this instruction helpful.
Was this instruction helpful to you?
Thank you for voting!
Ice maker needed replacement
Unplug refridge then loosened two bolts holding old ice maker. Lower then unplug and removed. Plugged in new harness and tightened two bolts to secure new ice maker. Plug in frig and wait for ice.
Parts Used:
-
James from PLYMOUTH, MA
-
Difficulty Level:Really Easy
-
Total Repair Time:15 - 30 mins
-
Tools:Socket set
3 of 3 people
found this instruction helpful.
Was this instruction helpful to you?
Thank you for voting!
Made ice would not eject from ice holder bin
removed broken bin , slid new ice bin in closed door. I bought the complete part.
Parts Used:
-
Lynn from MOUNTAIN HOME, ID
-
Difficulty Level:Very Easy
-
Total Repair Time:Less than 15 mins
3 of 3 people
found this instruction helpful.
Was this instruction helpful to you?
Thank you for voting!
intermittent loud screeching,,humming sound
removed food from freezer section removed fan guard, partially remove ice maker, remove back panel, then fan assembly,disaasembled fan motor from brackets, fan from motor, grommet from bracket. assembled grommet in bracket, fan blade on motor, motor in bracket, fan assembly back in compartment, installed back panel,then ice maker, replaced fan guard and food. no more noise.
Parts Used:

-
LARRY. T from KNOXVILLE, TN
-
Difficulty Level:Easy
-
Total Repair Time:30 - 60 mins
-
Tools:Nutdriver, Pliers, Screw drivers
3 of 3 people
found this instruction helpful.
Was this instruction helpful to you?
Thank you for voting!
Fan not working
Took out old put new in. Watched a u tube, no problems
Parts Used:
-
joan from STERLING HTS, MI
-
Difficulty Level:Easy
-
Total Repair Time:1- 2 hours
-
Tools:Screw drivers, Socket set
3 of 3 people
found this instruction helpful.
Was this instruction helpful to you?
Thank you for voting!
The light would not turn on!
I pulled the bulb out to see if it was the bulb, no! I took the switch out, of course with the refer unplugged, and jummped out the wires and the light came on. Ordered my switch and put it in in 10 seconds and then there was light! Thanks again for showing me the light!
Tim in NJ
Tim in NJ
Parts Used:
-
TIMOTHY from CLIFTON, NJ
-
Difficulty Level:Really Easy
-
Total Repair Time:Less than 15 mins
-
Tools:Screw drivers
3 of 4 people
found this instruction helpful.
Was this instruction helpful to you?
Thank you for voting!
broken light switch
Really simple... broken light switch easily removed with flat edge screw driver. Once removed unplug and plug new one in and good to go.
Parts Used:
-
Sally from Avon, CO
-
Difficulty Level:Really Easy
-
Total Repair Time:Less than 15 mins
-
Tools:Screw drivers
4 of 7 people
found this instruction helpful.
Was this instruction helpful to you?
Thank you for voting!