




















F32C747CS0 Frigidaire Dryer - Instructions
Keep searches simple. Use keywords, e.g. "leaking", "pump", "broken" or "fit".
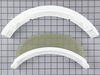
lint screen was torn to No repair!
/removed the lint screen & tossed in the trash, removed one screw from each side of the frame with a screw driver. Placed the New frame in place
& secured it with the screws that I removed from the old frame, placed the screen in place & that was all there was to it. The total amount of time to remove the old & replace with the new probably took 10-15 min. @ the most. I am so happy to have found the part & was able to replace it. You all are wonderful. Received it in 3 days, WOW!!
& secured it with the screws that I removed from the old frame, placed the screen in place & that was all there was to it. The total amount of time to remove the old & replace with the new probably took 10-15 min. @ the most. I am so happy to have found the part & was able to replace it. You all are wonderful. Received it in 3 days, WOW!!
Parts Used:
-
Ellsie from Rio Chiquito, NM
-
Difficulty Level:Really Easy
-
Total Repair Time:Less than 15 mins
-
Tools:Screw drivers
1 person
found this instruction helpful.
Was this instruction helpful to you?
Thank you for voting!
The clothes were not getting dry, no matter how long they ran
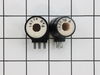
The first thing I did was logged onto the internet to search the web for my dryer information. Next, after I found the correct model, the site referred me to the parts section and that is where I determined the problem was the M series ignition coil. I then unplugged the dryer and turned off the gas. I took a screwdriver and popped the top off and cut the wire straps that held the door strips and the light to the front panel. I then unplugged the door switch at the connector - HOWEVER - DO NOT TRY TO REMOVE THE WIRES FROM THE ACTUAL DOOR SWITCH BECAUSE THEY ARE VERY FRAGILE AND CAN EASILY BREAK. Next, I removed the two screws that hold the front panel on. By using a slight bit of pressure, I removed the front panel and was able to locate where the ignition coil switch was. (It was right in front) I then removed the two screws that held the clamp down, as well as the bad coils. The coils easily slid off the post and the new pieces slid back on just as easy. I then replaced the screws and clamps to hold the new pieces in place and replaced the front panel. **NOTE ~ while the front panel is off, it would be a good time to clean out all the built up dirt and lint that has accumulated over the years. Lastly, I re-connected all switches and wires and replaced the top panel. Once I turned the gas back on, everything ran beautifully.
Parts Used:
-
Bruce from madison, OH
-
Difficulty Level:Really Easy
-
Total Repair Time:Less than 15 mins
-
Tools:Screw drivers
1 person
found this instruction helpful.
Was this instruction helpful to you?
Thank you for voting!
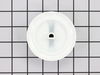
Timer Knob broke off
-
Regina from Richmond, KY
-
Difficulty Level:Really Easy
-
Total Repair Time:Less than 15 mins
1 person
found this instruction helpful.
Was this instruction helpful to you?
Thank you for voting!
Timer knob broke on the dryer
-
BARRY from HARRISBURG, PA
-
Difficulty Level:Really Easy
-
Total Repair Time:Less than 15 mins
1 person
found this instruction helpful.
Was this instruction helpful to you?
Thank you for voting!
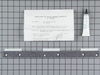
Our Clothes Would Get Caught In Between The Drum & The Front Cover, Making Marks On The Clothes.
I unpluged the dryer, raised the top cover up, removed 2 two screws & pulled front cover out. Removed the old seal, cleaned the area & installed the new seal. Reinstalled as new. Very, very easy.
Parts Used:
-
EDWARD from EDISON, NJ
-
Difficulty Level:Really Easy
-
Total Repair Time:Less than 15 mins
-
Tools:Screw drivers
1 person
found this instruction helpful.
Was this instruction helpful to you?
Thank you for voting!
squeaking dryer driving insane
First removed the top of the dryer, then the front of the dryer. Took the plate off the back left of the dryer to disengage the belt off the pulley.
Took the three screws out that hold the drum in place, of course the third screw stripped and had to use a screw remover, which didn't work, but the adjustable pliers did so then lifted the drum out of the plastic reservoir in which the bearing laid. Next unscrewed the two bolts holding the plastic reservoir which also loosened the small metal piece on the back of the dryer where a small bearing is located. Put the new parts in, but instead of putting the larger bearing that fits in the plastic reservoir, I decided to put it on the drum first and guide it into the reservoir all at once, this worked well . Prior to that I put the new plastic piece on the inside and taped it there while holding that piece put the small metal piece with the small bearing on the back of the dryer. I'm sure it is alot easier with two people doing this part, but it worked and I didn't lose the small bearing. Next put the front of the dryer back on and then put the belt back on the pulley, then the top.
It definitely helped immensely to read how someone did this, just follow the instructions given and there you go, no more annoying squeak and also a feeling of accomplishment and thanks to the person who wrote the story on how to do this job, appreciate it.
Took the three screws out that hold the drum in place, of course the third screw stripped and had to use a screw remover, which didn't work, but the adjustable pliers did so then lifted the drum out of the plastic reservoir in which the bearing laid. Next unscrewed the two bolts holding the plastic reservoir which also loosened the small metal piece on the back of the dryer where a small bearing is located. Put the new parts in, but instead of putting the larger bearing that fits in the plastic reservoir, I decided to put it on the drum first and guide it into the reservoir all at once, this worked well . Prior to that I put the new plastic piece on the inside and taped it there while holding that piece put the small metal piece with the small bearing on the back of the dryer. I'm sure it is alot easier with two people doing this part, but it worked and I didn't lose the small bearing. Next put the front of the dryer back on and then put the belt back on the pulley, then the top.
It definitely helped immensely to read how someone did this, just follow the instructions given and there you go, no more annoying squeak and also a feeling of accomplishment and thanks to the person who wrote the story on how to do this job, appreciate it.
Parts Used:

-
greg from great cacapon, WV
-
Difficulty Level:A Bit Difficult
-
Total Repair Time:1- 2 hours
-
Tools:Pliers, Screw drivers
1 person
found this instruction helpful.
Was this instruction helpful to you?
Thank you for voting!
squeel when turning
lacked instructions. Internet yielded a simple paragraph. Scored real bonus when we discovered the lint build up past the internal filter was approaching catastropic level. Replaced the exhaust tube (plastic) with rigid metal and resolved to disassemble and clean dryer on 2 year cycle in future. Kit just isn't complete without detailed instructions. Parts were complete and sufficient. Local codes have eliminated the plactic exhaust tube. Recommend that all old installs refit to rigid or semirigid before the fire happens!
Parts Used:
-
Bob from Lynchburg, VA
-
Difficulty Level:A Bit Difficult
-
Total Repair Time:1- 2 hours
-
Tools:Nutdriver, Screw drivers, Socket set
1 person
found this instruction helpful.
Was this instruction helpful to you?
Thank you for voting!
no heat
I lifted the top at the front edge, slid the top back, disconnected the ground wire connected to the top at the rear edge, just slides off.
Then removed the phillips screws on the inside front edge, only one on each side,near top of dryer disconnect the wiring harness at the right side, cut the nylon tie strap holding harness also.
Tip front panel out a little and lift up, comes right off.
The coils are in plain site on the gas valve, remove the wires, and the two screws holding the bracket that holdes them in place, slide the old ones off and start putting back together.
I also used a vacume and cleaned all the lint and dust off everything I could, including the air intake at the rear of machine, "Peice of Cake"
Then removed the phillips screws on the inside front edge, only one on each side,near top of dryer disconnect the wiring harness at the right side, cut the nylon tie strap holding harness also.
Tip front panel out a little and lift up, comes right off.
The coils are in plain site on the gas valve, remove the wires, and the two screws holding the bracket that holdes them in place, slide the old ones off and start putting back together.
I also used a vacume and cleaned all the lint and dust off everything I could, including the air intake at the rear of machine, "Peice of Cake"
Parts Used:
-
James from Alpena, MI
-
Difficulty Level:Easy
-
Total Repair Time:1- 2 hours
-
Tools:Screw drivers
1 person
found this instruction helpful.
Was this instruction helpful to you?
Thank you for voting!
Rear Bearing wearing out
I first looked at your directions then felt I could do the repair. So I ordered the part. The video was extremely helpful and allowed me to follow each step in the process. Last time I paid $270 for the exact repair. This time I costs me under $30. Plus I was able to clean out the entire inside of the dryer. The sitr instructions were very helpful and on target for any level of experience. I fixed my own dryer and saved a ton on it! Thank You, Randy In Colorado
Parts Used:
-
Randy from CENTENNIAL, CO
-
Difficulty Level:Really Easy
-
Total Repair Time:1- 2 hours
-
Tools:Nutdriver, Screw drivers, Socket set
1 person
found this instruction helpful.
Was this instruction helpful to you?
Thank you for voting!
Loud squealing
As all others have said, without being redundant, I'd view post #1 or #2 for a good detailed set of instructions.
The primary issue I had was with the stainless steel ball bearing that was shipped with the kit. I couldn't figure out what it was used for, because when I removed the bearing carrier the ball fell out before I could see where the original one was located. The stainless ball bearing is a grounding ball, not a bearing. It goes on the exterior of the plastic bearing carrier/receiver.
Once I figured that part out, it was a piece of cake.
Took a little longer than other people's repairs, but I also put a new belt on and re-worked the exhaust duct for solid ducting versus flexible duct. fine-tuning the rigid duct work was a piece of cake with the tumbler out, since i could crawl right inside the chassis and make sure everything would line up (level legs, adjust elbows, etc)
The primary issue I had was with the stainless steel ball bearing that was shipped with the kit. I couldn't figure out what it was used for, because when I removed the bearing carrier the ball fell out before I could see where the original one was located. The stainless ball bearing is a grounding ball, not a bearing. It goes on the exterior of the plastic bearing carrier/receiver.
Once I figured that part out, it was a piece of cake.
Took a little longer than other people's repairs, but I also put a new belt on and re-worked the exhaust duct for solid ducting versus flexible duct. fine-tuning the rigid duct work was a piece of cake with the tumbler out, since i could crawl right inside the chassis and make sure everything would line up (level legs, adjust elbows, etc)
Parts Used:
-
John from Avis, PA
-
Difficulty Level:Really Easy
-
Total Repair Time:30 - 60 mins
-
Tools:Nutdriver, Pliers, Screw drivers
1 person
found this instruction helpful.
Was this instruction helpful to you?
Thank you for voting!
time knob broke
Slid on new knob. The turn around time on receiving the part was amazing. We were back in business within 2 days.
Parts Used:
-
Lori from Riverview, FL
-
Difficulty Level:Really Easy
-
Total Repair Time:Less than 15 mins
1 person
found this instruction helpful.
Was this instruction helpful to you?
Thank you for voting!
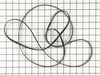
belt broke
Took it apart, lost several screws cause I am an Idiot, placed belt back on, cut hand on back of dryer bled over every thing, curse loudly, put it back together and wiped the blood off, worked perfect!
I went great, worked fine, thanks for your very quick shipment. I will always buy from you if I can!
Thanks again
Bill Manning Florida
I went great, worked fine, thanks for your very quick shipment. I will always buy from you if I can!
Thanks again
Bill Manning Florida
Parts Used:
-
William from Ellenton, FL
-
Difficulty Level:A Bit Difficult
-
Total Repair Time:1- 2 hours
-
Tools:Nutdriver, Pliers, Screw drivers
1 person
found this instruction helpful.
Was this instruction helpful to you?
Thank you for voting!
bearing went out
took apart and replaced parts easy to do but no one in my town can get me parts. thay want 100.00 gust to come out and look at it so found parts online and thats that
Parts Used:
-
james from tahlequah, OK
-
Difficulty Level:Really Easy
-
Total Repair Time:Less than 15 mins
-
Tools:Screw drivers
1 person
found this instruction helpful.
Was this instruction helpful to you?
Thank you for voting!
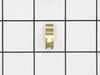
strike broken
-
Linda from Batesburg, SC
-
Difficulty Level:Easy
-
Total Repair Time:Less than 15 mins
7 of 19 people
found this instruction helpful.
Was this instruction helpful to you?
Thank you for voting!
Noisy
Took it apart and installed the parts. Then I threw the dryer in the trash and bought a new one.
Parts Used:
-
April from CARYVILLE, TN
-
Difficulty Level:Really Easy
-
Total Repair Time:15 - 30 mins
-
Tools:Screw drivers
1 person
found this instruction helpful.
Was this instruction helpful to you?
Thank you for voting!