




















ECBP82WK1WW General Electric Range - Instructions
Keep searches simple. Use keywords, e.g. "leaking", "pump", "broken" or "fit".
Inside Oven door cracked
-
Deborah from Fort Worth, TX
-
Difficulty Level:Really Easy
-
Total Repair Time:15 - 30 mins
-
Tools:Nutdriver
2 of 3 people
found this instruction helpful.
Was this instruction helpful to you?
Thank you for voting!
lens snapped off on the inside-plug was left loose
popped out the remainder of old lens, then pushed in new ones and slipped on plugs.
Parts Used:
-
RICKEY from MONTROSE, NY
-
Difficulty Level:Easy
-
Total Repair Time:Less than 15 mins
-
Tools:Screw drivers
3 of 6 people
found this instruction helpful.
Was this instruction helpful to you?
Thank you for voting!
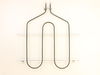
Broil (top) element burned out.
Unplugged the power supply. Took off the cover on the back of the unit. Unplugged the wires to the broiler element. Removed the bolts(4) holding the element inside the oven. Removed the temprature sensor from element and took it out. Put it all back the way it came out. Worked great. Took 25 minutes.
Parts Used:
-
Dee from McKinney, TX
-
Difficulty Level:Easy
-
Total Repair Time:15 - 30 mins
-
Tools:Nutdriver
2 of 3 people
found this instruction helpful.
Was this instruction helpful to you?
Thank you for voting!
Broiler element was burned out
The repair was so simple. First i killed the circuit breaker then removed five screws upluged element from contacts and removed the element plugged new element into the contacts popped the screws back and was done.
Parts Used:
-
Charles from Washingtin, DC
-
Difficulty Level:Really Easy
-
Total Repair Time:15 - 30 mins
-
Tools:Socket set
2 of 3 people
found this instruction helpful.
Was this instruction helpful to you?
Thank you for voting!
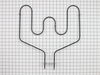
Oven heater coil burned out
Removed power plug- disconnected wire, removed cover over wires two screws, and removed old heated strip, held in by two screws inside of oven
Slide in new coil installed two screws, connected two wires replaced guard over wires, plugged in stove, cooked a rubarb pie, success
Slide in new coil installed two screws, connected two wires replaced guard over wires, plugged in stove, cooked a rubarb pie, success
Parts Used:
-
David from Canterbury, CT
-
Difficulty Level:Really Easy
-
Total Repair Time:15 - 30 mins
-
Tools:Nutdriver
1 person
found this instruction helpful.
Was this instruction helpful to you?
Thank you for voting!
Burner burned out
Very easy. Unpluged range from outlet, took two screws from the front under side of the range top, raised cook top up, took off four wires from burner, removed two screws than holds burner on cook top, replaced with new burner, installed two screws that hold burner in place, installed the four wires to burner, lowered cook top back into place replaced two screws that hold cook top down, pluged back into outlet. DONE!
Parts Used:

-
Daniel from Norborne, MO
-
Difficulty Level:Really Easy
-
Total Repair Time:Less than 15 mins
-
Tools:Pliers, Screw drivers
1 person
found this instruction helpful.
Was this instruction helpful to you?
Thank you for voting!
Bake unit started on fire then cracked in half.
We ordered the part from PartSelect and received it the next day. Didn't even have to move the range out from the wall. Just unscrewed the two screws on the back wall of the stove that hold the bake element in place with a socket wrench, then pulled the old bake element and wires out about 2-3 inches so we could disconnect the old bake unit. The element was kind of hard to pull out, but after you pull it from the wires, just plug in the new bake unit, push the wires back in and put the screws back in. Oven was up and working again!
Parts Used:
-
Sachin from Omaha, NE
-
Difficulty Level:Easy
-
Total Repair Time:Less than 15 mins
-
Tools:Socket set, Wrench (Adjustable)
2 of 4 people
found this instruction helpful.
Was this instruction helpful to you?
Thank you for voting!
Not Reaching Temperature above 300 Degrees
Take off 6 screws of back cover of the range, unplug the white wire. Go to the inside of oven, pull out racks. At the top of the oven is your Broiler element, in the center you will see a rod sticking out with one screw holding it in place. Take out screw and pull temperature sensor out toward you. Reverse steps to put it back together.
Parts Used:

-
Ron from SAN TAN VLY, AZ
-
Difficulty Level:Very Easy
-
Total Repair Time:Less than 15 mins
-
Tools:Nutdriver
1 person
found this instruction helpful.
Was this instruction helpful to you?
Thank you for voting!
Bake unit caught fire and a 3 inch section burned away
Becuase of the fire we had used a chemical based fire extinguisher, which made a real mess in the whole main floor of the house. I removed the oven from the house and used a leaf blower to get rid of all the white chemical powder (like a baking soda of sorts). Once that issue was done, I removed the part in less than 5 minutes. Two screws to remove it and then unpluged the two wire clips from the back of the stove under the shield which also had 6 screws to remove. It took only 3 days to have a new one delivered and I installed it in less than 5 minutes. The oven works fine now. It took much longer to clean the house than fix the oven.
Parts Used:
-
Mark from Comstock Park, MI
-
Difficulty Level:Really Easy
-
Total Repair Time:Less than 15 mins
-
Tools:Socket set
1 person
found this instruction helpful.
Was this instruction helpful to you?
Thank you for voting!
Back element was broken
My son did it by using pliers. He took out the screws that held the element in and pulled it out and used the pliers to pull the wires out of the old one and snapped the new one in . put it back together. about 5 minutes.
Parts Used:
-
Shiirley from CASPER, WY
-
Difficulty Level:Really Easy
-
Total Repair Time:Less than 15 mins
-
Tools:Pliers
1 person
found this instruction helpful.
Was this instruction helpful to you?
Thank you for voting!
Light burnt out.
Turned the wire protector to the side. Turned out the old bulb and replaced it with the new. Turned the wire protector back in place and I'm like new.
Parts Used:

-
Roscoe G from ROCHESTER, NY
-
Difficulty Level:Very Easy
-
Total Repair Time:Less than 15 mins
2 of 4 people
found this instruction helpful.
Was this instruction helpful to you?
Thank you for voting!
Replacing handle spacer
This one is simple. unscrew a portion of the door, install the spacer and screw back together. Worked well.
Parts Used:

-
Sherry from SAINT PAUL, MN
-
Difficulty Level:Easy
-
Total Repair Time:Less than 15 mins
-
Tools:Screw drivers
1 person
found this instruction helpful.
Was this instruction helpful to you?
Thank you for voting!
Burned out
Remove two screws to loosen the ceramic top....prop top open and change part...the part was exactly the same...change wires from one to the other and transfer clamps.....1st grade craft class would have done it in half the time I did......you folks have your parts inventory and description application to a science.....God Bless
Parts Used:
-
Dean from Elkton, FL
-
Difficulty Level:Really Easy
-
Total Repair Time:15 - 30 mins
-
Tools:Screw drivers
1 person
found this instruction helpful.
Was this instruction helpful to you?
Thank you for voting!
Baking element broke
Opened the box removed old element with socket put new one in tightened and voila ?? Just in time for thanksgiving ??
Parts Used:
-
Veronica from PORT ORCHARD, WA
-
Difficulty Level:Very Easy
-
Total Repair Time:Less than 15 mins
-
Tools:Wrench set
1 person
found this instruction helpful.
Was this instruction helpful to you?
Thank you for voting!
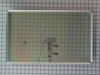
Replaced cracked inner oven door glass
This went pretty smoothly. Watch the video and just follow along step-by-step and it goes well. It would have only taken about 30-45 minutes (even being careful and slow) but I ended up placing the glass twice (be very careful and triple check that all the insulation gets poked under the housing and none is sticking out). The first time I had a small piece sticking out. (Use gloves for this part so your hands don't itch). The second time I needed to redo part of it is I forgot one of the spacers on the door handle and had to get that in there so the handle worked properly. I also took the time to clean the oven while the door was off so that took some time. Total I probably had 1.5-2 hours into this project but at least half of that was me cleaning and being fussy. This is an easy repair. I'm not a confident repair person and this wasn't difficult. It was a little time consuming but well worth the cost vs calling a repair person or buying a new appliance. You do need to have a specialty star head on a screwdriver but my simple tool kit had all the tools I needed. The oven has been working great since the repair.
Parts Used:
-
Sherry from SAINT PAUL, MN
-
Difficulty Level:Easy
-
Total Repair Time:1- 2 hours
-
Tools:Screw drivers
1 person
found this instruction helpful.
Was this instruction helpful to you?
Thank you for voting!