




















DU1055XTPS4 Whirlpool Dishwasher - Instructions
Keep searches simple. Use keywords, e.g. "leaking", "pump", "broken" or "fit".
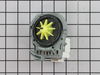
Dishwasher Not Draining
The video included with this part is perfect. Unplug the dishwasher, take off the front trim piece, remove the drain hose from the pump, unclip the power, press the little clip that holds the pump in while turning it counter clockwise to remove. Then just do that in the opposite order to put the new one in. Just make sure you hear it click when you twist the new one on so you know the clip has engaged. Super easy.
Parts Used:
-
Derek from ROCKFORD, MI
-
Difficulty Level:Really Easy
-
Total Repair Time:Less than 15 mins
-
Tools:Pliers
6 of 6 people
found this instruction helpful.
Was this instruction helpful to you?
Thank you for voting!
Water would not enter machine
Tried to clean old part and it did not work. Ordered the new part on Saturday and received it on Tuesday. Removed the old part and installed the new one. Ran the machine and it worked great. A big savings on not having to buy a new machine!!
Parts Used:

-
Reginald from Alhambra, CA
-
Difficulty Level:Easy
-
Total Repair Time:15 - 30 mins
-
Tools:Pliers, Screw drivers, Wrench (Adjustable)
7 of 9 people
found this instruction helpful.
Was this instruction helpful to you?
Thank you for voting!
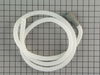
Drain hose leaking
I did not relize that the drain hose was in two parts. Naturally I ordered the wrong half. So after I relized my mistake, I re-ordered the correct part. Once the correct part was received the repair was easy and went well.
Parts Used:
-
Robert from Beaufort, SC
-
Difficulty Level:Easy
-
Total Repair Time:15 - 30 mins
-
Tools:Pliers
8 of 12 people
found this instruction helpful.
Was this instruction helpful to you?
Thank you for voting!
Spinner flew off and melted.
I am a 61 year old woman and it took me a total of 2 min. max. Popped it into place and pushed in button that holds it..Taa Daa...perfect!
Parts Used:
-
Winona from Rockford, MI
-
Difficulty Level:Really Easy
-
Total Repair Time:Less than 15 mins
8 of 12 people
found this instruction helpful.
Was this instruction helpful to you?
Thank you for voting!
No power to dishwasher. Quit mid-cycle.
Pulled front panel and replaced door switch. Extremely easy but did not fix the problem.
Parts Used:

-
Jon from Bend, OR
-
Difficulty Level:Really Easy
-
Total Repair Time:Less than 15 mins
-
Tools:Screw drivers
8 of 12 people
found this instruction helpful.
Was this instruction helpful to you?
Thank you for voting!
Friction sleeve had torn, resulting in dishwasher door 'falling' when opening.
I unscrewed the dishwasher from the counter (two screws under the countertop), and pulled it out about a foot so I could access the friction sleeve. I used a needle nosed pliers to slip a spring latch off the door. Then I slipped the new friction sleeve on and reattached the spring. Tested the door. Success! Super easy. About 5 minutes of work.
Parts Used:

-
Jm from OSHKOSH, WI
-
Difficulty Level:Really Easy
-
Total Repair Time:Less than 15 mins
-
Tools:Pliers, Screw drivers
6 of 6 people
found this instruction helpful.
Was this instruction helpful to you?
Thank you for voting!
dishwasher leaked
Our Kitchenaid dishwasher was leaking so I called a repair service. I gave the model number and serial number over the phone and explained the problem. I was told the rubber gasket would need to be replaced. When the repairman came 5 days later he told me that the gasket needed to be replaced but he didn't have a new one on his truck. He ordered one and said he would be back in a week to repair the dishwasher. That took 10 minutes at the most. He then gave me a bill for $200.49 ($71.49 for the part and $129 for the labor)that I had to pay right then. I wrote him a check so he would leave and immediately called the repair company to tell them the price was outrageous and that I had never before paid for a repair before the work was done. I was simply told it was their policy. I then told them I was stopping payment on the check - which I did. I checked on-line for the part and found your web-site and the the part I needed for $27.62. I ordered it on a Monday, it arrived on Tuesday and my husband easily installed it that evening. Thank you, thank you, thank you!
Parts Used:
-
Sue from Hudson, OH
-
Difficulty Level:Really Easy
-
Total Repair Time:Less than 15 mins
8 of 12 people
found this instruction helpful.
Was this instruction helpful to you?
Thank you for voting!
Dishwasher would not drain. Pump was jammed with broken glass .
Turn off breaker to dishwasher.
Remove lower basket.
Drain any water using a wet vac.
Remove bottom cover plate. Should be 2 plastic screws using flat head screwdriver.
Should be able to reach pump. Turn counter clockwise to remove.
Disconnect plug wire on pump.
Install new pump by turning clock wise.
Reattach wire plug.
Run a wash cycle with empty dishwasher and check for leaks.
Replace cover plate.
Done.
Remove lower basket.
Drain any water using a wet vac.
Remove bottom cover plate. Should be 2 plastic screws using flat head screwdriver.
Should be able to reach pump. Turn counter clockwise to remove.
Disconnect plug wire on pump.
Install new pump by turning clock wise.
Reattach wire plug.
Run a wash cycle with empty dishwasher and check for leaks.
Replace cover plate.
Done.
Parts Used:
-
Thomas from WEST WARWICK, RI
-
Difficulty Level:Really Easy
-
Total Repair Time:Less than 15 mins
-
Tools:Screw drivers
6 of 7 people
found this instruction helpful.
Was this instruction helpful to you?
Thank you for voting!
The motor was too loud
I took the unit apart to find out what was making the loud noise and found the seal on the main pump had been leaking ito the bearing on the motor.
Parts Used:

-
Conelis from Eclectic, AL
-
Difficulty Level:A Bit Difficult
-
Total Repair Time:30 - 60 mins
-
Tools:Nutdriver, Screw drivers, Wrench (Adjustable)
6 of 7 people
found this instruction helpful.
Was this instruction helpful to you?
Thank you for voting!
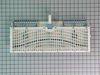
Basket was broken
Sorry -- but my 5 yearold replaced this broken item -- He helped by slipping off the old broken one and sliding in the new one -- No tools were necessary -- after all it was the silverware basket ...
Parts Used:
-
Liisa from Taunton, MA
-
Difficulty Level:Really Easy
-
Total Repair Time:Less than 15 mins
6 of 7 people
found this instruction helpful.
Was this instruction helpful to you?
Thank you for voting!
dispenser would no longer lock
Watched the video from your web site. Extremely easy to follow and to complete the replacement!
Parts Used:

-
Joseph from PHILADELPHIA, PA
-
Difficulty Level:Very Easy
-
Total Repair Time:Less than 15 mins
-
Tools:Nutdriver
6 of 7 people
found this instruction helpful.
Was this instruction helpful to you?
Thank you for voting!
old hose possible leakage
-
Fred from Kernersville, NC
-
Difficulty Level:Really Easy
-
Total Repair Time:Less than 15 mins
-
Tools:Nutdriver, Pliers, Screw drivers
8 of 13 people
found this instruction helpful.
Was this instruction helpful to you?
Thank you for voting!
front seal on the old pump failed causing the front bearing to get wet repeatedly and fail
Removed required hardware and dishwasher from undercounter mount. Turned dishwasher on its front and removed the old motor. Installed the new motor and tested for function. Installed once test was successful.
Parts Used:
-
lisa from columbus, NE
-
Difficulty Level:Easy
-
Total Repair Time:30 - 60 mins
-
Tools:Screw drivers, Socket set, Wrench set
6 of 7 people
found this instruction helpful.
Was this instruction helpful to you?
Thank you for voting!
Dishwasher wouldn't work
Looked under machine, saw wire going to heater was burned off.Seal on heater failed, water leaked onto terminal, shorted and burned, ruined plastic terminal nut.Replaced heater and wire terminal, and nut, took minutes, works great.
Parts Used:

-
Greg from Lebanon, CT
-
Difficulty Level:Really Easy
-
Total Repair Time:Less than 15 mins
-
Tools:Pliers
6 of 7 people
found this instruction helpful.
Was this instruction helpful to you?
Thank you for voting!
The Power Was Completely Of The Dishwasher.
I opened yutube and noted the tips on how to fix specific problems with my dishwasher. That "steve" guy was very helpful. I tested the old bi-metal fuse with no flow and ordered a new replacement through partselect. The part arrived in one day and was fitted quickly. I used the teat meter to confirm that the fuse was ok before I installed it. The only problem that I had was identifying the part and number from a diagram which I did not have.
Parts Used:
-
Alan from Corona, CA
-
Difficulty Level:Really Easy
-
Total Repair Time:30 - 60 mins
-
Tools:Pliers, Screw drivers
8 of 13 people
found this instruction helpful.
Was this instruction helpful to you?
Thank you for voting!