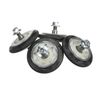
The drum support roller for your dryer holds the drum in place while the drum turns on the support wheels. The drum roller is round with a bearing in the middle and measures approximately 3 inches in ...
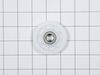
This lint filter assembly for your dryer catches lint and debris from your clothes. You can find it near the door. It helps keep the air flowing properly and stops lint from blocking the exhaust ducts...
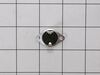
Looking to extend the lifespan of your LG electric dryer? Our authentic LG Idle Pulley could be the missing piece you need! This little thing plays a big role in keeping your dryer working smoothly an...
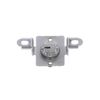
Take a look at this essential LG Dryer Safety Switch Assembly. A don't-miss fixture for your LG Dryer. This is more than just a part, it's a safeguard for you. If your dryer's door springs open, this ...
Looking to get your LG Dryer working like new again? Your solution could be our Motor Pulley Assembly! This central piece plays a key role by maintaining the right tension on the drive belt, allowing ...
They are all strung with a coiled wire made of a nickel and a chrome alloy. This wire receives, but resists, a controlled electric current and as a result, the wire heats up. The heat produced is used...
$278.40
In Stock
Questions And Answers for DLEX8100V
Ask our experts a question about this model and we'll get back to you as soon as possible!
7 questions answered by our experts.
< Prev
1
2
Next >
Sort by:
Search filter:
Clear Filter
Your search term must have 3 or more characters.
Keep searches simple. Use keywords, e.g. "leaking", "pump", "broken" or "fit".
Sorry, we couldn't find any existing answers that matched.Try using some different or simpler keywords, or submit your new question by using the "Ask a Question" button above!
Curt
December 6, 2022
Will not power on. Control panel has no power. Already checked breaker.
For model number DLEX8100V
Hello Curt, thank you for reaching out. If your dryer is not turning on, we suggest that you check the thermal fuse, part number PS3530485, and the door switch, part number PS3529308, as these could be the culprits of this issue. If you require assistance to place an order, please contact customer service. We hope that helps!
No power out of main start control board.
Has voltage into board
For model number DLEX8100V
Hi Larry, thank you for reaching out. According to the symptom, it seems that the electronic control board is damaged and needs to be replaced. The part number for the main control board is PS12080464. If you require assistance to place an order, please contact customer service. We hope that helps!
Was this helpful?
Thank you for voting!
Arnie
January 17, 2023
Hello, I was informed that my LG Dryer has a faulty main control board that is not sending voltage to the control panel.
Do you sell control boards for that LG Dryer model?
Thank you for your help.
Arnie
For model number DLEX8100V
Hello Arnie, Thank you for your inquiry. Researching the model number that you have provided, we show the main control board as part# PS12080464 and the user interface display board as part# PS12080767. We hope this helps.
Was this helpful?
Thank you for voting!
Constantine
April 13, 2023
Have power going through cord to unit but will not power up. We turned the steam cycle on and unit completely shut off. Heard LG was having problems with the steam function on the unit. Lights won’t even come on in tumbler. Did a hard boot with no success.
For model number DLEX8100V
Hi Constantine, thank you for the question. Based on our understanding of the issue, we would suggest you check the thermal fuse, part number PS3530485, as it is the most likely cause of this issue. We hope this sorts out your problem!
Well everything has been running great.
Out of nowhere I heard a wining sound coming from the dryer. By the time I got to the laundry room the dryer stopped.
The cycle paused as if I hit the stop button. I tried to restart but got click click pause then click click.
I read it may be a fuse but being I herd strange noises before it turned off I believe I either lost a belt or maybe a motor issue. I can spin the drum by hand with no noises or loose wobbly feeling to it. Hoping I can get some insight and possibly a video on how to remove the outer shell to view the belts etc
For model number DLEX8100V
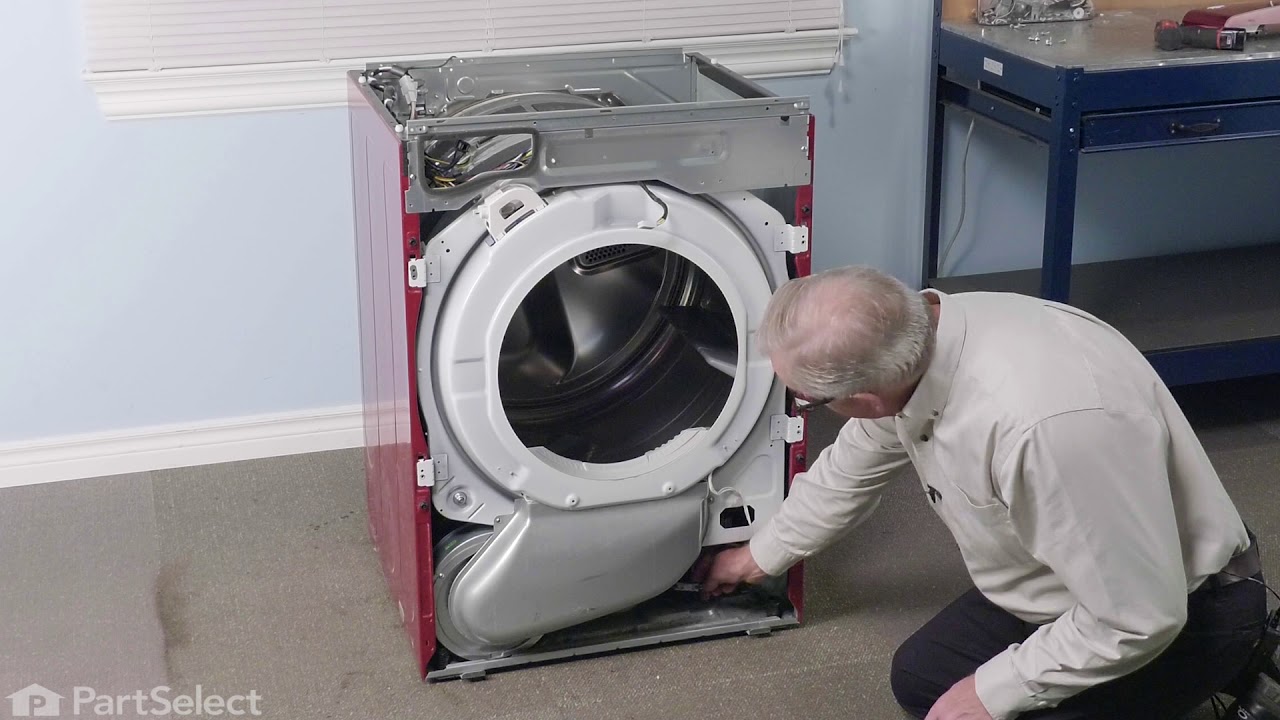
Hi Damian, thank you for contacting us. We have researched the model and would suggest making sure the drain hose is not clogged and the water is being drained properly from the tub. If the issue remains, the bearings of the drive motor, part number PS12075888, might be faulty. Checking the drive motor for continuity using a multimeter might help. We have found a video to help you remove the outer shell and get access to the drive motor, belt, and related components. It may not be for the exact same model but will help you with the disassembly. Good luck with the repair!
Had to replace front drum support rollers. Removed screws underneath top in back that held bracket that keeps top in place. Slid top towards rear and lifted up. Removed 4 screws that hold plastic front panel in place (inside..2 on each corner) Unplugged front panel electric plugs to remove panel. Opened door..removed 2 screws at bottom of door opening. Removed screws on top of front panel. Unplugged door switch plug. Removed front panel. Removed right front roller with 9/16th wrench for nut. Adjustable for back of stud. Lifted up on drum to get roller out. Reversed to install. Left roller a bit harder to get to stud. Removed and installed same as right side. Did not attempt to replace rear rollers. Have them if needed but very much more involved to replace.
I actually went to mr fix it on u tube. Great instruction on how to take dryer apart. First I unplugged the dryer. I found I could reach the heating system by removing the lint tube in the back of the dryer. I put my I phone with the light on inside the back of the dryer and tested the connections to see if all were working. The thermal fuse was not working. I removed the two wires , red on top and white on the bottom. Then used a small Phillips screwdriver to remove the two mounting screws and removed the fuse. I then used a vacuum to clear any lint from the back of the dryer and inside the dryer. This took me about an hour and a half. I did it this way because I did not want to disassemble the entire dryer to get to the components. I received the fuse in 3 days and tested it. It was fine. I then put it in the dryer screwed it in place, connected the wires. Replaced the lint tube. This took about 10 minutes. Dryer is running great.
Found disassembly video and watched several times. Suspected that one of the drum wheels had seized up. Found extreme volume of lint and hair inside unit as well as a dryer sheet melted on top of heating unit. Front left drum wheel was worn down from lint and hair jamming its movement. Video made it easy, not a really complicated piece of machinery. Replaced all 4 wheels due to normal wear on other three. Wanted to be sure drum evenly balanced on all 4. Parts came quickly and were easy to install. My sister and I did this together. Would not recommend doing it alone. Took time to vac and wipe down entire unit. Now it runs so quiet we have to look to see if it is operating. Got a brand new machine out of it, saved a couple of hundred dollars in repair bills, and found 11 cents inside the machine. For your own piece of mind, if you have had your dryer for several years, you need to open it up and clean it out. Its not hard... added note, we are both in our 60's... so if we can do it so can you.... Such a feeling of accomplishment, can't buy that in a store....