Having troubles with your LG dryer? Discover the solution you need with this genuine Lint Holder Filter. This valuable part has been crafted specially for LG dryers to function as a moisture sensor gu...
We know how inconvenient it is when your LG dryer starts losing heat. That's exactly why we've got the perfect solution for you - our genuine LG door gasket seal, suitably designed for select LG dryer...
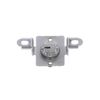
This moisture sensor wire harness connects the sensor bars to the dryer’s control board, enabling accurate detection of fabric dampness to prevent over-drying and improve energy efficiency. Designed f...
Ask our experts a question about this model and we'll get back to you as soon as possible!
1 question answered by our experts.
< Prev
1
Next >
Sort by:
Search filter:
Clear Filter
Your search term must have 3 or more characters.
Keep searches simple. Use keywords, e.g. "leaking", "pump", "broken" or "fit".
Sorry, we couldn't find any existing answers that matched.Try using some different or simpler keywords, or submit your new question by using the "Ask a Question" button above!
Judith
March 11, 2023
How do I get the bulb out?
For model number DLE2000W
Hello Judith, thank you for your query. We have found some relevant instructions to help you replace the bulb. They may not be of the exact same model, but they will help you with the installation. You can replace the light bulb by following these steps:
Open the dryer door and remove the mounting screws securing the lens. Slide the lens towards the top to remove and unscrew the old light bulb. Prepare the new light bulb for installation by transferring the insulation ring from the old bulb to the new one. Screw the new light bulb into the socket. Replace the light lens by inserting the tab into the bulkhead, then slide the lens down and lock it into place. Secure it with the mounting screw. We hope this helps.
Was this helpful?
Thank you for voting!
< Prev
1
Next >
✖
Ask a Question
Ask our experts a question on this model and we'll respond as soon as we can.
I actually went to mr fix it on u tube. Great instruction on how to take dryer apart. First I unplugged the dryer. I found I could reach the heating system by removing the lint tube in the back of the dryer. I put my I phone with the light on inside the back of the dryer and tested the connections to see if all were working. The thermal fuse was not working. I removed the two wires , red on top and white on the bottom. Then used a small Phillips screwdriver to remove the two mounting screws and removed the fuse. I then used a vacuum to clear any lint from the back of the dryer and inside the dryer. This took me about an hour and a half. I did it this way because I did not want to disassemble the entire dryer to get to the components. I received the fuse in 3 days and tested it. It was fine. I then put it in the dryer screwed it in place, connected the wires. Replaced the lint tube. This took about 10 minutes. Dryer is running great.
I unplugged the dryer and disconnected the vent. I pulled the dryer away from the wall so I had room to work on it. Pulled the top cover off (slides back). Took the door off Took the front adjustable feet on the bottom off Unscrewed all of the face screws on the front of the dryer Took the two screws off of the back of the control panel holding the control panel to the metal frame. Gently pulled on the control panel to reveal 4 screws under the control panel to be able to take the front cover off. Pulled the front cover off (the dryer door front cover). Pulled the dryer vent cover off (two screws). I could now see the heating element with sensor/fuse (right side). Did a continuity test (beep) on all visable sensors/fuses on the heating element. No beep on the thermal fuse (used website diagram to locate parts to test and replacement part numbers). Got the part after about a week, tested the parted (it beeped), replaced with new part and put dryer back together, plugged in and the dryer heated. Problem solved.
1. Had to find out what was causing the problem by eliminating each part one by one using a multimeter. I got a video link from parts select on how to do this.
2. Then got another video link sent to me by parts select on how to take my dryer a part and replace the part.
3. Followed it step by step and it worked really well.
4. The process was great except shipping was excessively high for such a small part.