




















DFE29JMDAES General Electric Refrigerator - Instructions
Keep searches simple. Use keywords, e.g. "leaking", "pump", "broken" or "fit".
Light would no longer turn on
I watched the video online, followed the instructions and within minutes had the part installed. The frig light was working once again! I will say the original switch was very snug and I had to do some very minor scraping of the plastic to get the new part to slide in.
Parts Used:

-
paypal_shipping_address from Ripon, CA
-
Difficulty Level:Really Easy
-
Total Repair Time:Less than 15 mins
-
Tools:Pliers
3 of 6 people
found this instruction helpful.
Was this instruction helpful to you?
Thank you for voting!
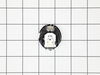
LED (5) light system are in a series. 1 goes out, other 4 go dim.
Locate the light that is completely out, remove the assembly. Unplug the wire harness in the back. Plug in the new assembly and snap into place in the cabinet.
Parts Used:
-
Robert from Liberty Hill, TX
-
Difficulty Level:Very Easy
-
Total Repair Time:Less than 15 mins
2 of 3 people
found this instruction helpful.
Was this instruction helpful to you?
Thank you for voting!
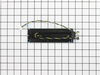
switch went bad
just removed the old switch and replaced it with the new one
Parts Used:
-
donald from FAIRVIEW, MI
-
Difficulty Level:Easy
-
Total Repair Time:15 - 30 mins
-
Tools:Screw drivers
3 of 6 people
found this instruction helpful.
Was this instruction helpful to you?
Thank you for voting!
Light out
Turned off the breaker to the fridge because I couldn't reach the power plug to unplug it . Use small flat head screwdriver to pop out the piece, disconnected the rubber prong connectors, inserted the new piece into the rubber prongs snapped it back into place. Flipped the breaker back on and prayed it worked. It did and I saved myself $120 service call.
Parts Used:
-
Jodi from Benton Harbor, MI
-
Difficulty Level:Very Easy
-
Total Repair Time:Less than 15 mins
-
Tools:Pliers, Screw drivers
2 of 3 people
found this instruction helpful.
Was this instruction helpful to you?
Thank you for voting!
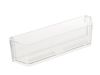
I dropped The top left bin and it cracked
-
Karen from Salisbury, NC
-
Difficulty Level:Very Easy
-
Total Repair Time:Less than 15 mins
1 person
found this instruction helpful.
Was this instruction helpful to you?
Thank you for voting!
Broken light switch
This was so easy I think it took me 2 minutes. I am not very mechanically inclined but that didn't matter! Works perfect thank you!
Parts Used:
-
Deborah from BRADLEYVILLE, MO
-
Difficulty Level:Very Easy
-
Total Repair Time:Less than 15 mins
-
Tools:Pliers, Screw drivers
1 person
found this instruction helpful.
Was this instruction helpful to you?
Thank you for voting!
Refrigerator not getting cold
-
Dan from COLUMBIA, SC
-
Difficulty Level:Really Easy
-
Total Repair Time:15 - 30 mins
-
Tools:Pliers, Socket set
1 person
found this instruction helpful.
Was this instruction helpful to you?
Thank you for voting!
Door water and ice dispenser not working
It was very simple. Removed 4 screws on top of door where panel is located. Unplug 3 three connectors and removed board. reinstalled new one in reverse mode. On the down side this did not solve the problem. I am still working on it.
Parts Used:

-
Kenneth from JUNEAU, WI
-
Difficulty Level:Very Easy
-
Total Repair Time:Less than 15 mins
-
Tools:Screw drivers
1 person
found this instruction helpful.
Was this instruction helpful to you?
Thank you for voting!
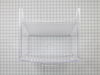
Meat pan wouldn't slide in or out - sides damaged
-
Carol from WARRENTON, VA
-
Difficulty Level:Really Easy
-
Total Repair Time:15 - 30 mins
1 person
found this instruction helpful.
Was this instruction helpful to you?
Thank you for voting!
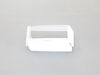
Replace butter compartment on GE Profile
-
Gary from LAKE PLACID, NY
-
Difficulty Level:Very Easy
-
Total Repair Time:Less than 15 mins
1 person
found this instruction helpful.
Was this instruction helpful to you?
Thank you for voting!
light switch freezer door
put the gratefruit knife behind the old switch pooped it out pluged the new one in piece of cake 5min.even vacumed the dust off the coil
Parts Used:
-
Sumlorq from Cleveland, OH
-
Difficulty Level:Really Easy
-
Total Repair Time:Less than 15 mins
3 of 7 people
found this instruction helpful.
Was this instruction helpful to you?
Thank you for voting!
Light would stay on when door closed
Extremely easy repair, the hardest part was getting the old switch out. I used a pair of needle nose pliers to squeeze the tabs in and it came right out.
Parts Used:
-
James from Glendale Heights, IL
-
Difficulty Level:Really Easy
-
Total Repair Time:Less than 15 mins
-
Tools:Nutdriver, Pliers
3 of 7 people
found this instruction helpful.
Was this instruction helpful to you?
Thank you for voting!
Light went out in refrigerator
Pop out switch, pull wires, attach wires to new switch and pop back in. Easy smeasy!
Parts Used:
-
Gary from EAST JORDAN, MI
-
Difficulty Level:Really Easy
-
Total Repair Time:Less than 15 mins
-
Tools:Pliers, Screw drivers
1 person
found this instruction helpful.
Was this instruction helpful to you?
Thank you for voting!
Ice maker failure
Ordered a replacement ice maker. Simple to remove old unit one screw and one screw to remove wire cover to unplug. Replacement unit looked a little different as the left side of the new unit had various ridges which did not allow a proper fit into ice making box. After examining old unit and new I swapped the old left cover with new left cover and unit fit perfectly and it is working correctly. I suggest adding a quick note about the upgraded part as it may not fit properly and the side cover may have to swapped out.
Parts Used:

-
MICHAEL from MONMOUTH BEACH, NJ
-
Difficulty Level:Really Easy
-
Total Repair Time:30 - 60 mins
-
Tools:Nutdriver, Socket set
1 person
found this instruction helpful.
Was this instruction helpful to you?
Thank you for voting!
Lower Ice Maker making loud knocking noise
Removed all containers from the freezer,
Removed lower freezer door, 3 bolts on each side.
Removed one front screw on the ice maker, unplugged two connectors on slide off unit
Removed covers on the old ice maker and installed on the new one
Installed the new ice maker in reverse of the removal process
Inspected the old ice maker and found the motor drive gear had missing teeth; I believe that the heater on the ice maker was failing causing a strain on the drive gears
Removed lower freezer door, 3 bolts on each side.
Removed one front screw on the ice maker, unplugged two connectors on slide off unit
Removed covers on the old ice maker and installed on the new one
Installed the new ice maker in reverse of the removal process
Inspected the old ice maker and found the motor drive gear had missing teeth; I believe that the heater on the ice maker was failing causing a strain on the drive gears
Parts Used:
-
Les from Visalia, CA
-
Difficulty Level:Easy
-
Total Repair Time:30 - 60 mins
-
Tools:Nutdriver, Screw drivers, Socket set
1 person
found this instruction helpful.
Was this instruction helpful to you?
Thank you for voting!