This 40-Watt light bulb is sold individually.
It is specially designed to withstand extreme temperatures, so this bulb is compatible with a variety of appliance types including refrigerators, ranges,...
This OEM water filter works with side-by-side and bottom freezer refrigerators. You will find this filter mounted in a vertical position in the back upper right-hand corner of the refrigerator compart...
This door recess spring or dispenser lever spring in your refrigerator is used to return the ice door to the closed position or the dispenser lever to the home position once released. You will find th...
This ice maker assembly is used to make ice in your refrigerator. The ice maker receives water from the water inlet valve and will freeze until ice cubes are formed. Once the water has been frozen the...
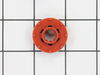
This genuine OEM solenoid is designed for use with GE refrigerators and controls the opening and closing of the ice chute door. It serves as a direct replacement for a worn or faulty solenoid, helping...
Ask our experts a question about this model and we'll get back to you as soon as possible!
1 question answered by our experts.
< Prev
1
Next >
Sort by:
Search filter:
Clear Filter
Your search term must have 3 or more characters.
Keep searches simple. Use keywords, e.g. "leaking", "pump", "broken" or "fit".
Sorry, we couldn't find any existing answers that matched.Try using some different or simpler keywords, or submit your new question by using the "Ask a Question" button above!
Sudheer
October 26, 2023
Top shelf in freezer side does not remain in position. It does not stay in position meaning, id falls down after a while. What could be the problem?
For model number CSCP5UGXAFSS
Hello Sudheer, thank you for the question. This is caused by the inner walls of the freezer flexing over time and it makes the racks not stay in place. You can order rack spacers, part number PS250311, which will hold the racks up and lessen the space between them and the walls of the freezer or purchase plastic tubing that would go around the corners or sides of the rack to allow them to fit better. We hope this helps!
After replacing the defrost heater, main board and thermistor I still had the same problem. Called a repair guy and he (with the help of GE on the phone) diagnosed that the temperature sensor was bad. So I ordered from partselect and installed it and it fixed the problem. Been good for a couple months (knocking on wood). To install I had to cut the 2 wires to the old sensor, crimp the 2 new wires on and snap the new sensor to the clip on the evaporator. Very easy. Make sure you seal the ends of the wire crimps so moisture doesn't get in and corrode the connection.
I went to a GE repair center to explain my problem, the service center reccomended that I have a techinician come out o look at it. $75.00 for the visit and what ever labor and materials wuld cost.
I went on line to see if there were others having this same problem and found that there were many with the same problem.
After reading some of the ways that people found out what was wrong ...it became a matter of three components, the timer, heater or thermostat.
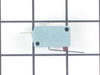
I tried the most common component and the less expensive one first , the thermostat switch I installed it very easily snipping two wires and attaching the news using wire nuts I used the diagram on this website to pinpoint the component and there has not been a problem since.
I read in a previous post how to do the job from outside fridge which saved me lots of time. No need to remove inner door lining. Here is my procedure: 1.Turned off power. 2.Snapped off outside trim ring. 3.Located three small holes inside lip just above ice tube. The center hole was not used. 4.Pushed rather firmly up through two remaining holes with small Allen wrench to release front control panel. 5.Removed (3) wire connectors from printed circuit board. Firmly pull/pry them straight out as lifting on retaining clip will break it off. I broke one & had to elect. tape it back in place later although I doubt it would have ever come off. 6.Release secondary panel by removing (4) screws. The problem was obvious as the solenoid had broken the crank arm off the flapper rod & trapped it open 7.Replaced solenoid, crank arm with flapper attached, spring & micro switch. Switch was okay but I changed anyway. 8.Cleaned all areas with 1/10 bleach water to sanitize. 9.Re-installed evrything in reverse order & all is okay. Thanks to someone for telling about those two small holes. Made job easy versus a very hard one.