




















CRSS262QW4 Crosley Refrigerator - Instructions
Keep searches simple. Use keywords, e.g. "leaking", "pump", "broken" or "fit".
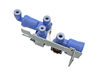
water valve failure
removed rear cover, removed screws, diconnected water line connections, cut off old water line connection, installed new compression water line connection, replace screws in water line housing, replace rear cover.
worked fine
worked fine
Parts Used:
-
Robert from Louisville, KY
-
Difficulty Level:Really Easy
-
Total Repair Time:More than 2 hours
-
Tools:Pliers, Screw drivers
13 of 20 people
found this instruction helpful.
Was this instruction helpful to you?
Thank you for voting!
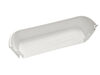
broken shelf
-
Johan from Schenectady, NY
-
Difficulty Level:Really Easy
-
Total Repair Time:Less than 15 mins
10 of 11 people
found this instruction helpful.
Was this instruction helpful to you?
Thank you for voting!
worn out gasket...
very easy to install...shipping was really fast...i would order to this website again....
Parts Used:
-
Yves from Miramar, FL
-
Difficulty Level:Really Easy
-
Total Repair Time:Less than 15 mins
12 of 17 people
found this instruction helpful.
Was this instruction helpful to you?
Thank you for voting!
broken door shelf bin
-
Elsie from Effingham, SC
-
Difficulty Level:Really Easy
-
Total Repair Time:Less than 15 mins
11 of 14 people
found this instruction helpful.
Was this instruction helpful to you?
Thank you for voting!
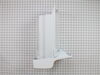
ice crusher blades not working
got replacement ice container with ice crusher and dispenser in the door. removed broken one and slid in the new one like a drawer and started crushing ice right away!!
Parts Used:
-
Rebecca from Athens, AL
-
Difficulty Level:Really Easy
-
Total Repair Time:Less than 15 mins
11 of 14 people
found this instruction helpful.
Was this instruction helpful to you?
Thank you for voting!
Rust had corroded Front Plate and Drive Blade
Installation was completed by following the online Parts diagram. Had to completely remove all parts, including the blades in ice crusher, and re-assemble. Glad the online diagram was clear and easy to read.
Parts Used:

-
Calvin from Massillon, OH
-
Difficulty Level:A Bit Difficult
-
Total Repair Time:1- 2 hours
-
Tools:Nutdriver, Screw drivers
11 of 15 people
found this instruction helpful.
Was this instruction helpful to you?
Thank you for voting!
There was a hole in the plastic bin where ice fell through to the freezer.
I removed the screws that held the the ice dispencer from the bin. I than removed three screws from the bottom of the bin. I put the new plastic piece on the end of the spiral piece that
pushes the ice. I inserted the spiral piece back into the hole. I than screwed the ice dispencer
to the bin and re-inserted it back in the refrigerator.
It took me about 5 to 10 minutes. It's really easy!
pushes the ice. I inserted the spiral piece back into the hole. I than screwed the ice dispencer
to the bin and re-inserted it back in the refrigerator.
It took me about 5 to 10 minutes. It's really easy!
Parts Used:
-
Thomas from Niceville, FL
-
Difficulty Level:Really Easy
-
Total Repair Time:Less than 15 mins
-
Tools:Screw drivers
9 of 9 people
found this instruction helpful.
Was this instruction helpful to you?
Thank you for voting!
crisper drawer supports broke
The parts supplied were made to fit. The hardest part was getting the original broken tabs out of the internal walls of the fridge with out damaging the internal insulation. I punched the center locking pin through completely, dug out the broken tabs and then reached into the hole with a dental pick and pulled out the center pin. The new parts fit perfectly and with a plastic mallet, tapped the new locking pin into place.
Parts Used:

-
Timothy C. from Aberdeen, MD
-
Difficulty Level:Really Easy
-
Total Repair Time:15 - 30 mins
-
Tools:Pliers, Screw drivers
20 of 43 people
found this instruction helpful.
Was this instruction helpful to you?
Thank you for voting!
door didn't seal good
Pulling the old seal was the easy part. The problem became dificult when I opened the seal package. Either Part Select or UPS had folded the seal in half. Witch caused the wire inside the seal to become crimped up. I used a pair of pliers "carefully" to straighten the wire as best I could. Luckly it worked, after pressing it firmly all the way aroud about 5 or 6 times. I'll still keep an eye on it for the next couple of weeks.
Parts Used:
-
jerimy from greenbrier, TN
-
Difficulty Level:A Bit Difficult
-
Total Repair Time:30 - 60 mins
-
Tools:Pliers, Screw drivers
9 of 10 people
found this instruction helpful.
Was this instruction helpful to you?
Thank you for voting!
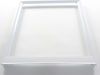
Shelf broken
Ordered a new shelf which arrived very fast. Installed in no time at all as it just slides in and rests on brackets. No tools needed and the new part looks just like the original.
Parts Used:
-
Matthew from Shawnee, KS
-
Difficulty Level:Really Easy
-
Total Repair Time:Less than 15 mins
9 of 10 people
found this instruction helpful.
Was this instruction helpful to you?
Thank you for voting!
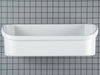
the shelf bin had broken from too many condiments crammed into it...so really needed it fixed...
I went on line and presto! Ordered the part! It came in the mail just two days later and I popped it into place! Thank you for such service!
Parts Used:
-
Holland from Williamsburg, VA
-
Difficulty Level:Really Easy
-
Total Repair Time:Less than 15 mins
9 of 10 people
found this instruction helpful.
Was this instruction helpful to you?
Thank you for voting!
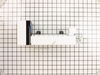
Ice maker failed
Watched YouTube video. Very easy. Used my cell phone camera in ‘selfie’ mode propped up in the upper right hand corner of freezer to see the 2 hidden screws.
Parts Used:
-
Mary from SOUTH LYON, MI
-
Difficulty Level:Easy
-
Total Repair Time:Less than 15 mins
-
Tools:Nutdriver, Screw drivers
9 of 11 people
found this instruction helpful.
Was this instruction helpful to you?
Thank you for voting!
Replacing Icemaker
Pull refrigerator from wall and disconnect the water line and unplug the power.
On top of the icemaker, two machine screws hold the icemaker to the side of the refrigerator. You will have to feel around to find the machine screws, but once you do, it is simple to slip the appropriate size socket over the hex heads. I found it helpful to have an extension on the socket wrench. Disconnect the power cable inside the refrigerator (there are little pressure clips on the side that help release the cable) and move it out of the way for the time-being.
Back out both machine screws several turns, but do not remove them completely. The icemaker slips over the screws, so leaving them in the side of the refrigerator makes that process a lot easier. Hand tighten the machine screws once you have positioned the new icemaker in place. One thing to be sure and do is make sure the water line hose coming out of the back of the refrigerator inside is on top of the icemaker. It fits into a slot in the top of the icemaker - failing to do this will result in water pouring into the freezer compartment, not into the icemaker..
Reconnect the power cable to the new icemaker and tuck it up behind the icemaker assembly. Tighten the machine screws completely, but do not over-tighten.
Reconnect the water line on the back of the refrigerator at the wall, and plug in the refrigerator. You should hear the unit fill immediately.
In about an hour you should have ice filling the bin. Enjoy!
On top of the icemaker, two machine screws hold the icemaker to the side of the refrigerator. You will have to feel around to find the machine screws, but once you do, it is simple to slip the appropriate size socket over the hex heads. I found it helpful to have an extension on the socket wrench. Disconnect the power cable inside the refrigerator (there are little pressure clips on the side that help release the cable) and move it out of the way for the time-being.
Back out both machine screws several turns, but do not remove them completely. The icemaker slips over the screws, so leaving them in the side of the refrigerator makes that process a lot easier. Hand tighten the machine screws once you have positioned the new icemaker in place. One thing to be sure and do is make sure the water line hose coming out of the back of the refrigerator inside is on top of the icemaker. It fits into a slot in the top of the icemaker - failing to do this will result in water pouring into the freezer compartment, not into the icemaker..
Reconnect the power cable to the new icemaker and tuck it up behind the icemaker assembly. Tighten the machine screws completely, but do not over-tighten.
Reconnect the water line on the back of the refrigerator at the wall, and plug in the refrigerator. You should hear the unit fill immediately.
In about an hour you should have ice filling the bin. Enjoy!
Parts Used:
-
Richard Allen from PHOENIX, AZ
-
Difficulty Level:Really Easy
-
Total Repair Time:30 - 60 mins
-
Tools:Socket set
8 of 8 people
found this instruction helpful.
Was this instruction helpful to you?
Thank you for voting!
Water actuator broke off on door.
Fridge has Ice & water in Door.
Slide bottom plate out.Remove three screws
across bottom.
Remove two screws that holds a circut board.
pull the water hose off and remove board.The hose is a little tricky getting back on.
remove two screws that holds two little plates and remove old part.
Reverse prosedure to put back.
Slide bottom plate out.Remove three screws
across bottom.
Remove two screws that holds a circut board.
pull the water hose off and remove board.The hose is a little tricky getting back on.
remove two screws that holds two little plates and remove old part.
Reverse prosedure to put back.
Parts Used:
-
Harry from Curwensville, PA
-
Difficulty Level:Easy
-
Total Repair Time:30 - 60 mins
-
Tools:Screw drivers
8 of 9 people
found this instruction helpful.
Was this instruction helpful to you?
Thank you for voting!
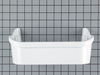
broken door shelf bin
-
Raul from Kissimmmee, FL
-
Difficulty Level:Really Easy
-
Total Repair Time:Less than 15 mins
8 of 9 people
found this instruction helpful.
Was this instruction helpful to you?
Thank you for voting!