




















CGR1420BDW Magic Chef Range - Instructions
Keep searches simple. Use keywords, e.g. "leaking", "pump", "broken" or "fit".
Oven wouldn't heat
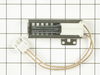
First I removed the burner to which the igniter was attached to. Then I attempted to removed the two screws holding the igniter in place. However, these screws proved to be difficult. I called a local appliance repair shop and the person I spoke to explained how the screws were designed to go one way. Any attempt to remove these screws would result in the threading to be stripped and virtually impossible to remove. (I have never heard of these type of screws before) Anyway, he recommended a hack-saw. Well, the hack-saw worked. After that, the replacing of the part was very easy. Igniter works perfectly and now my wife is ready to conquer the bake sales.
This was my first time using partselect.com.
Yes, I will recommend them to other homeowners.
Thanks. A.T
This was my first time using partselect.com.
Yes, I will recommend them to other homeowners.
Thanks. A.T
Parts Used:
-
Adawel from Brooklyn, NY
-
Difficulty Level:A Bit Difficult
-
Total Repair Time:15 - 30 mins
-
Tools:Pliers, Screw drivers
6 of 6 people
found this instruction helpful.
Was this instruction helpful to you?
Thank you for voting!
Burners would not ignite flame...Had to start with match.
Removed the old burners with a Plumbing Pipe Wrench by turning 1/4 turn counter clockwise. Disconnected (2) wires and replaced with new Sealed Burners. The simmer burner wires were slightly diffrent from the original but they do fit by opening the connector with screwdriver and then clamping once wire inserted.
Parts Used:
-
Richard from Los Angeles, CA
-
Difficulty Level:Really Easy
-
Total Repair Time:15 - 30 mins
-
Tools:Screw drivers, Wrench (Adjustable)
6 of 7 people
found this instruction helpful.
Was this instruction helpful to you?
Thank you for voting!
black dirty burner grates
-
Carolyn from St. George, UT
-
Difficulty Level:Really Easy
-
Total Repair Time:Less than 15 mins
14 of 31 people
found this instruction helpful.
Was this instruction helpful to you?
Thank you for voting!
oven wouldnt light or would light inconsistently
igniter would heat but oven wouldnt come on or would intermittently.opened door a little and lifted it off removed racks and bottom shield removed wingnut and burner shield,removed 2 screws holding igniter ,took off lower shield to allow access to plug,unplugged old one plugged in new one replaced shield and 2 screws holding igniter,put oven back together in reverse order,works like new :) ps if unit not unplugged from wall be careful igniter is hot with electricity and will bite you OUCH!
Parts Used:
-
Jay from Hubbard, TX
-
Difficulty Level:Easy
-
Total Repair Time:30 - 60 mins
-
Tools:Nutdriver
6 of 7 people
found this instruction helpful.
Was this instruction helpful to you?
Thank you for voting!
My oven wouldn't light.
I located the igniter element, and remove the two screws that hold it in place. I then went around to the back of the oven and located the wire, and disconnected it. Then I pulled it out through the oven and removed it. I then replaced it with the new element; pushed the wires through to back of the stove and plugged it in. With that done, I screwed the new igniter element into place. I then put my oven back together; pushed it back into place and turned the gas back on. And presto! my oven lights like new again. I saved myself the costly repairman visit, and the job was easy.
Parts Used:
-
Anna from Valparaiso, IN
-
Difficulty Level:Really Easy
-
Total Repair Time:15 - 30 mins
-
Tools:Nutdriver
6 of 7 people
found this instruction helpful.
Was this instruction helpful to you?
Thank you for voting!
burner would not ignite
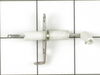
Even though the ceramic insulator looked new (white), it had become non-functional, replacement was simple, 2 phillips screws, reassemble and test. Now I will have to order the other 3.
Parts Used:
-
Scott from Sacramento, CA
-
Difficulty Level:Really Easy
-
Total Repair Time:Less than 15 mins
-
Tools:Screw drivers
6 of 8 people
found this instruction helpful.
Was this instruction helpful to you?
Thank you for voting!
Bad Door Gasket.
First I took the new gasket out of the plastic bag to make sure it was the right size. Then I proceded to take the old gasket out by pulling it with a long noise pliers. Then I took the new gasket and went around the door putting the pins in the holes that, the old gasket was in. That,s about it.
Parts Used:
-
Donald from Schuylkill Haven, PA
-
Difficulty Level:Really Easy
-
Total Repair Time:Less than 15 mins
-
Tools:Pliers
6 of 8 people
found this instruction helpful.
Was this instruction helpful to you?
Thank you for voting!
light bulb in water ice freezer door went bad
I didn't. Don't know how to get to light bulb to change it for this specific model
Parts Used:

-
Carl from RIVERSIDE, CA
-
Difficulty Level:Very Difficult
-
Total Repair Time:More than 2 hours
-
Tools:Screw drivers
8 of 14 people
found this instruction helpful.
Was this instruction helpful to you?
Thank you for voting!
Stove wouldn't stay lit and would fire unless the gas was turned on the range top .
Removed the drawer and the flash plate underneath .
Unplugged the igniter then opened the & removed the over door . Lifted the bottom plate to expose the burner and igniter . Undo the 2 screws holding the igniter in place . Replace the igniter and reach underneath and plug the wire connecters together . Place all the proper things in their place .. and it was finished ...
The biggest snag I ran into was the one of the 2 screws stripped out when when taken things apart .. but I have taps and found a few new screws and replaced them ......
Quite easy fix .. don't a pay repair man to do it .... !!
Unplugged the igniter then opened the & removed the over door . Lifted the bottom plate to expose the burner and igniter . Undo the 2 screws holding the igniter in place . Replace the igniter and reach underneath and plug the wire connecters together . Place all the proper things in their place .. and it was finished ...
The biggest snag I ran into was the one of the 2 screws stripped out when when taken things apart .. but I have taps and found a few new screws and replaced them ......
Quite easy fix .. don't a pay repair man to do it .... !!
Parts Used:
-
Allen from Swengel, PA
-
Difficulty Level:Easy
-
Total Repair Time:15 - 30 mins
-
Tools:Nutdriver, Pliers, Screw drivers, Wrench set
6 of 8 people
found this instruction helpful.
Was this instruction helpful to you?
Thank you for voting!
Oven took way too long to preheat . Emitted strong gas odor.
I first matched the symptom (very long preheat time/gas odor) with the most likely problem (faulty oven gas igniter). I then wrote the model # and Googled gas oven repair and got to your website. I then located the faulty part within about 5 clicks and proceeded to order the exact part within another 5 or so clicks. I received my order from PartSelest in 2 days and had the oven working with the new igniter in about 10 minutes....Then it dawned on me---"Hey, I should be a Maytag Repair Man."
Thanks for the prompt delivery and the correct installation instructions. I will absolutely use your service again. (Not too soon, I hope !)
Thanks for the prompt delivery and the correct installation instructions. I will absolutely use your service again. (Not too soon, I hope !)
Parts Used:
-
Patrick from Las Vegas, NV
-
Difficulty Level:Really Easy
-
Total Repair Time:Less than 15 mins
-
Tools:Nutdriver
6 of 8 people
found this instruction helpful.
Was this instruction helpful to you?
Thank you for voting!
simple-just missing a knob
No one and I mean no one could find this part-so I went to this website on the advice of my secretary and without any hassle found it!
Parts Used:

-
Dale from Torrance, CA
-
Difficulty Level:Really Easy
-
Total Repair Time:Less than 15 mins
6 of 8 people
found this instruction helpful.
Was this instruction helpful to you?
Thank you for voting!
One element of number display did not light
clock is in top of double oven. Dis-assembly and access to the clock was a puzzle. Four screws in the top of the oven were the solution. The clock panel then folded out and access to three plug-ins and four screws allowed access to the clock. remounted the clock with four screws and replaced plugs. (watch carefully order of wiring) Re-power on the oven and set clock. NOTE: Cover said Magic Chef but Label said MayTag
Parts Used:
-
Lawrence J from BENTON, AR
-
Difficulty Level:Easy
-
Total Repair Time:15 - 30 mins
-
Tools:Pliers, Screw drivers
7 of 11 people
found this instruction helpful.
Was this instruction helpful to you?
Thank you for voting!
Stove seal fell apart
Removed old seal parts and had to cut new part to put into space but it went in without difficulty and has sealed the stove door tight again.
Parts Used:
-
Teresa from Washougal, WA
-
Difficulty Level:Really Easy
-
Total Repair Time:30 - 60 mins
-
Tools:Pliers, Screw drivers
5 of 6 people
found this instruction helpful.
Was this instruction helpful to you?
Thank you for voting!
Oven did not light---only glowed
I thought that the initial problem based on the users manual may had been the thermostat.
Removal of the old unit and installation of the new one was quite simple.
The only time lag was cleaning some of the surrounding areas of the oven as worked progressed.
As it turned out though, the problem wasn't the thermostat, but rather the igniter.
But, that was a fairly easy job as well!
Removal of the old unit and installation of the new one was quite simple.
The only time lag was cleaning some of the surrounding areas of the oven as worked progressed.
As it turned out though, the problem wasn't the thermostat, but rather the igniter.
But, that was a fairly easy job as well!
Parts Used:
-
PEREZ from YONKERS, NY
-
Difficulty Level:Easy
-
Total Repair Time:15 - 30 mins
-
Tools:Screw drivers
5 of 7 people
found this instruction helpful.
Was this instruction helpful to you?
Thank you for voting!
Igniter insulation had cracked and spark was shorting out on the flame holder whatchmacallit.
The flame holder twists about 1/2 inch to left and lifts off. I removed the two screws that holds the igniter on and removed it and installed the new igniter.
There was one complication: when I put it back together, there was no spark. I removed the ground wire and cleaned and scraped it and replaced it and still no spark. But, for no apparent reason the spark returned and has been okay since.
There was one complication: when I put it back together, there was no spark. I removed the ground wire and cleaned and scraped it and replaced it and still no spark. But, for no apparent reason the spark returned and has been okay since.
Parts Used:
-
Melvin from Santa Maria, CA
-
Difficulty Level:Easy
-
Total Repair Time:15 - 30 mins
-
Tools:Screw drivers
4 of 5 people
found this instruction helpful.
Was this instruction helpful to you?
Thank you for voting!