




















CEL1115AAW Magic Chef Range - Instructions
Keep searches simple. Use keywords, e.g. "leaking", "pump", "broken" or "fit".
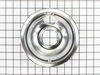
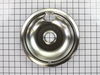
I wanted to purchase new drip pans, since those that I have are a bit grimy
I will begin by saying that not only will I continue to order my parts from PartsSelect, but I also highly recommend this business. If you call Whirlpool be careful that they forward your call for parts to some preferred vendor, which a customer might assume is Whirlpool but it is not. PartsSelect is the same type of business, but with outstanding customer service. With regard to the drip pan, Whirlpool had not updated the part number for these as I found out when i called them. Whirlpool no longer uses the drip pans without the holes which is a serious problem since this could be hazardous to the owners of these ranges if you are forced to purchase the drip pans with the holes in them. That said, I ended up keeping my old drip pans, because if you spill grease under the new ones with the holes in them and since the range design with the fan built in on the top does not allow you to lift the top to clean under the pans, you could end up with a grease fire. This is not the fault of PartsSelect and they handled my order in a manner that I would give them a rating of exceptional for customer service.
Parts Used:
-
Hedy from Richmond, VA
-
Difficulty Level:Really Easy
-
Total Repair Time:Less than 15 mins
Was this instruction helpful to you?
Thank you for voting!
Broken leveling leg.
This is a no brainer. I am only doing this because you asked. Pull out the stove, tilt it back, remove broken leg, install new leg.
Parts Used:

-
Don from Crestwood, MO
-
Difficulty Level:Really Easy
-
Total Repair Time:Less than 15 mins
-
Tools:Pliers
Was this instruction helpful to you?
Thank you for voting!
the old bowls were burned.
-
Rosibel from Houston, TX
-
Difficulty Level:Really Easy
-
Total Repair Time:Less than 15 mins
Was this instruction helpful to you?
Thank you for voting!
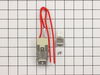
burners would not come on without moving them around
took old screw out of stove top that held them in and cut the two wires off close to the burner stripped the wires and used the screw caps to put each line together it doesn't matter which line goes where and screwed it back on with the old screw and tried the two burners and they both worked job done ps it took longer for me to type this but i am slow at typing
Parts Used:
-
Ronald E. from Marissa, IL
-
Difficulty Level:Really Easy
-
Total Repair Time:15 - 30 mins
-
Tools:Screw drivers
Was this instruction helpful to you?
Thank you for voting!
Electric surface burner would only turn very hot
Well, I had to search a bit deeper in the internet to find out that the problem was not with the surface burner (which did look a bit burned out anyway) but rather with the surface burner switch (Part Number: PS336885) which must have ben damaged by the heat of the closest burner. If this problem would have been better documented (or if I would have searched more carefully) I would have saved over $40 with parts (Surface Burner Receptacle Kit) that I didn't quite need. Repairing the switch was very easy, thanks also to the available video , even though the stove used on this video (front panel) didn't quite match mine (top-back panel).
Parts Used:
-
Vittorio from Wakefield, MA
-
Difficulty Level:Easy
-
Total Repair Time:15 - 30 mins
-
Tools:Screw drivers
Was this instruction helpful to you?
Thank you for voting!
Leveling legs were broken during the summer
The range in my classroom had the leveling legs broke off by the summer staff. I ordered two new leveling legs and the night custodian replaced them in about 45 minutes and them leveled the stove. Parts were just as stated and easy to order.
Parts Used:
-
Jayne from Willimantic, CT
-
Difficulty Level:A Bit Difficult
-
Total Repair Time:30 - 60 mins
-
Tools:Pliers, Screw drivers, Wrench set
Was this instruction helpful to you?
Thank you for voting!
Dirty drip bowl
-
Paul from Carnegie, PA
-
Difficulty Level:Really Easy
-
Total Repair Time:Less than 15 mins
Was this instruction helpful to you?
Thank you for voting!
I had a power serge and it burned the Plug at the termial block and melted a few wire.
After we got the part in the mail my husband put it on and shortened the wires and put new plugs on the ends of the wires and we had to get a new plug put it on and it was fixed.
Parts Used:

-
Robin from Vanderbilt, PA
-
Difficulty Level:Really Easy
-
Total Repair Time:15 - 30 mins
-
Tools:Socket set
Was this instruction helpful to you?
Thank you for voting!
Drip bowls tarnished.
Remove heating element coils. & old drip pans. Install the new drip pans and reinsert the heating elements and insure all elements were level. For aesthetic reasons I replaced all the drip pans - 2 x 8" & 2 x 6".
Parts Used:
-
Jennifer from Albion, NE
-
Difficulty Level:Really Easy
-
Total Repair Time:15 - 30 mins
Was this instruction helpful to you?
Thank you for voting!
heating coils would not work
Remove heat coils, take body of coil inserts out, remove screws from body, cut old receptacle out, tie new recptacle wires to the old piece of left over wires using wire nuts, and reassemble body, insert heating coils and test.
Parts Used:
-
Adam from Kempner, TX
-
Difficulty Level:Really Easy
-
Total Repair Time:15 - 30 mins
-
Tools:Nutdriver
Was this instruction helpful to you?
Thank you for voting!
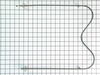
Oven wouldn't heat
-
Mary J from Lapeer, MI
-
Difficulty Level:Really Easy
-
Total Repair Time:15 - 30 mins
Was this instruction helpful to you?
Thank you for voting!
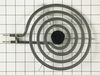
Old burner stopped working right.
Was able to unplug the old burner and plug the new one in. Very easy.
Parts Used:
-
Paulette J. from Connell, WA
-
Difficulty Level:Really Easy
-
Total Repair Time:Less than 15 mins
Was this instruction helpful to you?
Thank you for voting!
burned out coil
Simply slide out old coil by lifting cooktop pan; position new coil electirc elements in oven slots, slowly push in, then push coil tab into slot in pan for balance. No problems
Parts Used:
-
L from Richardson, TX
-
Difficulty Level:Really Easy
-
Total Repair Time:Less than 15 mins
Was this instruction helpful to you?
Thank you for voting!
My burner element had broken.
I ordere the new burner element. It arrived quickly compared to some of the things I order. I removed the broken burner element and plugged in the new one and that was all that was needed. It feels pretty good to have that burner working properly again.
Parts Used:
-
Mary from Hastings, FL
-
Difficulty Level:Really Easy
-
Total Repair Time:Less than 15 mins
Was this instruction helpful to you?
Thank you for voting!
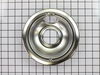
To Old Needed To Be Replace
Actualy I just removed the old ones and replace them with the new ones . And thank you for your prompt delivery I found some one I can trust . Thanks again . Mrs bolanos
Parts Used:
-
ROSARIO from MESQUITE, TX
-
Difficulty Level:Really Easy
-
Total Repair Time:Less than 15 mins
Was this instruction helpful to you?
Thank you for voting!