




















CAV1004AWW Magic Chef Washer - Instructions
Keep searches simple. Use keywords, e.g. "leaking", "pump", "broken" or "fit".
Water leak and it would not agitate
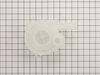
Turned off the water supply. Removed clothing and bailed out water fro tub. Removed back access panel. Turned washer over to access the bottom and removed drive belt by turning the large pulley attached the drum while pulling the belt over the pulley. Next remove the two hoses attached to the pump, remove the screws holding the pump on and remove the pump. Replace the pump by reversing the procedure, as for replacing the drive belt, place the belt on the motor and pump first and start it on the larger pulley and hold it on while you turn the pulley, it will pull the motor adjustment as you turn and when fully in the pulley it will be properly adjusted. Then replace the access panel, turn the washer upright, push back in place, turn on the water supply and replace the drain hose. Back in business. For me, while I was waiting for the new pump to arrive, I took the time to remove the agitator and tub and give it a good cleaning inside and out, but that's me.
Parts Used:
-
George from WILMINGTON, NC
-
Difficulty Level:Easy
-
Total Repair Time:30 - 60 mins
-
Tools:Socket set
2 of 2 people
found this instruction helpful.
Was this instruction helpful to you?
Thank you for voting!
Random slow spin during Rinse cycle and would then shut off and not drain
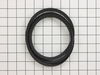
Top loader May Tag washer with open bottom. After research I presumed it needed a new belt, or Transmission, which runs 3 pulleys under the open bottom. After tipping the washer back for inspection, saw oil splatter underneath. Removed old belt by turning largest pulley on Transmission while pulling the belt "off" the edge. Belt was aged, Stretched and worn. Belt and all 3 pulleys were oily causing slippage. The main large Drive pulley on the Transmission shaft, has a plastic snap on grease cup at it's center. I snapped it off with screw driver. The cup was partially full of thinned old grease causing the oily mess. There's a C clip inserted in a groove on the end of the drive shaft holding the pulley on. Removed the C clip with screw driver tip and slid off the Drive pulley. The Center of the pulley contains a plastic ratchet assembly that operates the washer tub cycle to rotate and stop and repeat. The ratchet assembly falls right out, and in the end of transmission is a Thrust washer which can be pulled of easily also. I Cleaned all 3 pulleys with De-greaser and finally with Rubbing Alcohol to dry the pulley surfaces. Then cleaned and removed all grease from the plastic ratchet assembly parts and cleaned them. Then I Repacked everything including the Drive shaft with "heavier" Grease that would not break down so easy. Reassembled everything in reverse and installed on the shaft. Snapped the C clip back on to hold pulley back in place and then the Grease cup, which just snaps back in place with a push. Installed new drive belt in the same manner it was removed, only in reverse by turning the pulley, and pushing the belt "on" over the edge of the pulley. Problem fixed and washer works perfect again with Noticeably better operation through all washer cycles.
Parts Used:
-
Frank from BRADFORD, MA
-
Difficulty Level:Easy
-
Total Repair Time:30 - 60 mins
-
Tools:Screw drivers
2 of 2 people
found this instruction helpful.
Was this instruction helpful to you?
Thank you for voting!
'Machine' wobbled & 'walked away from the wall'. Had to stop it and re-arrange the load, almost everytime!
I pretty much followed the video,and read some of the other comments on how to do it. I only had one problem, the back panel had an opening of about 14"x14" to access the 2 rear balance springs. I finally laid the machine on it's face,so I didn't have to kneel down.The only problem with that,is the tub falls forward, making the springs farther away from the upper hole to attach/stretch, the springs to remove/install. I cured that problem by cutting a wedge out of a piece of 2x4, and stuck it between the top edge of the tub & upper frame. Worked great,held the tub in position, closer to the springs & locating holes. Taking them off is no problem,installing them, was made easier by using the wedge. The parts were a perfect fit, no more 'walking away from the wall' now! Thanks PartSelect
Parts Used:

-
jim from warne, NC
-
Difficulty Level:Easy
-
Total Repair Time:30 - 60 mins
-
Tools:Nutdriver, Pliers, Socket set
2 of 2 people
found this instruction helpful.
Was this instruction helpful to you?
Thank you for voting!
Drain Pump
Remove back compartment, remove belt disconnect two water rubber tubes from the drain pump, unscrew three screws securing the drain pump from the frame. Replace with a new drain pump, secure to frame with thee screws, reconnect rubber tubes, and replace belt.
Parts Used:
-
Ali from PLACENTIA, CA
-
Difficulty Level:Easy
-
Total Repair Time:30 - 60 mins
2 of 2 people
found this instruction helpful.
Was this instruction helpful to you?
Thank you for voting!
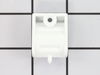
Left hinge pin & hinge sheared
Hving read some of the tips in regards to this repair I set out with equal parts of confidence & apprehension. The advice of shifting the tub toward the hinge to be removed is in itself the key to the whole procedure. After having done so & wedging a dust pan handle between the tub & frame to first one side & then the other, I removed the entire lid with the hinge & hinge pin assys. attached as ther is not sufficient clearance to slide a servicable hinge pin from a hinge when only one hinge has beeen removed. With the lid completely removed access to the hinge pin(s) is straight forward. I suggest screwing & unscrewing the fastening screw into a new hinge assy before mounting the hinge onto the machine & also using an offset philips screwdriver or ,as I did, a 1/4" drv. ratchet with a #2 philips apex bit which allows for a better feel & more control over the upside down blind operation of removing & replacing the fastening screw into the hinge assy. Hope this helps. Tom
Parts Used:
-
Tom from Camp Verde, AZ
-
Difficulty Level:Easy
-
Total Repair Time:15 - 30 mins
-
Tools:Screw drivers, Socket set
2 of 2 people
found this instruction helpful.
Was this instruction helpful to you?
Thank you for voting!
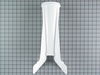
Broken agitator top
Pretty simple repair--popped the fabric softener cup off of the agitator top and took out the bolt that secures it to the assembly. Removed the broken agitator top, replaced with the new one and reinstalled the bolt and softener cup. EZ as pie for only $24 including shipping! Great price!
Fabulous turnaround time from www.partselect.com. I had the problem corrected inside of 4 days using standard shipping. I will definitely do business with them again!
Fabulous turnaround time from www.partselect.com. I had the problem corrected inside of 4 days using standard shipping. I will definitely do business with them again!
Parts Used:
-
sherman from mckinney, TX
-
Difficulty Level:Really Easy
-
Total Repair Time:Less than 15 mins
-
Tools:Socket set
2 of 2 people
found this instruction helpful.
Was this instruction helpful to you?
Thank you for voting!
The Bearing On The Pump Had Gone Out And Was Making A Horrible Noise.
Removed the screws on the back plate pulled the hose clamps off removed the belt and three screws off the pump went back just as easy and the machine was like new again. If only all repairs was this easy!
Parts Used:
-
DONNIE from MOSS POINT, MS
-
Difficulty Level:Really Easy
-
Total Repair Time:Less than 15 mins
-
Tools:Pliers, Screw drivers, Wrench (Adjustable)
2 of 2 people
found this instruction helpful.
Was this instruction helpful to you?
Thank you for voting!
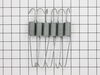
Shaking and walking.
I followed the video you have on web site. Very good and easy to follow.
Parts Used:
-
Richard from VANDLING, PA
-
Difficulty Level:Easy
-
Total Repair Time:1- 2 hours
-
Tools:Nutdriver, Pliers, Screw drivers, Socket set, Wrench (Adjustable)
2 of 2 people
found this instruction helpful.
Was this instruction helpful to you?
Thank you for voting!
Washer making squealing noise in spin cycle
Pump is readily accessible at the back of the machine by taking off the access cover. First step is to disconnect power and remove drive belt off tub pulley which is the largest in the center - the takeup is in the drive motor mount but it seems easier to turn the larger pulley and wind the belt off. There are three 3/8 hex mount screws fastening the pump to the washer base and two hose spring clamps attaching the tub drain hose and outlet drain hose to the pump. Follow the directions in the utube video which is the best (most others don't give detailed directions and best method). The only caution I would give is that there is some water in the drain hoses so be prepared to mop it up with sponge and bucket or have some towels available. Install new pump (loose assemble two visible screws to locate pump and then loose assemble far side blind screw and tighten all 3),replace hoses snug to stops and assemble clamps, replace access panel and replace drive belt and plug washer back in.
Parts Used:
-
Edward D from GRAND BLANC, MI
-
Difficulty Level:Easy
-
Total Repair Time:30 - 60 mins
-
Tools:Nutdriver, Pliers, Socket set
2 of 2 people
found this instruction helpful.
Was this instruction helpful to you?
Thank you for voting!
banging out of balance
-
Daryl from LYNCHBURG, OH
-
Difficulty Level:Really Easy
-
Total Repair Time:15 - 30 mins
-
Tools:Nutdriver, Pliers
2 of 2 people
found this instruction helpful.
Was this instruction helpful to you?
Thank you for voting!
Pump making grinding noise
Pulled machine out from wall. Tilted back and rolled belt from pulleys. Pulled further out and removed cover plate 3 screws. Disconnected hoses with pliers and removed 3 screws with nut driver took out old pump and placed new pump into position. Replaced screws and hoses replaced cover. Tilted machine and replaced new belt. Put machine back in place. Started machine with no laundry. Checked for leaks Done. Approximately 20 minutes. Working great
Parts Used:
-
Dennis from LUTTS, TN
-
Difficulty Level:Really Easy
-
Total Repair Time:15 - 30 mins
-
Tools:Nutdriver, Pliers
2 of 2 people
found this instruction helpful.
Was this instruction helpful to you?
Thank you for voting!
Noisy on spin cycle
Followed the excellent utube instructions you provide. Piece of cake when I followed the video. The rear springs became much more difficult because my model does not have rear access panel. They were the only stuggle. Thank you for doing the repair videos
Parts Used:
-
William B from STURGIS, MI
-
Difficulty Level:Easy
-
Total Repair Time:30 - 60 mins
-
Tools:Nutdriver, Pliers, Screw drivers, Socket set, Wrench (Adjustable)
2 of 3 people
found this instruction helpful.
Was this instruction helpful to you?
Thank you for voting!
Water leaking when washer was filling with water.
Took off the back plate. Looked to see where it was leaking. Squeezed the clamps on top and bottom to remove from hose and pull hose out.
Parts Used:
-
Colleen from Glenflora, WI
-
Difficulty Level:Difficult
-
Total Repair Time:15 - 30 mins
-
Tools:Pliers
3 of 6 people
found this instruction helpful.
Was this instruction helpful to you?
Thank you for voting!
Leaking water pump
Removing and installing the pump is theoretically easy, as everyone on this site has said so far. Just remove three hex-shaped screws, loosen drive belt and remove pump, then install new one using the same steps in reverse order. The trick is getting the screws off and on--they do not have slots for a screwdriver and there is not room around them for a socket wrench or pliers. I probable spent over an hour just on removing/replacing these screws and have many bruises to show for it. I ended up attaching a vice grips on the tips of the screws underneath the washing machine and screwing them out that way. And replacing the drive belt was horrifically difficult--that's where the other hour went. The devil was definitely in the details! If anyone had told me what I would have to go through to make this repair, I would have called a repairman. And I am an extremely handy person--I do stuff like repairs all the time, so it is unusual for me to say this. The good news is that the new pump works and the washer is back in commission.
Parts Used:
-
Crista from Santa Ana, CA
-
Difficulty Level:Very Difficult
-
Total Repair Time:More than 2 hours
-
Tools:Pliers, Screw drivers, Wrench (Adjustable)
3 of 6 people
found this instruction helpful.
Was this instruction helpful to you?
Thank you for voting!
The washer was jumping all over the place and leaking water during the spin cycle
I took out the agitator first, then I took out the inner tub, next I took out the outer tub, and last I took out the transmission assembly. After replacing the snubber I put the transmission assembly back on, then the new outer tub and next the inner tub. Last I put the agitator back on.
Parts Used:


-
Elmer from Fort Campbell, KY
-
Difficulty Level:Difficult
-
Total Repair Time:More than 2 hours
-
Tools:Nutdriver, Pliers, Screw drivers, Socket set
4 of 9 people
found this instruction helpful.
Was this instruction helpful to you?
Thank you for voting!