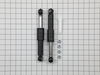
This kit is used for front load washers and includes 2 dual-stage shock absorbers, 1 spare shock mounting pin and 4 locking nuts. These shock absorbers keep the washer from vigorous shaking during it's cycles.
This door lock and switch assembly is manufactured to lock the door on your front load washer to prevent it from opening while it is running. You may need to replace the door lock and switch if the do...
The pump is what your washer uses to remove the water from the tub. This part is the pump and motor assembly which includes the red flapper to prevent drain back flow.
Refresh the look and function of your washer with this white outer door panel. Designed for select front-loading models, it helps your door close securely and keeps water where it belongs—inside the m...
Also known as a Door Boot Seal and is used in front load washers. This part is used to keep the clothes inside the tub during the wash cycle. The folds in the bellow allow the tub to move separately f...
This is a replacement screw for your washer or dryer. The screw is approximately half an inch in length and is a Phillips-head screw. It screws in from the outside of the drum, into the vane/baffle. T...
This washer shock absorber mounting pin is a small but essential fastener that secures the shock absorber to the outer tub of a front-load washing machine. By holding the shock absorber firmly in plac...
Ask our experts a question about this model and we'll get back to you as soon as possible!
4 questions answered by our experts.
< Prev
1
Next >
Sort by:
Search filter:
Clear Filter
Your search term must have 3 or more characters.
Keep searches simple. Use keywords, e.g. "leaking", "pump", "broken" or "fit".
Sorry, we couldn't find any existing answers that matched.Try using some different or simpler keywords, or submit your new question by using the "Ask a Question" button above!
Arman
November 22, 2022
may washer stops/shut off at the middle of the cycle. As in all lights off just couple of beeps then dead. door lock is ok in fact its washes near to finish I guess but doesnt finish the cycle leave the clothes wet. what causes this behavior
For model number ATF6000ES1
Hello Arman, thank you for reaching out. We have researched your model and we would recommend checking the following parts to fix your issue: door strike, part number PS890617, lock and switch assembly, part number PS12364048, motor, part number PS2373340, and control board, part number PS1152359. If you require assistance to place an order, please contact customer service. We hope that helps!
Hello Sheilah, thank you for reaching out. In order to access the filter, you have to remove the top of the washer. Remove the screws holding the top panel and pull it back so that the front lip comes out underneath the control panel. After you've released it, you can easily lift the top up and set it aside. Remove the detergent drawer and the console. Now set the control panel on top of the washer. Use a screwdriver to remove the two screws that hold the door lock to the front panel. In order to get the clamp off, there is a spring located at 6 o'clock. You have to lift this up and carefully get underneath it with a small flathead screwdriver. You can lift it up and go clockwise around the clamp to pull it out of the groove. Once you have taken it off, you can not pull it out of the washer. Now that you have the clamp up, you can pull the seal off the front panel. Carefully pull it away from the front panel all the way around the front opening. Once you have it off, you can kind of tuck it behind the panel and then remove all the screws that hold the front panel. First, remove the screws at the bottom, then at the top. Once you have removed the second screw, release the clip for the door switch wiring harness. To release the wire harness, simply pull out on the panel a little bit, and then take your needle nose and compress the clip and push it through the panel. Remove the door and set it aside. Now that you have the front panel off, you have access to the tub and the pump hose. Loosen up this clamp and pull it off the tub. Disconnect the top of the pump hose from the pump. Now compress the clamp; all you have to do is compress it, and then you can pull it off the pump. Once you have the hose off the fitting, you can take the clamp off and set it aside, and then pull the tub and pump hose out of the washer. You can not take the washer filter out of it; just press it up from the bottom and work the edges over the lip so you can pull it out through the top. Now remove any particles in the filter. We hope this information is useful!
1 personfound this helpful.
Was this helpful?
Thank you for voting!
Debbe
March 22, 2025
My washershuts off at 6 minutes left on all cycles. So it doesn't complete the spin cycle.
For model number ATF6000ES1
Hi Debbe, thank you for the question. It seems that there is an issue with the control board, part number PS1152359. It manages the washer's functions such as filling, washing, draining and spinning. You may need to replace it to fix the issue. We hope this sorts out your problem!
Hello Tom, thank you for the question. According to our research, the door does not come as an assembly. You may need to order the parts separately. We are attaching a relevant link that will help you in ordering the parts of the door. The diagram of the door is located at the top of this schematic. The parts of the door include diagram number 48, 56, 16, 52, and associated parts. We hope this helps!
This was one of the simpliest repairs I have ever done taking less than 5 minutes to complete. On the inner door I removed the two screws that hold the plastic catch in place. I then removed the broken catch and put the new catch in place. Finally I replaced the two screws that hold the catch in place and it was done.
1. Unplug unit. 2. Unscrew 2 nuts holding top in place in rear of unit using phillips head screwdriver. 3.Slide top back and remove. 4. Open door of washer and unscrew 2 screws holding in door lock unit. 5.Pull out unit from the top and install new unit reconnecting the 3 wire connections.
remove top of machine by removing 3 screws along the top edge in the back of your machine and then sliding the top back and up. Then loosen the screws holding on the control panel enough to get to the 2 screws at the top of the door panel. Next remove bottom panel by removing 2 screws along bottom edge then pulling it free from snaps. Then along the outside lip of the bellow, just inside the door, is a wire clip that is easily removed by prying it past rubber lip with a screw driver and lifting it away. Remove the door panel by removing the 2 screws you exposed by loosening the control panel and 2 more along the bottom that were exposed when removing bottom panel. After the door panel is removed and the bellow is completely exposed, you will find that it is held in place by a circular spring which wraps the whole way around the drum opening. Again it can be removed by prying it out away from the groove in which it sits with a screw driver. Now your machine is broken down as far as it needs to be. From here you can follow the directions included in your new bellow kit and put it back together by following these instructions in reverse.