




















AER6603SFS1 Whirlpool Range - Instructions
Keep searches simple. Use keywords, e.g. "leaking", "pump", "broken" or "fit".
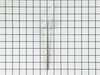
oven not keeping correct temp and sometimes would not relight when temp went dropped.t
Slid oven out and took back shield off unplugged sensor took bracket screw out replaced sensor with new one.
Parts Used:
-
Gary from PLUM CITY, WI
-
Difficulty Level:Really Easy
-
Total Repair Time:30 - 60 mins
-
Tools:Screw drivers
3 of 4 people
found this instruction helpful.
Was this instruction helpful to you?
Thank you for voting!
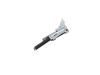
Broken spring hinge
the door came apart fairly easy getting it all back together was another story lining up glass and panels that have already been heated was fun but its back together and working fine.... It should be noted that I have a warranty for the stove but the hoops I had to jump thru and the time it would take for the tech to come it was easier to do it myself!!
Parts Used:
-
Ralph from TEATICKET, MA
-
Difficulty Level:Difficult
-
Total Repair Time:1- 2 hours
-
Tools:Screw drivers
3 of 4 people
found this instruction helpful.
Was this instruction helpful to you?
Thank you for voting!
Busted door hinge
Wrestled with it for ten minutes and then watched a youtube video on how to set the locks on the oven door hinges in order for the door to be installed. The video was instrumental
Parts Used:
-
Robert from DEERING, NH
-
Difficulty Level:A Bit Difficult
-
Total Repair Time:15 - 30 mins
-
Tools:Screw drivers
3 of 4 people
found this instruction helpful.
Was this instruction helpful to you?
Thank you for voting!
Had lost one of the drawer glide
Just attached the glide to the drawer. It just popped in. No problem.
took about 5 minutes.
took about 5 minutes.
Parts Used:

-
Lydia from SAN ANTONIO, TX
-
Difficulty Level:Very Easy
-
Total Repair Time:Less than 15 mins
2 of 2 people
found this instruction helpful.
Was this instruction helpful to you?
Thank you for voting!
You
Pleaae prepopulate the manufacturer and part i purchased. I fix a lot of appliances so cannot expend the effort to decipher this.
Be well.
Be well.
Parts Used:
-
Ron from CARIBOU, ME
-
Difficulty Level:Really Easy
-
Total Repair Time:30 - 60 mins
2 of 2 people
found this instruction helpful.
Was this instruction helpful to you?
Thank you for voting!
Very hard to close the door range, especially one way and it sticks to close.
First, view videos to know what is an active door range problem.
Second, when you know the problem, see videos on you tube and be sure you will replace the right part
Third, I go to Part Select, see reference video for your problem if you need and buy the part on line, good price, very quick delivery.
Second, when you know the problem, see videos on you tube and be sure you will replace the right part
Third, I go to Part Select, see reference video for your problem if you need and buy the part on line, good price, very quick delivery.
Parts Used:
-
Joanne from LAUDERHILL, FL
-
Difficulty Level:Very Easy
-
Total Repair Time:30 - 60 mins
-
Tools:Screw drivers
2 of 2 people
found this instruction helpful.
Was this instruction helpful to you?
Thank you for voting!
Door hinge fell apart
-
myron from west salem, WI
-
Difficulty Level:Really Easy
-
Total Repair Time:30 - 60 mins
-
Tools:Screw drivers
2 of 2 people
found this instruction helpful.
Was this instruction helpful to you?
Thank you for voting!
Paint peeling from strip

-
Myron from Punta Gorda, FL
-
Difficulty Level:Easy
-
Total Repair Time:15 - 30 mins
-
Tools:Nutdriver
3 of 5 people
found this instruction helpful.
Was this instruction helpful to you?
Thank you for voting!
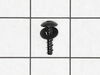
Replaced screw
-
Judith from SALEM, OR
-
Difficulty Level:Very Easy
-
Total Repair Time:Less than 15 mins
-
Tools:Screw drivers
2 of 2 people
found this instruction helpful.
Was this instruction helpful to you?
Thank you for voting!
Oven not reaching temperature
Simple-pulled range away from wall, unplug from socket. Removed back panel unscrewed thermoses and replace. Put back panel back on plug in, tested temperature setting before sliding range back on place
Parts Used:
-
Marsha from Clermont, FL
-
Difficulty Level:Really Easy
-
Total Repair Time:Less than 15 mins
-
Tools:Screw drivers
2 of 2 people
found this instruction helpful.
Was this instruction helpful to you?
Thank you for voting!
Replacing the bulb in the freezer side
Removed the ice brucket,
Removed the light shield by releasing one screw using a nutdriver.
Replacing the bulb and reinstalled the light shield.
Your web site is one of the best and most helpfull service sites I ever used. Just wish that in the future you will ship parts overseas.
Removed the light shield by releasing one screw using a nutdriver.
Replacing the bulb and reinstalled the light shield.
Your web site is one of the best and most helpfull service sites I ever used. Just wish that in the future you will ship parts overseas.
Parts Used:

-
Yafa (and David) from Bothell, WA
-
Difficulty Level:Easy
-
Total Repair Time:Less than 15 mins
-
Tools:Nutdriver
5 of 11 people
found this instruction helpful.
Was this instruction helpful to you?
Thank you for voting!
Compressor would not shut off at the maximum recommended pressure (150psi)
Removed face plate (4 screws). Removed 2 screws holding manifold in place. Detached wires from the switch. No need to mark them - they don't have to go back on any particular terminal. Remove the switch from the manifold with an adjustable wrench. Replace with new switch (thread sealing compound on the new switch is sufficient - no need for teflon tape). Reattach wires and reassemble manifold and face plate. Easy fix!
Parts Used:
-
Mark from SYLVA, NC
-
Difficulty Level:Really Easy
-
Total Repair Time:15 - 30 mins
-
Tools:Screw drivers, Wrench (Adjustable)
2 of 2 people
found this instruction helpful.
Was this instruction helpful to you?
Thank you for voting!
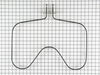
Extremely easy repair
Unplug stove. Remove the two screws attaching the element to the rear of the oven. Carefully pull out. Disconnect wires. Reconnect wires. Screw back in. Done. The hardest part was moving the stove away from the wall.
Parts Used:
-
Melissa from MILL CITY, OR
-
Difficulty Level:Very Easy
-
Total Repair Time:Less than 15 mins
-
Tools:Screw drivers
2 of 2 people
found this instruction helpful.
Was this instruction helpful to you?
Thank you for voting!
Heating element, broken
Unplugged appliance, removed the 2 screws that mount element. Unhooked the electric wires,with pliers.
Connected, the wires to new element replaced the 2 screws. And was done in about 9 minutes.
Connected, the wires to new element replaced the 2 screws. And was done in about 9 minutes.
Parts Used:
-
Frank from COLUMBIA, TN
-
Difficulty Level:Very Easy
-
Total Repair Time:Less than 15 mins
-
Tools:Pliers, Screw drivers
2 of 2 people
found this instruction helpful.
Was this instruction helpful to you?
Thank you for voting!
Burner didn’t work
I shut off the breaker to the stove. I removed 2 screws from the underside of the cooktop at the front of the unit. I raised the cooktop and had my helper hold the top at an angle to access the burner. I removed 2 screws attached to the burner and then loosened the 2 clips and moved them to release the burner. I transferred the electrical connections from the old to the new. Reinstalled the burner and cooktop. Turned the breaker on, tested the new burner and I was fone
Parts Used:

-
Marc from MIDDLETOWN, CT
-
Difficulty Level:Easy
-
Total Repair Time:15 - 30 mins
-
Tools:Nutdriver, Screw drivers
2 of 2 people
found this instruction helpful.
Was this instruction helpful to you?
Thank you for voting!