




















ADB1400AWS2 Amana Dishwasher - Instructions
Keep searches simple. Use keywords, e.g. "leaking", "pump", "broken" or "fit".
There was no problem
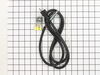
I simply had to hook up the power cord to the dishwasher so i could plug it into the outlet rather than direct wire the appliance. Everything went very smoothly. Everything needed for installation other than tools was provided. Easy to follow instructions if you know a little about electrical wiring.
Parts Used:
-
Briant from Byron, MN
-
Difficulty Level:Easy
-
Total Repair Time:30 - 60 mins
-
Tools:Pliers, Screw drivers, Wrench (Adjustable)
13 of 30 people
found this instruction helpful.
Was this instruction helpful to you?
Thank you for voting!
Pump motor would not start
I did not get to repair my dishwasher using the part supplied by Partselect.com. I pulled my dishwasher out and found that the connector had fallen of the capacitor during installation. Happy to say that I returned the part for a full refund minus the shipping. Have bought from them before, and will again
Parts Used:

-
Nick from Littleton, CO
-
Difficulty Level:Easy
-
Total Repair Time:Less than 15 mins
-
Tools:Nutdriver, Screw drivers, Wrench (Adjustable)
11 of 24 people
found this instruction helpful.
Was this instruction helpful to you?
Thank you for voting!
Worn out door gasket
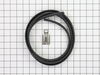
Easy to do. Less than fifteen minutes total and only tool required was a screw driver. Simply pulled out the old gasket by hand and then pressed in the new one with the screw driver. Anyone could do this.
Parts Used:
-
Derek from Chubbuck, ID
-
Difficulty Level:Really Easy
-
Total Repair Time:Less than 15 mins
-
Tools:Screw drivers
5 of 6 people
found this instruction helpful.
Was this instruction helpful to you?
Thank you for voting!
Rollers broke off top rack assembly
Replacement parts from factory installed using u tube support video
Also replaced stop ends for top rack by removing old clip in to push down and lined up to secure in slots at end of rack, notice new plastic parts are installed by pushing hardware into slots downward until they clip into place
Also replaced stop ends for top rack by removing old clip in to push down and lined up to secure in slots at end of rack, notice new plastic parts are installed by pushing hardware into slots downward until they clip into place
Parts Used:

-
Mark from WESTERVILLE, OH
-
Difficulty Level:Really Easy
-
Total Repair Time:Less than 15 mins
-
Tools:Screw drivers
5 of 6 people
found this instruction helpful.
Was this instruction helpful to you?
Thank you for voting!
A mouse was chewed through the hose and ate part of it. Di
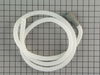
Disconnected the damaged hose extension from the dishwasher outlet drain hose and the connection to the sink drain. Removed two clamps. One a spring clamp and the other a screw clamps. Connected the new extension hose with a spring clamp to the dishwasher outlet drain hose. Connected the other end to the sink drain with a screw clamp. Checked for leaks. Good to go!
Parts Used:
-
Michael from NEW HOPE, PA
-
Difficulty Level:Really Easy
-
Total Repair Time:Less than 15 mins
-
Tools:Pliers, Screw drivers, Wrench (Adjustable)
5 of 7 people
found this instruction helpful.
Was this instruction helpful to you?
Thank you for voting!
Door was falling down quickly
Only one friction sleeve was broken. So I pulled out the dishwasher to see how the one on the other side went on. It was very easy to replace and I replaced both. Unit works fine now.
Parts Used:

-
Chris from VALLEY STREAM, NY
-
Difficulty Level:Very Easy
-
Total Repair Time:Less than 15 mins
-
Tools:Pliers
4 of 4 people
found this instruction helpful.
Was this instruction helpful to you?
Thank you for voting!
dishwasher would not drain
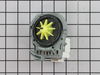
Follow the u tube instruction. Replacing the pump was very simple and easy. The hard part was getting the dishwasher out of the cabinet and back in again.
Parts Used:
-
Gene from SKYKOMISH, WA
-
Difficulty Level:Easy
-
Total Repair Time:1- 2 hours
-
Tools:Screw drivers
5 of 7 people
found this instruction helpful.
Was this instruction helpful to you?
Thank you for voting!
dishracks wre worn out
quick and easy replacement, without tools...
i ordered the wrong part and received the new part and credit for the old part, quickly...Plus, I was kept informed with e-mails....
excellent service...
i ordered the wrong part and received the new part and credit for the old part, quickly...Plus, I was kept informed with e-mails....
excellent service...
Parts Used:

-
BRUCE from TOPEKA, KS
-
Difficulty Level:Really Easy
-
Total Repair Time:15 - 30 mins
8 of 16 people
found this instruction helpful.
Was this instruction helpful to you?
Thank you for voting!
Heating element not heating for both wash and dry.
Put in both a new element and thermostat. Did not fix problem. Using an ohm meter I did not measure any voltage to the thermostat. Suspect it’s a problem in the control unit, and decided to replace dishwasher.
Parts Used:

-
Thomas from SEATTLE, WA
-
Difficulty Level:Really Easy
-
Total Repair Time:30 - 60 mins
-
Tools:Screw drivers
4 of 4 people
found this instruction helpful.
Was this instruction helpful to you?
Thank you for voting!
Dishwasher had a pool of water in it after using it.
Soak up the water in the dishwasher with an old towel. Removed the cover under the dishwasher. Found the pump and twisted it off anti clockwise. Replaced with the new pump. Run a quick cycle, to make sure it pumped out all the water. My wife has used it several times since without any issues.
Parts Used:
-
Patrick from HIGHLAND MLS, NY
-
Difficulty Level:Really Easy
-
Total Repair Time:Less than 15 mins
4 of 4 people
found this instruction helpful.
Was this instruction helpful to you?
Thank you for voting!
the soap dispenser door latch was broken
I removed the front of the dishwasher. Then removed the old dispenser assembly, and installed the new one. I don't have as many tools as I need here in our winter residence, so the job took a few more minutes than it would if I'd have had the correct tools.
Parts Used:

-
John from Sanibel, FL
-
Difficulty Level:Easy
-
Total Repair Time:30 - 60 mins
-
Tools:Pliers, Wrench set
4 of 5 people
found this instruction helpful.
Was this instruction helpful to you?
Thank you for voting!
Dishwasher leaked occasionally due to age and condition of old gasket
Repair was a "no brainer". Pulled out the old gasket, started the replacement of the new gasket in the lower right hand corner and worked all the way around the opening, then trimmed excess gasket of about 2" with a pair of scissors and I was done. Total time - less than 5 minutes.
Parts Used:
-
rick from sparta, NJ
-
Difficulty Level:Really Easy
-
Total Repair Time:Less than 15 mins
4 of 5 people
found this instruction helpful.
Was this instruction helpful to you?
Thank you for voting!
Start light was flashing
Thanks to everyone for posting their experiences on changing the heater element. The most difficult part of the repair was getting the dishwasher out of the cabinet. I didn't know that I should disconnect the water line underneath the sink and this would make the removal easier. Also, because the copper water line going to the dishwasher was kinked, I ended up changing it with a flexible steel braided line.....much easier to install.
Once the dishwasher was out of the cabinet, I turned it over and easily removed the clips that held the heater element in.
I would definetly recommend people doing this repair themselves, it will save you a lot of money!!!!!
Once the dishwasher was out of the cabinet, I turned it over and easily removed the clips that held the heater element in.
I would definetly recommend people doing this repair themselves, it will save you a lot of money!!!!!
Parts Used:

-
Aaron from Aurora, IL
-
Difficulty Level:Easy
-
Total Repair Time:1- 2 hours
-
Tools:Pliers, Screw drivers, Wrench (Adjustable)
4 of 5 people
found this instruction helpful.
Was this instruction helpful to you?
Thank you for voting!
Dispenser cover was broken
The repair went okay. The problem was that the dishwasher would not run after the installation of the dispenser. The door was taken apart 2-3 times. I told my husband (the repair man) that we should pull out the dishwasher so I could clean behind it. I asked him 4 or 5 times to pull out the dishwasrer. Never an answer. Mind you he is an electrician by trade now retired. For some reason while I was not looking he did pull the unit out after 2 hours of fussing with this electrical problem. Remember he is an electrican by trade. When he pulled the unit out "THE PLUG WAS OUT OF THE SOCKET". How funny!!!!!!!!!!!!!!!!!!!!!!!!!!
I could not stop laughing. I had to answer the phone at that time and my friend thought I was out of breath from running for the phone. I told her later it was from the PLUG OUT OF SOCKET TRICK. I still am laughing. The first thing an repair mann will ask you is if the unit is pluged in. I have two sons and one son-in-law that are electricans and will have many years of fun telling this story. It is good to laugh. I will be laughing for a long time.
I could not stop laughing. I had to answer the phone at that time and my friend thought I was out of breath from running for the phone. I told her later it was from the PLUG OUT OF SOCKET TRICK. I still am laughing. The first thing an repair mann will ask you is if the unit is pluged in. I have two sons and one son-in-law that are electricans and will have many years of fun telling this story. It is good to laugh. I will be laughing for a long time.
Parts Used:
-
Eleanor from Middlefield, OH
-
Difficulty Level:Really Easy
-
Total Repair Time:1- 2 hours
-
Tools:Nutdriver, Screw drivers, Socket set, Wrench (Adjustable)
9 of 20 people
found this instruction helpful.
Was this instruction helpful to you?
Thank you for voting!
no water reached top rack spinners
Removed DW following great instructions for our unit at: repairclinic.
Problem when removing actual pump as a thin metal screen fell out after. Cleaned it and tried to reinstall the screen. It took over an hour figuring out how the screen went back in as it was cut to fit a certain way and had to try it over and over blindly then try to get it to stay before putting in pump. Finally put DW on its face. It was almost two hours after starting that everything was done exactly as instructed.
Started washer. Water came in perfectly. After about two minutes when the washer arms would start there was a horrible grinding sound and we promptly turned it off. My wife gave up the fight and is washing dishes by hand. That was a $172.00 experience.
Problem when removing actual pump as a thin metal screen fell out after. Cleaned it and tried to reinstall the screen. It took over an hour figuring out how the screen went back in as it was cut to fit a certain way and had to try it over and over blindly then try to get it to stay before putting in pump. Finally put DW on its face. It was almost two hours after starting that everything was done exactly as instructed.
Started washer. Water came in perfectly. After about two minutes when the washer arms would start there was a horrible grinding sound and we promptly turned it off. My wife gave up the fight and is washing dishes by hand. That was a $172.00 experience.
Parts Used:
-
Kenneth from PAHRUMP, NV
-
Difficulty Level:Difficult
-
Total Repair Time:More than 2 hours
-
Tools:Pliers, Screw drivers, Socket set, Wrench (Adjustable), Wrench set
4 of 5 people
found this instruction helpful.
Was this instruction helpful to you?
Thank you for voting!