




















ACS7270AB Amana Range - Instructions
Keep searches simple. Use keywords, e.g. "leaking", "pump", "broken" or "fit".
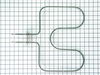
Baking element overheated and split into two parts.
First removed 2 screws holding in element housing at the back of the oven. Pulled element out and disconnected wire leads from the the element connection points. Reconnected leads from new element, pushed back into the back of oven and rescrewed into the oven housing. Done, very easy.
Parts Used:
-
Derek from Gilford, NH
-
Difficulty Level:Really Easy
-
Total Repair Time:15 - 30 mins
-
Tools:Screw drivers
0 of 3 people
found this instruction helpful.
Was this instruction helpful to you?
Thank you for voting!
I had a power serge and it burned the Plug at the termial block and melted a few wire.
After we got the part in the mail my husband put it on and shortened the wires and put new plugs on the ends of the wires and we had to get a new plug put it on and it was fixed.
Parts Used:

-
Robin from Vanderbilt, PA
-
Difficulty Level:Really Easy
-
Total Repair Time:15 - 30 mins
-
Tools:Socket set
Was this instruction helpful to you?
Thank you for voting!
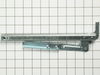
Oven door hinge broken
Discriptions provided by others in this section made it easy and there is little additional insight I can add. The part was delivered the next day. I don't reply to these requests for comments, as providing what I paid for is the expectation. But, this outfit did a good job.
Parts Used:
-
Sherry from Mountain Ranch, CA
-
Difficulty Level:Really Easy
-
Total Repair Time:30 - 60 mins
-
Tools:Screw drivers
Was this instruction helpful to you?
Thank you for voting!
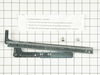
Door wouldnt shut evenly.
Ordered hinge, went to Sears bought some tools to finish manufacturing the hinge, tapped out the screw hole, installed the hinge.
Parts Used:
-
David from Westlake, OH
-
Difficulty Level:Difficult
-
Total Repair Time:1- 2 hours
-
Tools:Screw drivers
Was this instruction helpful to you?
Thank you for voting!
auto door lack stop working
turn the power off first, remove knobs, removed burners,disconnected wire from igniter,raise the top of the stove,re rmoved wire from the door lock removed two screws remove the door lock itself, then put all back on in same order as I remove. Main thing to remember is to writeyour colors of the wire down so you know where to replace them.
Parts Used:

-
connie from Tallahassee, FL
-
Difficulty Level:Really Easy
-
Total Repair Time:30 - 60 mins
-
Tools:Pliers, Screw drivers
Was this instruction helpful to you?
Thank you for voting!
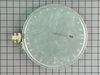
Inner element dead
Pulled range away from wall and unplugged it. Pulled smoothtop out a bit to clear retaining clips. Swung top up and unplugged the cable going to top. Removed top hinge so top could be removed. Put top upside down on a table to work on. Removed wires from bad burner and then removed screws holding the burner in place. Replaced bad burner with new one and reversed the previous steps. Range worked like new. PartSelect service was great, received the part in one day.
Parts Used:
-
John from Lancaster, PA
-
Difficulty Level:Easy
-
Total Repair Time:1- 2 hours
-
Tools:Screw drivers
Was this instruction helpful to you?
Thank you for voting!
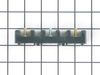
range installer broke a screw off & busted the plastic piece
-
Christina from West Des Moines, IA
-
Difficulty Level:Easy
-
Total Repair Time:30 - 60 mins
-
Tools:Pliers, Screw drivers
Was this instruction helpful to you?
Thank you for voting!
Oven heating element burnt out
-
Mark from Madison, WI
-
Difficulty Level:Really Easy
-
Total Repair Time:Less than 15 mins
-
Tools:Screw drivers
Was this instruction helpful to you?
Thank you for voting!
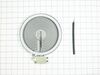
Burner Would,Nt Heat Up.
Removed top of stove replaced heating element ,piece of cake.
Parts Used:
-
david from cleveland, TX
-
Difficulty Level:Really Easy
-
Total Repair Time:15 - 30 mins
-
Tools:Screw drivers
Was this instruction helpful to you?
Thank you for voting!
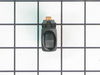
switch was broken
-
don from gardner, KS
-
Difficulty Level:Really Easy
-
Total Repair Time:Less than 15 mins
-
Tools:Nutdriver
Was this instruction helpful to you?
Thank you for voting!
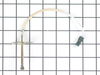
Food was undercooked using normal baking times
The key to this repair was making sure I typed in the correct model number and serial number so that I got the correct part. I had read here that a couple of folks had received the wrong temperature sensor (i.e. it had the male plug instead of the female plug). Unfortunately I had to call the local appliance repair guy as the plug could not be accessed from the interior of the oven. It was easy to remove the 2 screws that held it in place but I could not pull enough of the wire out to access the plug. The local repair guy pulled to oven out and removed the back in order to unpluy the bad sensor and plug in the new one. It was actually kind of nice that he came as he used a digital thermometer to cycle the oven through a couple of warm ups to see if it was actually working correctly. It worked fine and my wife was happy again. The $75 I spent on the repairman was darn well worth it. "Happy wife = happy life!"
Parts Used:
-
Ronald from Lowell, MI
-
Difficulty Level:Difficult
-
Total Repair Time:15 - 30 mins
-
Tools:Nutdriver
Was this instruction helpful to you?
Thank you for voting!
Stove Range Drawer Difficult to Open and Close
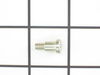
Insert one end of the railing into the slot in the back of the stove. Align the front end of the railing with the hole at the front of the stove. Align the roller with the hole. Secure the front end of the railing, roller ,and hole with the shoulder bolt using a 10mm wrench. Tighten just enough but don't over tighten.
Parts Used:
-
Hau from Burke, VA
-
Difficulty Level:Easy
-
Total Repair Time:15 - 30 mins
-
Tools:Nutdriver
Was this instruction helpful to you?
Thank you for voting!
circuit breaker blew
I went to the source of power on the stove and noticed one of the terminals had come loose from the terminal block and had shorted out against the cover of the terminal junction. After prying the loose terminal off cover I ordered new terminal block and received it the 2nd day. I removed the old terminal block and replaced the part in about 10 minutes..Thank you Parts Select for your easy to find diagrams and quick delivery.
Parts Used:
-
Richard from Sarasota, FL
-
Difficulty Level:Easy
-
Total Repair Time:Less than 15 mins
-
Tools:Pliers, Screw drivers
Was this instruction helpful to you?
Thank you for voting!
One of the burner wasn't light up.
The repair was very easy. It took me less than ten minutes. There were only five screws including two to hold heat element that I have to unscrew and transferred the old clip the screw onto new heat element.
Parts Used:
-
Sam from Fairport, NY
-
Difficulty Level:Really Easy
-
Total Repair Time:Less than 15 mins
-
Tools:Screw drivers
Was this instruction helpful to you?
Thank you for voting!
no heat from bottom element
1. waited unsuccessfully for heat (one hour) 2. realized the bottom element wasn't working (one minute) 3. found part on-line from pictures (five minutes) 4. ordered part (one minute) 5. received part (36 hours) 6. installed part (five minutes) 7. "THAT'S how you fix the oven" look to husband (1-2 years)
Parts Used:
-
Susan from Suffield, CT
-
Difficulty Level:Really Easy
-
Total Repair Time:Less than 15 mins
-
Tools:Screw drivers
Was this instruction helpful to you?
Thank you for voting!