




















AC110W Jenn-Air - Instructions
Keep searches simple. Use keywords, e.g. "leaking", "pump", "broken" or "fit".
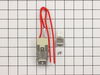
burner receptacle failed (stove over 30 years old)
Took out burner (pulls out) Took out one screw that holds recep. in, cut the two old wires and attached new wires with wire nuts included in the new package.
Parts Used:
-
BETH from COUNCE, TN
-
Difficulty Level:Really Easy
-
Total Repair Time:15 - 30 mins
-
Tools:Pliers, Screw drivers
1 person
found this instruction helpful.
Was this instruction helpful to you?
Thank you for voting!
burner cartridge terminal broke due to electrical shock. circuit shortage caused the problem.
dissembled the burner, remove the broken blocpk and bad spade.rewiered and assembled the burner.
Parts Used:

-
Ge from Solon, OH
-
Difficulty Level:Really Easy
-
Total Repair Time:Less than 15 mins
-
Tools:Nutdriver, Screw drivers, Socket set
1 person
found this instruction helpful.
Was this instruction helpful to you?
Thank you for voting!
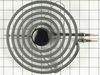
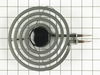
Replacement of elements
Simply unplugged the old elements and inserted the new ones.
Parts Used:
-
Starla from Tomball, TX
-
Difficulty Level:Really Easy
-
Total Repair Time:Less than 15 mins
3 of 7 people
found this instruction helpful.
Was this instruction helpful to you?
Thank you for voting!
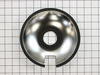
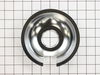
old part lasted more than 20 yrs so needed to replace
-
Anjali from TALLAHASSEE, FL
-
Difficulty Level:Very Easy
-
Total Repair Time:Less than 15 mins
1 person
found this instruction helpful.
Was this instruction helpful to you?
Thank you for voting!
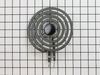
Burners needed replacing
Pulled out the old burners and put in the new ones.
Parts Used:
-
Alene from INDIANAPOLIS, IN
-
Difficulty Level:Very Easy
-
Total Repair Time:Less than 15 mins
1 of 2 people
found this instruction helpful.
Was this instruction helpful to you?
Thank you for voting!
burned out stove eye, 6"
remove burned out eye, replaced with new eye.new eye does not fit exactally correct onto splash pan as point on end of steel " rod " not pointed enough to slip into mate on splash pan
Parts Used:
-
Robert from Birmingham, AL
-
Difficulty Level:Easy
-
Total Repair Time:15 - 30 mins
1 of 2 people
found this instruction helpful.
Was this instruction helpful to you?
Thank you for voting!
Drip pans were a mess
-
Chhristopher from Houston, TX
-
Difficulty Level:Really Easy
-
Total Repair Time:Less than 15 mins
1 of 2 people
found this instruction helpful.
Was this instruction helpful to you?
Thank you for voting!
The radiant ring element had broken
-
Martin from Alexandria, VA
-
Difficulty Level:Really Easy
-
Total Repair Time:Less than 15 mins
-
Tools:Screw drivers
1 of 2 people
found this instruction helpful.
Was this instruction helpful to you?
Thank you for voting!
stove top burner would not heat
new element plugged into burner connection- an easy fix
Parts Used:
-
Marjorie from Indianapolis, IN
-
Difficulty Level:Really Easy
-
Total Repair Time:Less than 15 mins
1 of 2 people
found this instruction helpful.
Was this instruction helpful to you?
Thank you for voting!
My electric range burner was not heating.
All I had to do was remove the old burner and push the new burner into place. It couldn't have been easier.
Parts Used:
-
Joyce from Oceanside, CA
-
Difficulty Level:Really Easy
-
Total Repair Time:Less than 15 mins
1 of 2 people
found this instruction helpful.
Was this instruction helpful to you?
Thank you for voting!
Burned out burner
Pulled out the old burner and plugged in the new!
Parts Used:
-
Esther from Alexandria, VA
-
Difficulty Level:Really Easy
-
Total Repair Time:Less than 15 mins
1 of 2 people
found this instruction helpful.
Was this instruction helpful to you?
Thank you for voting!
Drip pans were in need of replacement
No brain surgery required. Removed electric burner, put in new drip pans. Voila! Good for many more years of service looking like new.
Parts Used:
-
JOANNE from MONKEY ISLAND, OK
-
Difficulty Level:Really Easy
-
Total Repair Time:Less than 15 mins
1 of 2 people
found this instruction helpful.
Was this instruction helpful to you?
Thank you for voting!
center piece of the heating element broke off
so easy, just ordered the part, the part came and inserted the element into the stovetop
Parts Used:
-
Elaine from Atascadero, CA
-
Difficulty Level:Really Easy
-
Total Repair Time:Less than 15 mins
1 of 2 people
found this instruction helpful.
Was this instruction helpful to you?
Thank you for voting!
8 inch element not heating in cooktop
I removed the old element. I then plugged the new element in place. Simple repair, no tools required. Turned the cooktop element on to test for proper functioning. It heated properly. Repair completed.
Ordering the part was easy and it arrived within 2 days. Very happy with Parts Select service.
Ordering the part was easy and it arrived within 2 days. Very happy with Parts Select service.
Parts Used:
-
LouAnn from Maquoketa, IA
-
Difficulty Level:Really Easy
-
Total Repair Time:Less than 15 mins
1 of 2 people
found this instruction helpful.
Was this instruction helpful to you?
Thank you for voting!
burner receptacle was broken
The repairs were very simple we just disconnected one screw then removed the old one and replace with new one. The left side took a little longer, because of the 8 screws we needed to remove to take the back panel off. But once we had it taken off the replacement was a snap. Nothing to it.
Parts Used:
-
Molly Grace from Victoria, TX
-
Difficulty Level:Really Easy
-
Total Repair Time:15 - 30 mins
-
Tools:Pliers, Screw drivers
1 of 2 people
found this instruction helpful.
Was this instruction helpful to you?
Thank you for voting!