




















91193592990 Kenmore Range - Instructions
Keep searches simple. Use keywords, e.g. "leaking", "pump", "broken" or "fit".
oven continued to get F2, F3 and F5 error messages when ovewn got hot
This repair was quite a bit more difficult then what had been described on the web site. First off, I have a double wall oven that is built in. Sliding it out of the cabinet was difficult and because oven was hard wired, I had to disconnect the actual wiring from the oven back. . Positioning the oven and allowing for it to rest on a support bench was the most difficult part The oven is heavy. Eventually, removing the back and top panels of the oven revealed the sensor connection. I was then able to feed it through the oven and reconnect all the wiring harnesses.. Getting the oven back in the cabinet was equally a challenge. But it did seem to fix the problem with over heating.
Parts Used:
-
Ralph from Redding, CA
-
Difficulty Level:Difficult
-
Total Repair Time:1- 2 hours
-
Tools:Nutdriver, Screw drivers, Socket set
Was this instruction helpful to you?
Thank you for voting!
Broiler unit burned out!
For someone who does not do this often, the directiions walked us through it well. Saved big service call. I helped him hold the unit in place and he was able to connect the connections, and it works! But it was awkward to get to.
Parts Used:
-
mary from sunbury, OH
-
Difficulty Level:A Bit Difficult
-
Total Repair Time:30 - 60 mins
-
Tools:Screw drivers, Socket set
Was this instruction helpful to you?
Thank you for voting!
Needed neighbor wrench didn't have the type needed
Due to my disability, 2 neighbors came over with their tools. It took both of them to take oven door apart to install the new glass. All went well.
Parts Used:
-
Rachel from Goldsboro, NC
-
Difficulty Level:Easy
-
Total Repair Time:30 - 60 mins
Was this instruction helpful to you?
Thank you for voting!
Burner was always on high when on.
Disconnected the power. Removed hex head screws from top and lower rear panel. I think there were 8 all together. Pull the knob of the burner control, removed two screws that held the switch in place. Moved the wires one at a time to the new switch, re-assembled. Burner worked properly. Very easy to find the right part from this web-site, and the instructions from others like this were helpful. Easy fix!
Parts Used:
-
David from Jericho, VT
-
Difficulty Level:Easy
-
Total Repair Time:Less than 15 mins
-
Tools:Nutdriver, Screw drivers
Was this instruction helpful to you?
Thank you for voting!
Burner light would not shut off
Checked each burner switch by disconnecting the light indicator wire. Located the switch, replaced the switch and the indicator light operated as it should.
Parts Used:
-
Curt from Maple Grove, MN
-
Difficulty Level:Really Easy
-
Total Repair Time:Less than 15 mins
-
Tools:Nutdriver, Screw drivers
Was this instruction helpful to you?
Thank you for voting!
broil element wasn't heating
-
Kathryn from Cope, SC
-
Difficulty Level:Really Easy
-
Total Repair Time:15 - 30 mins
-
Tools:Screw drivers
Was this instruction helpful to you?
Thank you for voting!
Inner glass inside oven door cracked
Used screwdriver to open door and Allen wrench to remove and replace glass.
Parts Used:
-
Amy N. from Arroyo Grande, CA
-
Difficulty Level:Easy
-
Total Repair Time:15 - 30 mins
-
Tools:Screw drivers, Wrench set
Was this instruction helpful to you?
Thank you for voting!
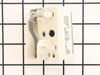
Replacment of burner control switches
I watched your video on the subject and followed it exactly. It explained everything I needed to know. The hardest part was CLEANING under the stove once I pulled it out from the wall!
Parts Used:
-
Judith from Keezletown, VA
-
Difficulty Level:Really Easy
-
Total Repair Time:15 - 30 mins
-
Tools:Nutdriver, Pliers, Screw drivers
Was this instruction helpful to you?
Thank you for voting!
The broiler elemet had burned through
First I unplugged the range. Then I removed the hex head screws, disconnected the two flag connectors and removed the old element. Then I reversed the process with the new element. I plugged the range back in and set the control to broil. It works like a charm!
Parts Used:
-
Cyndi from Beaverton, OR
-
Difficulty Level:Really Easy
-
Total Repair Time:15 - 30 mins
-
Tools:Nutdriver
Was this instruction helpful to you?
Thank you for voting!
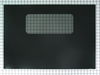
Broken Oven Glass
Removed two screws inside the oven door using hex key. Then I gained access to 4 screws that allowed me to remove the oven door handle assembly. I place the oven door glass in the tracks and replaced the handle assemby and reinstalled the two hex screws.
Parts Used:
-
Mike from Phoenix, AZ
-
Difficulty Level:Really Easy
-
Total Repair Time:15 - 30 mins
-
Tools:Socket set
Was this instruction helpful to you?
Thank you for voting!
Broiler unit in oven quit working.
Removed old broiler unit and installed new broiler unit. Very easy. We ordered the part on Monday over the internet and got it on Wednesday. Such speedy delivery and way in time for Easter. Thank you. Very impressed. I am keeping this site for any future repairs!
Parts Used:
-
Carol from Bolckow, MO
-
Difficulty Level:Really Easy
-
Total Repair Time:15 - 30 mins
-
Tools:Screw drivers
Was this instruction helpful to you?
Thank you for voting!
Replacement of Broiler Element
-Pull the oven away from the wall and unplug it. -Remove the sheet metal panel on the middle of the back of the oven exposing the electrical connections. -Pull off the wire connections from the broiler element and identify which one goes to which side. Pull apart the connector for the thermostat -Go inside the oven and remove the 2 screws holding the element to the back wall. -Remove the 2 screws holding the element to the top of the oven. -Pull the element out and remove the thermostat, and attach it to the new element bracket. Reinstall everything in the reverse order.
Parts Used:
-
Jamesd from Penfield, NY
-
Difficulty Level:Really Easy
-
Total Repair Time:Less than 15 mins
-
Tools:Nutdriver
Was this instruction helpful to you?
Thank you for voting!
Burner Switch Went Out
Turn off power at main electric panel/ move stove away from wall and unplug cord from outlet. Take knob off the front take two screws off the panel, take back panel off and remove the used switch and take and replace the wiring to the new one , one at a time wire for wire. Then put back tighter in reverse of the way you took it off. Plug in cord and move stove back to the wall. Easy
Parts Used:
-
Jim from Prosser, WA
-
Difficulty Level:Really Easy
-
Total Repair Time:Less than 15 mins
-
Tools:Nutdriver, Pliers
Was this instruction helpful to you?
Thank you for voting!
surface burner would not work
watched it on parts select this is a real fast and simple install took longer to pull the range out of its position well started by shuting off the power then double checked that the range was deenergized removed the knob then the 2 screws then on the rear of the range removed the back panel about 8 screws used a nut driver then removed the old switch removed each wire one by one and pluged each wire into the new switch just as they were on the old switch the new switch was exactly the same so every thing matched up perfect installed the screws to the front which hold the swich in place then the back cover turned on the power and tested the switch every thing working ok done shut off power slid range back into its place turned power back on everything still ok
Parts Used:
-
julio from hobbs, NM
-
Difficulty Level:Really Easy
-
Total Repair Time:Less than 15 mins
-
Tools:Nutdriver
Was this instruction helpful to you?
Thank you for voting!
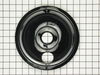
Replaced All Burner Receptacles After One Failed And Also Replaced Ball Burner Bowls
This installation was for a replacement for one of the burner bowls on the original order. Replacement bowl fits proiperly.
Parts Used:
-
ROBERT from MECHANICSBURG, PA
-
Difficulty Level:Really Easy
-
Total Repair Time:Less than 15 mins
Was this instruction helpful to you?
Thank you for voting!