




















91193592990 Kenmore Range - Instructions
Keep searches simple. Use keywords, e.g. "leaking", "pump", "broken" or "fit".
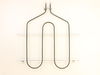
element burned out
couldn't get exact fit--out of production. mounting bracket at back of range for new element too small. took bracket off old element. cut down bracket on new element with tin snips, drilled holes thru it and old bracket and screwed together. at this point the new element was to long & touched oven door. removed spacers that came with new element (used old support to attached to roof of oven) and pried elements apart (which made element wider & shorter). working good.
Parts Used:
-
raleigh from gresham, OR
-
Difficulty Level:A Bit Difficult
-
Total Repair Time:30 - 60 mins
-
Tools:Nutdriver, Pliers, Screw drivers
2 of 2 people
found this instruction helpful.
Was this instruction helpful to you?
Thank you for voting!
Burned out broiler element.
Pulled the stove out from between the cabinets, used a blade screwdriver to pop the oven door retainers down and lifted the oven door out, removed the racks. used a 1/4'' nut driver to remove the 5 screws holding the broiler in place. From the time I unplugged the stove from the outlet until I plugged the stove back in was 15 min. I would suggest wearing gloves because the metal frame around the burner element has sharp edges.
Parts Used:
-
Jack from YORK, PA
-
Difficulty Level:Really Easy
-
Total Repair Time:15 - 30 mins
-
Tools:Nutdriver, Pliers, Screw drivers
2 of 2 people
found this instruction helpful.
Was this instruction helpful to you?
Thank you for voting!
Broken element
Removed the old element and burner bowls and replaced them with the new ones! No screws, no tools needed. PartSelect's prices are cheaper than any other place on the Internet and they shipped me genuine replacement parts, not some 3rd party no-name brand. Also, shipping took less than 2 days! I am thoroughly impressed.
Parts Used:
-
Matt from Olympia, WA
-
Difficulty Level:Really Easy
-
Total Repair Time:Less than 15 mins
3 of 5 people
found this instruction helpful.
Was this instruction helpful to you?
Thank you for voting!
Defective switch
Replaced element control switches
Parts Used:
-
Mary from EDENTON, NC
-
Difficulty Level:Easy
-
Total Repair Time:15 - 30 mins
-
Tools:Screw drivers, Socket set
2 of 2 people
found this instruction helpful.
Was this instruction helpful to you?
Thank you for voting!
Electrode burnt off on left side
First I removed the five screws that hold the
element in place and pulled the element out
about 3 inches and disconnected the two wires
and hooked a piece of wire on the leads to make sure they did not fall behind the cabinet.
Then I connected the new element to the lead
wires and removed the piece of wire and secured the new element in place with the mounting screws. Took about 25 minutes to remove and replace.
element in place and pulled the element out
about 3 inches and disconnected the two wires
and hooked a piece of wire on the leads to make sure they did not fall behind the cabinet.
Then I connected the new element to the lead
wires and removed the piece of wire and secured the new element in place with the mounting screws. Took about 25 minutes to remove and replace.
Parts Used:
-
Kenneth from Wisconsin Rapids, WI
-
Difficulty Level:Easy
-
Total Repair Time:15 - 30 mins
-
Tools:Nutdriver
2 of 2 people
found this instruction helpful.
Was this instruction helpful to you?
Thank you for voting!
Surface burner stopped working & light indicator remained on
It took my son very little time to install control switch. Using a screw driver he removed the back panel directly behind burner units & replaced the control switch. Very easy.
Parts Used:
-
Cynthia from BALDWINSVILLE, NY
-
Difficulty Level:Very Easy
-
Total Repair Time:15 - 30 mins
-
Tools:Screw drivers
2 of 2 people
found this instruction helpful.
Was this instruction helpful to you?
Thank you for voting!
just needed new GE burner bowls
Only instructions I have has nothing to do with installation. But I'd like to suggest that you find a better shipping method. Placed my order on Feb. 7, received message later same day that it'd shipped. I didn't receive it until Feb. 16th -- very poor delivery service.
Parts Used:
-
Jacqueline from E WENATCHEE, WA
-
Difficulty Level:Very Easy
-
Total Repair Time:Less than 15 mins
2 of 2 people
found this instruction helpful.
Was this instruction helpful to you?
Thank you for voting!
front lift burner not working and surface light on with everything off
unplugged the range removed 4 screws from back top cover then took the knob off controller removed 2 screws from behind the knob removed 1 wirer at a time and placed it on the new controller in same order the wires came off put everything back to gather did not fix the problem .
Parts Used:
-
kevin from GAYLORD, MI
-
Difficulty Level:Really Easy
-
Total Repair Time:15 - 30 mins
-
Tools:Nutdriver, Screw drivers
2 of 2 people
found this instruction helpful.
Was this instruction helpful to you?
Thank you for voting!
Burner spontaneously cycled without knob activation
First I cut the circuit at the breaker, and then pulled the range from wall to access the access panel. This top panel was held with 4 screws and removable with a standard phillips head screwdriver.
I then removed the 5 wire-crimped fasteners from the defective surface burner switch. (I first labeled these wires to ensure correct placement to the new switch). There were an additional two screws behind the corresponding knob that needed to be removed in order to completely remove the old switch.
The new switch was installed in reverse order to the steps indicated above (two screws behind knob, 5 wire-crimped fasteners, 4 screws to panel). Range was pushed back into position and breaker turned on.
I then removed the 5 wire-crimped fasteners from the defective surface burner switch. (I first labeled these wires to ensure correct placement to the new switch). There were an additional two screws behind the corresponding knob that needed to be removed in order to completely remove the old switch.
The new switch was installed in reverse order to the steps indicated above (two screws behind knob, 5 wire-crimped fasteners, 4 screws to panel). Range was pushed back into position and breaker turned on.
Parts Used:
-
Anil from Milpitas, CA
-
Difficulty Level:Easy
-
Total Repair Time:Less than 15 mins
-
Tools:Screw drivers
2 of 3 people
found this instruction helpful.
Was this instruction helpful to you?
Thank you for voting!
The broiler had shorted out.
I had my husband fix it! Very easy for me.
It didn't take him long. The most difficult part was getting to the screws. He had to practically climb into the oven.
The parts were shipped promptly and the whole process was relatively painless!
It didn't take him long. The most difficult part was getting to the screws. He had to practically climb into the oven.
The parts were shipped promptly and the whole process was relatively painless!
Parts Used:
-
Marjorie from Salem, IN
-
Difficulty Level:Really Easy
-
Total Repair Time:15 - 30 mins
-
Tools:Socket set
2 of 3 people
found this instruction helpful.
Was this instruction helpful to you?
Thank you for voting!
Broil (top) element burned out.
Unplugged the power supply. Took off the cover on the back of the unit. Unplugged the wires to the broiler element. Removed the bolts(4) holding the element inside the oven. Removed the temprature sensor from element and took it out. Put it all back the way it came out. Worked great. Took 25 minutes.
Parts Used:
-
Dee from McKinney, TX
-
Difficulty Level:Easy
-
Total Repair Time:15 - 30 mins
-
Tools:Nutdriver
2 of 3 people
found this instruction helpful.
Was this instruction helpful to you?
Thank you for voting!
Broiler element was burned out
The repair was so simple. First i killed the circuit breaker then removed five screws upluged element from contacts and removed the element plugged new element into the contacts popped the screws back and was done.
Parts Used:
-
Charles from Washingtin, DC
-
Difficulty Level:Really Easy
-
Total Repair Time:15 - 30 mins
-
Tools:Socket set
2 of 3 people
found this instruction helpful.
Was this instruction helpful to you?
Thank you for voting!
Broiler element burned out in the oven.
The only hard thing was contorting my old beat up body and joints long enuff to reconnect the 2 wires and oven heat sensor and put in 6 screws with a 1/4" nut driver. I did remover the oven door and that made it much easier for me.
Parts Used:
-
Emmett from Buffalo, TX
-
Difficulty Level:Really Easy
-
Total Repair Time:30 - 60 mins
-
Tools:Nutdriver, Screw drivers
2 of 3 people
found this instruction helpful.
Was this instruction helpful to you?
Thank you for voting!
control switch had stopped working, burner wouldn't work properly
took out a couple of screws and replaced with new switch, plugged in switch wires. very easy
Parts Used:
-
Ruth from JACKSON, MO
-
Difficulty Level:Really Easy
-
Total Repair Time:Less than 15 mins
-
Tools:Screw drivers
1 person
found this instruction helpful.
Was this instruction helpful to you?
Thank you for voting!
Broiler coil burnt out
It was just a matter of removing 5 screws that attached the broiler coil to oven top. Then carefully removing coil so as not to cause wires attached to fall into the back of the oven. Needed an extra pair of hands to hold coil while i guided the wires back thru the opening. All that was left to do was to secure the broiler coil to oven. All completed in less then 30 mins. A lot easier then originally thought. And, a lot cheaper then getting a repair person to do the job.
Parts Used:
-
Howard from LEXINGTON, KY
-
Difficulty Level:Easy
-
Total Repair Time:15 - 30 mins
-
Tools:Screw drivers
2 of 4 people
found this instruction helpful.
Was this instruction helpful to you?
Thank you for voting!