




















91148489992 Kenmore Wall Oven - Instructions
Keep searches simple. Use keywords, e.g. "leaking", "pump", "broken" or "fit".
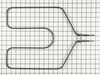
a segment of the broil element took on fire
-
maria from great neck, NY
-
Difficulty Level:Really Easy
-
Total Repair Time:15 - 30 mins
-
Tools:Nutdriver, Pliers, Screw drivers
2 of 4 people
found this instruction helpful.
Was this instruction helpful to you?
Thank you for voting!
The light socket cup could no longer hold the bracket that holds the light cover in place.
I watched a video of a similar model to familiarize myself with the required steps needed. I opened the back and disconnected the power cord and ground wires connected to the removable socket I then removed the lightbulb and removable socket from the oven interior side. I then removed the defective light socket cup and replaced it with the part I purchased. After replacing the removable socket and lightbulb, the bracket holding the light cover functioned perfectly with the new light socket cup. Final steps were to reconnect the power and ground wires to the removable socket. I then replaced the back cover over the light socket cup area. One word of advise. Be very careful when removing and reconnecting the cables to the removable light socket.
Parts Used:

-
Roger from ALPENA, MI
-
Difficulty Level:Really Easy
-
Total Repair Time:30 - 60 mins
-
Tools:Socket set
1 person
found this instruction helpful.
Was this instruction helpful to you?
Thank you for voting!
The broiler element burned out in the oven.
As with all of my orders from Part Select the part was as correct and arrived in a timely manner. The installation was easy. Remove two screws, unplug the old element from the wires, install wires on new element and reinstall the element. Restored power and everything worked fine.
Thanks,
Ken Fuelleman
Thanks,
Ken Fuelleman
Parts Used:
-
Ken from Mayfield, NY
-
Difficulty Level:Really Easy
-
Total Repair Time:Less than 15 mins
-
Tools:Screw drivers
1 person
found this instruction helpful.
Was this instruction helpful to you?
Thank you for voting!
I researched the part number from partselect.com, ordered it and in less than a week (even in all the snow!) I had my part. Fifteen minutes later, my wife was broiling dinner! I repaired my broiler element without waiting on a repairman and for less than $50.00!
First I removed the two screws that hold the element in place. I then pulled the element out about 3 inches and disconnected the two wires. Replaced the defective element with the new - all inless than fifteen minutes!
Parts Used:
-
Elwood from Allen, MD
-
Difficulty Level:Really Easy
-
Total Repair Time:Less than 15 mins
-
Tools:Screw drivers
1 of 2 people
found this instruction helpful.
Was this instruction helpful to you?
Thank you for voting!
Hanging broiler
-
Doris from Aberdeen, NJ
-
Difficulty Level:Really Easy
-
Total Repair Time:Less than 15 mins
-
Tools:Pliers
2 of 5 people
found this instruction helpful.
Was this instruction helpful to you?
Thank you for voting!
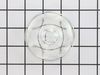
dropped & broke the oven light bulb cover
-
joseph from san jose, CA
-
Difficulty Level:Really Easy
-
Total Repair Time:Less than 15 mins
1 of 2 people
found this instruction helpful.
Was this instruction helpful to you?
Thank you for voting!
Upper over broil unit burned out
This part is a plug-in unit - two screws off; unplug the old unit; plug in the new unit; two screws on. Very simple.
Parts Used:
-
tim from fort scott, KS
-
Difficulty Level:Really Easy
-
Total Repair Time:15 - 30 mins
-
Tools:Wrench set
1 of 2 people
found this instruction helpful.
Was this instruction helpful to you?
Thank you for voting!
Broiler element blew out.
- removed the old element
- looked for part number, was none
- could not find direct replacement listed
- compared to dimensions on drawing
- ordered part
- discovered that the mounting plate on new element was too small, holes did not line up, did not cover opening in back of oven.
- sawed off mounting plate on new element
- removed mounting plate from old element
-drilled out holes on old mounting plate to accept new element
- attached the modified element
- Everything works fine.
- looked for part number, was none
- could not find direct replacement listed
- compared to dimensions on drawing
- ordered part
- discovered that the mounting plate on new element was too small, holes did not line up, did not cover opening in back of oven.
- sawed off mounting plate on new element
- removed mounting plate from old element
-drilled out holes on old mounting plate to accept new element
- attached the modified element
- Everything works fine.
Parts Used:
-
Gilbert from Clarkston, MI
-
Difficulty Level:Difficult
-
Total Repair Time:1- 2 hours
-
Tools:Nutdriver, Pliers, Screw drivers, Socket set, Wrench set
2 of 5 people
found this instruction helpful.
Was this instruction helpful to you?
Thank you for voting!
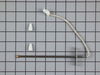
Bad sensor
-
John from CASPER, WY
-
Difficulty Level:Easy
-
Total Repair Time:30 - 60 mins
-
Tools:Screw drivers, Socket set
1 of 2 people
found this instruction helpful.
Was this instruction helpful to you?
Thank you for voting!
Just follow the enclosed instructions
-
HAROLD from Tucson, AZ
-
Difficulty Level:Really Easy
-
Total Repair Time:30 - 60 mins
-
Tools:Nutdriver
1 of 2 people
found this instruction helpful.
Was this instruction helpful to you?
Thank you for voting!
Element burned out.
I spent half an hour finding my driver set. It took about 25 minutes to turn the power off, remove the racks and element and replace the new elements.
Parts Used:
-
Harden from Lynchburg, VA
-
Difficulty Level:Easy
-
Total Repair Time:15 - 30 mins
-
Tools:Nutdriver, Pliers
1 of 3 people
found this instruction helpful.
Was this instruction helpful to you?
Thank you for voting!
Burned out broil element
.Received the part promptly. Installed it in about 30 minutes. With appliance servicemen, I figure I saved about $200.00 doing it myself. Thanks
Parts Used:
-
Beverly from Baton Rouge, LA
-
Difficulty Level:Really Easy
-
Total Repair Time:15 - 30 mins
-
Tools:Socket set
0 of 1 people
found this instruction helpful.
Was this instruction helpful to you?
Thank you for voting!
Burned out broiler element
After getting the part from PartSelect, which only took 2 days to get here and was in great condition and matched perfectly. I went to the customers house, shut off the power to the oven, removed the 2 screws holding in the element, pulled the element out and removed the leads. Took the new element and put the leads on the contacts, pushed the wires and leads back into the hole and screwed in the 2 screws. Went outside and turned the breaker back on, went and turned the oven on to broil, waited a few seconds and it heated up perfectly, and the customer was real happy. She said it was great that she could bake again. Thank you guys for sending the right part in a timely manner and good condition, it keeps my customers happy and keeps me in business. Joe
Parts Used:
-
joseph from Stockton, CA
-
Difficulty Level:Really Easy
-
Total Repair Time:Less than 15 mins
-
Tools:Socket set
Was this instruction helpful to you?
Thank you for voting!
Oven broiler stopped working. Had to replace the broiler element.
Just like the other responses described with two additional steps: 1) with a convection oven you have to remove the fan cover. It has four screws, the same size as the broiler element screws....but, get a piece of stiff cardboard the same width as the oven; put it all the way back, under the fan cover. There are holes in the oven bottom and your screws really want to roll into those holes and disappear; the cardboard will cover the holes. 2) as soon as you disconnect the element from the electrical wires....put a twist tie or other clamp on each wire as they want to fall back in behind the oven and you'll end up having to remove the build oven to get at the wires. The twist tie should keep them from falling out of reach.
Parts Used:
-
Don from Los Altos, CA
-
Difficulty Level:Easy
-
Total Repair Time:15 - 30 mins
-
Tools:Nutdriver, Screw drivers, Socket set
Was this instruction helpful to you?
Thank you for voting!
Broil element burned out, literally!
Turned off power to oven. Lifted off the oven door. Removed four 1/4 " bolts from outside of fan housing. Removed two 1/4" bolts holding element. Removed element from three clips holding it to upper oven surface. Unplugged two element wires. Reassembly was the reverse. I am an auto mechanic by trade and this was a fairly simple process.
Parts Used:
-
Judith from Franklin, NC
-
Difficulty Level:Easy
-
Total Repair Time:30 - 60 mins
-
Tools:Pliers, Screw drivers, Socket set
Was this instruction helpful to you?
Thank you for voting!