




















91146566994 Kenmore Range - Instructions
Keep searches simple. Use keywords, e.g. "leaking", "pump", "broken" or "fit".
F2 error code when oven was set at a higher temperature.
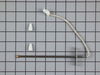
I pretty much followed the youtube video posted under the part that I needed. Turned off electricity to that area of the house. Unplugged stove. Took out the old sensor, pushed new sensor cord through the back hole. I did put a small amount of tape,so I could pull it through from the back better. It was impossible to get the clip disconnected in the back and the new clip didn't match up correctly anyway. Ended up having to cut the wires and strip them. I twisted them together and put on the ceramic wire nuts on. Reversed ever thing I did and F3 appeared. Looked that code up on internet. It was from an open or shorted oven. Suggested I check the connections. Pulled stove out again, unscrewed caps on wires and noticed the sensor's wire had another cloth type coating on it. I gentle cut that off, twisted and capped wires again. Plugged in oven, turn on electricity, and tried out stove. Everything is working just fine. Everything took a little longer because this was first time doing this type of repair.
Parts Used:
-
Rachele from OCEANSIDE, CA
-
Difficulty Level:A Bit Difficult
-
Total Repair Time:30 - 60 mins
-
Tools:Socket set
3 of 4 people
found this instruction helpful.
Was this instruction helpful to you?
Thank you for voting!
Alarm would sound whenever oven turned on - with an error message code
Watched the video on the PartSelect site. Could not have been an easier repair and I saved the cost of a service call - probably saved at least $100 - $150 in service call and I can only guess what the labor cost would have been. Will use this business again for other appliance repairs on my older stove, washer, etc. By the way - the official Kenmore site said this part was no longer made and unavailable --- Thank you PartSelect for having the part and saving me the cost of buying a new stove!
Parts Used:
-
Carolyn from MASON, MI
-
Difficulty Level:Really Easy
-
Total Repair Time:30 - 60 mins
-
Tools:Screw drivers
2 of 2 people
found this instruction helpful.
Was this instruction helpful to you?
Thank you for voting!
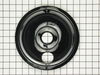
just needed new GE burner bowls
Only instructions I have has nothing to do with installation. But I'd like to suggest that you find a better shipping method. Placed my order on Feb. 7, received message later same day that it'd shipped. I didn't receive it until Feb. 16th -- very poor delivery service.
Parts Used:
-
Jacqueline from E WENATCHEE, WA
-
Difficulty Level:Very Easy
-
Total Repair Time:Less than 15 mins
2 of 2 people
found this instruction helpful.
Was this instruction helpful to you?
Thank you for voting!
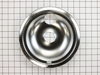
Needed new drip pans
-
Patricia from GORDONVILLE, TX
-
Difficulty Level:Really Easy
-
Total Repair Time:Less than 15 mins
2 of 2 people
found this instruction helpful.
Was this instruction helpful to you?
Thank you for voting!
Broken element
Removed the old element and burner bowls and replaced them with the new ones! No screws, no tools needed. PartSelect's prices are cheaper than any other place on the Internet and they shipped me genuine replacement parts, not some 3rd party no-name brand. Also, shipping took less than 2 days! I am thoroughly impressed.
Parts Used:
-
Matt from Olympia, WA
-
Difficulty Level:Really Easy
-
Total Repair Time:Less than 15 mins
3 of 5 people
found this instruction helpful.
Was this instruction helpful to you?
Thank you for voting!
broken light cover
-
Francis from LAKE ELSINORE, CA
-
Difficulty Level:Very Easy
-
Total Repair Time:Less than 15 mins
2 of 2 people
found this instruction helpful.
Was this instruction helpful to you?
Thank you for voting!
oven stopped heating and element appeared broken
The customer service rep was brilliant in finding the
right part number! It was sent the following day
(with email to let me know) The part itself was just
exactly like the old one. I simply turned off the power,
removed the 2 metal screws and unplugged the
broken element. The new one fit properly and works
like a million dollars. For about $50, you made me
look like a hero in my own house! Thjank you
right part number! It was sent the following day
(with email to let me know) The part itself was just
exactly like the old one. I simply turned off the power,
removed the 2 metal screws and unplugged the
broken element. The new one fit properly and works
like a million dollars. For about $50, you made me
look like a hero in my own house! Thjank you
Parts Used:
-
Henry J from South Haven, MI
-
Difficulty Level:Really Easy
-
Total Repair Time:15 - 30 mins
-
Tools:Socket set
2 of 3 people
found this instruction helpful.
Was this instruction helpful to you?
Thank you for voting!
bake element burnt into
-
gary from assumption, IL
-
Difficulty Level:Easy
-
Total Repair Time:15 - 30 mins
-
Tools:Nutdriver
2 of 3 people
found this instruction helpful.
Was this instruction helpful to you?
Thank you for voting!
Old Burner Chrome Ruined
-
RALPH from TROY, NY
-
Difficulty Level:Really Easy
-
Total Repair Time:Less than 15 mins
3 of 6 people
found this instruction helpful.
Was this instruction helpful to you?
Thank you for voting!
Intermittent heat then no heat on oven element
With multimeter checked resistance of oven sensor. Specs called for 1100 ohms. It was off by 27 ohms. The sensor from Part Select had exact wire connection as original. Then just matter of undoing old and reconnecting with new one.
One unsatisfactory event. I asked Part Select why my clock did not work or light up(timer works ok) . Answer was: sorry we have no time to help you. That soured the otherwise happy experience.
One unsatisfactory event. I asked Part Select why my clock did not work or light up(timer works ok) . Answer was: sorry we have no time to help you. That soured the otherwise happy experience.
Parts Used:
-
Bruce from AKRON, PA
-
Difficulty Level:Really Easy
-
Total Repair Time:30 - 60 mins
-
Tools:Nutdriver, Screw drivers
2 of 3 people
found this instruction helpful.
Was this instruction helpful to you?
Thank you for voting!
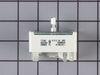
Burner control was erratic. Sometimes it worked, sometimes it didn't.
First pull knob off switch. You may need a small screwdriver to gently start it. I then removed two screws, one in each end of control panel. Then rolled the panel up and out, as it is kind of hinged in the back. Removed two screws from switch front,layed it to the side and installed new switch. Removed wires (there were 5) one at a time with needle nose pliers, and placed on new switch. Replaced panel screws and was finished. Easy fix, quick delivery of part, I have used Partselect in the past and will continue.
Parts Used:
-
Charles from Clarksville, OH
-
Difficulty Level:Really Easy
-
Total Repair Time:Less than 15 mins
-
Tools:Pliers, Screw drivers
2 of 3 people
found this instruction helpful.
Was this instruction helpful to you?
Thank you for voting!
bake element was fried
-
William from MARTIN, GA
-
Difficulty Level:Very Easy
-
Total Repair Time:Less than 15 mins
-
Tools:Nutdriver, Pliers
1 person
found this instruction helpful.
Was this instruction helpful to you?
Thank you for voting!
Old drip bowls were badly tarnished . . . shine could not be restored.
1) Make sure unit switches are turned off. 2) Lift Calrod unit up and pull it from electrical receptacle. 3) Withdraw Calrod unit from old bowl. 4) Insert Calrod unit through large hole in new bowl. 5) Push Calrod electrical connectors into receptacle under range top. 6) Seat Calrod unit on bowl rim and insert the assembled Calrod unit and bowl into the hole in the range top.
Parts Used:
-
Paul from PROVO, UT
-
Difficulty Level:Really Easy
-
Total Repair Time:Less than 15 mins
1 person
found this instruction helpful.
Was this instruction helpful to you?
Thank you for voting!
Oven would not heat
Removed old broken element and installed new one. Took less than 10 minutes
Parts Used:
-
Franz from CRESTVIEW, FL
-
Difficulty Level:Very Easy
-
Total Repair Time:Less than 15 mins
-
Tools:Nutdriver
1 person
found this instruction helpful.
Was this instruction helpful to you?
Thank you for voting!
Bake element sparked due to damage
Shut of circuit breaker. Removed two screws with socket set . pulled element out about three inches, disconnected and held wires in place with clip type closepins. pressed connections onto new element , secured screws and presto... All too simple and in less then 15 minutes.
Reading previous reviews was quite helpful
Reading previous reviews was quite helpful
Parts Used:
-
Robert from Bethlehem, NH
-
Difficulty Level:Really Easy
-
Total Repair Time:Less than 15 mins
-
Tools:Socket set
1 person
found this instruction helpful.
Was this instruction helpful to you?
Thank you for voting!