




















9114282790 Kenmore Cooktop - Instructions
Keep searches simple. Use keywords, e.g. "leaking", "pump", "broken" or "fit".
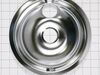
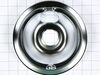
the drip bowls were a mess- rusty and beyond cleaning
I removed the old drip pans, cleaned the range top, washed and installed the new drip pans and put the old pans, box and packing materials in the trash. In only 12 minutes my range top looked like new and the mess was picked up. Now, if I could just get the rest of the kitchen looking that good that fast!
Parts Used:
-
Suzanne from Brigthon, MI
-
Difficulty Level:Really Easy
-
Total Repair Time:Less than 15 mins
3 of 6 people
found this instruction helpful.
Was this instruction helpful to you?
Thank you for voting!
drip ban needed replacing
removed heating element,removed old drip pan.added new drip pan,replaced heating element.Took less that 3 min.
Parts Used:
-
Angelo from Phoenix, AZ
-
Difficulty Level:Really Easy
-
Total Repair Time:Less than 15 mins
1 person
found this instruction helpful.
Was this instruction helpful to you?
Thank you for voting!
old wore out parts
-
Bobby from Trinity, TX
-
Difficulty Level:Really Easy
-
Total Repair Time:Less than 15 mins
1 person
found this instruction helpful.
Was this instruction helpful to you?
Thank you for voting!
Burned/scorched corroded drip bowl
No brainer. No tools. Remove burner, lift out old drip bowl, drop in new one, plug in burner, voila! Done. 10 seconds.
Parts Used:
-
Robert from Bar Harbor, ME
-
Difficulty Level:Very Easy
-
Total Repair Time:Less than 15 mins
1 person
found this instruction helpful.
Was this instruction helpful to you?
Thank you for voting!
Terminal block wire had burned out
Unplugged the range. Opened the range top, unscrewed the old block and cut the wires back. New mount did not match the range top. Removed the old mount from the old terminal block and removed the new mount from the new terminal block and inserted the new block in the old mount. Spliced the wires with the provided wire nuts, protected the splice with the provided heat shrink tubing and installed the burner in the new terminal block. Reinstalled the power cord and tested the burner.
Parts Used:

-
Mary from FOUNTAIN, CO
-
Difficulty Level:A Bit Difficult
-
Total Repair Time:Less than 15 mins
-
Tools:Nutdriver, Pliers
1 person
found this instruction helpful.
Was this instruction helpful to you?
Thank you for voting!
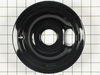
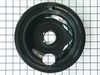
Dirty stained drip bowls. Impossible to clean.
-
Thomas from FORT WORTH, TX
-
Difficulty Level:Very Easy
-
Total Repair Time:Less than 15 mins
1 person
found this instruction helpful.
Was this instruction helpful to you?
Thank you for voting!
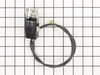
Burner socket disintegrated...2nd time.
Unplug the stove. Remover back panel. Remove coil and pan. LIft stove top. Remove screw(s) holding element in place and follow wires to the back of the stove and disconnect. Replace with new kit. Easy.
This is the second time the unit has gone bad. None of the other three burners has ever had the problem.
Thanks for having the part available.
This is the second time the unit has gone bad. None of the other three burners has ever had the problem.
Thanks for having the part available.
Parts Used:
-
Streeter from Millersville, PA
-
Difficulty Level:Easy
-
Total Repair Time:15 - 30 mins
-
Tools:Socket set
1 person
found this instruction helpful.
Was this instruction helpful to you?
Thank you for voting!
Burner would not stay in socket
I pulled off the back panel and the two wires were attached to the back of the know for the burner that did not work. I unhooked the wires, fed the new ones into the same slot and clipped the block in place. That was it!
Parts Used:
-
Jack from Georgetown, IN
-
Difficulty Level:Easy
-
Total Repair Time:15 - 30 mins
-
Tools:Nutdriver
1 person
found this instruction helpful.
Was this instruction helpful to you?
Thank you for voting!
the burner trays just needed replaced for an 85 year old senior citizen
Removed burner trays, pulled out heater unit, cleaned up inside of area around all four burners, slipped the burner trays back in and pushed the heater unit back into place.
Parts Used:
-
Bet from Bothell, WA
-
Difficulty Level:Easy
-
Total Repair Time:Less than 15 mins
1 person
found this instruction helpful.
Was this instruction helpful to you?
Thank you for voting!
rusted out drip pan
unplugged the element took the old pan out and put the new one in, plugged the element back in.
Parts Used:
-
Brenda L from Naples, NY
-
Difficulty Level:Really Easy
-
Total Repair Time:Less than 15 mins
1 person
found this instruction helpful.
Was this instruction helpful to you?
Thank you for voting!
Fix prior jimmy-rigged repair job
Prior repair job had spliced the terminal block wires with electrical tape; electrical tape caught fire while making pasta.
anyways, disconnect all power, remove burners, pull stove out. you'll need a 1/4" drive socket to get the back cover off; six bolts total. phillips head screw driver to unscrew the terminal blocks; replace with new terminal blocks; it did not seem to matter which wire plugged into the back. put everything back together. very easy.
anyways, disconnect all power, remove burners, pull stove out. you'll need a 1/4" drive socket to get the back cover off; six bolts total. phillips head screw driver to unscrew the terminal blocks; replace with new terminal blocks; it did not seem to matter which wire plugged into the back. put everything back together. very easy.
Parts Used:
-
Jason from Charleston, SC
-
Difficulty Level:Easy
-
Total Repair Time:15 - 30 mins
-
Tools:Screw drivers, Socket set
1 person
found this instruction helpful.
Was this instruction helpful to you?
Thank you for voting!
The terminal block broke
Replaced the terminal block and used hi-temp wire connectors to place the new part into the circuit.
Parts Used:
-
Karl from WINONA, MN
-
Difficulty Level:Really Easy
-
Total Repair Time:Less than 15 mins
-
Tools:Screw drivers
1 person
found this instruction helpful.
Was this instruction helpful to you?
Thank you for voting!
Burners on range would occasionally fail to heat
First I disconnected the power. Then I removed the burner element and drip pan. Using the screwdriver I removed the single screw that holds the terminal block in place. I then cut the 2 wires to the old terminal block. I connected the wires of the new block to the existing wires using the supplied wire nuts. Next I slipped the supplied heat shrink tubing over the wire nut and wires and using the heat gun I applied heat to the shrink wrap. Finally I reinstalled the new terminal block using the old screw and re-installed the drip pan and burner. I repeated the procedure for 2 other burners that were exhibiting the same problem. All work perfectly.
Parts Used:
-
Patrick from San Diego, CA
-
Difficulty Level:Easy
-
Total Repair Time:30 - 60 mins
-
Tools:Screw drivers
1 person
found this instruction helpful.
Was this instruction helpful to you?
Thank you for voting!
Replace rangetop burner connectors
Since we got the stove,this is the second time we've repaired these connectors. The first time the connectors came with pre-stripped wires, wire nuts and heat shrink tubing. This set came with pre-attached spade terminals, so I had to crimp the mate to the wires in the stove then put heat shrink tubing on the splices. I also had to bend the part of the connector that mounts onto the stovetop. These had a horizontal tab for the mounting screw rather than the vertical design that our ranges uses. If the connectors designed for the earlier model were available, it would simplify installation since shrink wrap and wire wraps came in that kit and the mounting bracket would fit correctly.
Parts Used:
-
James from Wilson, WY
-
Difficulty Level:A Bit Difficult
-
Total Repair Time:30 - 60 mins
-
Tools:Nutdriver, Pliers, Screw drivers, Socket set
1 of 2 people
found this instruction helpful.
Was this instruction helpful to you?
Thank you for voting!
stove top burner not heating
The longest part of the job was finding my misplaced nut driver!!Note:A small socket set will do.Unplug stove from outlet,remove rear cover panel,lift stove top up to access terminal. remove the one screw that holds the terminal and slide off the two wire clips that hold the wires up out of the way.next clip off the old terminal leaving the old wires so you can tape the new wires on just to pull them through the hole.Once you have the new wires pulled up to the heat control unplug old and replace with the new,tighten the screw on the new terminal and don't forget to slide on the wire clips
Parts Used:
-
Jon from Readsboro, VT
-
Difficulty Level:Really Easy
-
Total Repair Time:Less than 15 mins
-
Tools:Nutdriver
1 of 2 people
found this instruction helpful.
Was this instruction helpful to you?
Thank you for voting!