




















9114272590 Kenmore Cooktop - Instructions
Keep searches simple. Use keywords, e.g. "leaking", "pump", "broken" or "fit".
Dirty stained drip bowls. Impossible to clean.
-
Thomas from FORT WORTH, TX
-
Difficulty Level:Very Easy
-
Total Repair Time:Less than 15 mins
1 person
found this instruction helpful.
Was this instruction helpful to you?
Thank you for voting!
drip ban needed replacing
removed heating element,removed old drip pan.added new drip pan,replaced heating element.Took less that 3 min.
Parts Used:
-
Angelo from Phoenix, AZ
-
Difficulty Level:Really Easy
-
Total Repair Time:Less than 15 mins
1 person
found this instruction helpful.
Was this instruction helpful to you?
Thank you for voting!
old wore out parts
-
Bobby from Trinity, TX
-
Difficulty Level:Really Easy
-
Total Repair Time:Less than 15 mins
1 person
found this instruction helpful.
Was this instruction helpful to you?
Thank you for voting!
Burners on range would occasionally fail to heat
First I disconnected the power. Then I removed the burner element and drip pan. Using the screwdriver I removed the single screw that holds the terminal block in place. I then cut the 2 wires to the old terminal block. I connected the wires of the new block to the existing wires using the supplied wire nuts. Next I slipped the supplied heat shrink tubing over the wire nut and wires and using the heat gun I applied heat to the shrink wrap. Finally I reinstalled the new terminal block using the old screw and re-installed the drip pan and burner. I repeated the procedure for 2 other burners that were exhibiting the same problem. All work perfectly.
Parts Used:

-
Patrick from San Diego, CA
-
Difficulty Level:Easy
-
Total Repair Time:30 - 60 mins
-
Tools:Screw drivers
1 person
found this instruction helpful.
Was this instruction helpful to you?
Thank you for voting!
replaced the drip bowls
I am not going into a description. It is a very minor thing to do. I did appreciate the quick delivery of the parts and will purchase future appliance parts from you again.
Parts Used:
-
Barbara A from Riverhead, NY
-
Difficulty Level:Really Easy
-
Total Repair Time:Less than 15 mins
1 of 2 people
found this instruction helpful.
Was this instruction helpful to you?
Thank you for voting!
terminals was burned
-
alicia from harrison, NJ
-
Difficulty Level:Easy
-
Total Repair Time:15 - 30 mins
-
Tools:Pliers, Screw drivers
1 of 3 people
found this instruction helpful.
Was this instruction helpful to you?
Thank you for voting!
bowls were worn
Just removed the elements and inserted the new drip pans. Could not have been easier.
Parts Used:
-
Mary Ann from Orient, NY
-
Difficulty Level:Really Easy
-
Total Repair Time:15 - 30 mins
1 of 3 people
found this instruction helpful.
Was this instruction helpful to you?
Thank you for voting!
Porcelain drip bowls slots for unit to fit in was eroded
Simple ! I unplugged the units,removed the old drip bowls and replaced them with the new ones.
Parts Used:
-
Jean from Saluda, SC
-
Difficulty Level:Really Easy
-
Total Repair Time:15 - 30 mins
2 of 6 people
found this instruction helpful.
Was this instruction helpful to you?
Thank you for voting!
Range element working intermittently then failing completely
Remove the element and pan. Unscrew the bracket holding the old terminal. The terminal has adequate wire to pull out. Found area where insulation wasn't brittle. Cut old wires and stripped them to expose 1/2 inch of wire. Attached wires from new terminal with wire nuts. Placed heat-shrink tubing over each assembly and shrank it with a heat gun. Retained the bracket from the old terminal, since it looked like it would hold the terminal assembly a bit more firmly than the new bracket. Reassembled in reverse order. Presto -- once again disappointing my wife in her desire for new appliances!
Parts Used:
-
David from Richmond, VT
-
Difficulty Level:Really Easy
-
Total Repair Time:15 - 30 mins
-
Tools:Screw drivers
0 of 1 people
found this instruction helpful.
Was this instruction helpful to you?
Thank you for voting!
My heating element will not work
I turned the power off to the stove (very important). then I unplugged the heating element from the terminal. I then unscrewed the terminal from the range top and pulled the terminal through to expose enough wire to do the job. I then proceeded to cut one wire from the old terminal and twist the new wire onto the wire that goes to the switch. Then I capped it off with the electric cap that came with the new terminal. then I covered the exposed wires with the sleeve that came with new terminal. Then I did the same exact thing for the second wire. After that was all done I put everything back together and turned the power back on.
Parts Used:
-
Joseph from Guilford, NY
-
Difficulty Level:Easy
-
Total Repair Time:15 - 30 mins
-
Tools:Screw drivers
0 of 1 people
found this instruction helpful.
Was this instruction helpful to you?
Thank you for voting!
All drip bowls broken or rusted
Just pull out the heat element, place the new drip bowls and then insert again the heat element.
Parts Used:
-
Jose from Miami 33166-2667, FL
-
Difficulty Level:Really Easy
-
Total Repair Time:Less than 15 mins
0 of 1 people
found this instruction helpful.
Was this instruction helpful to you?
Thank you for voting!
Existing drip pan was burned & beyond cleaning.
Unplugged the burner unit. Removed the existing drip pan. Installed new drip pan in place & re-plugged the burner unit.
Parts Used:
-
Janet from Frederick, MD
-
Difficulty Level:Really Easy
-
Total Repair Time:Less than 15 mins
0 of 2 people
found this instruction helpful.
Was this instruction helpful to you?
Thank you for voting!
Blower not working correctly.
Turned off the power to the stove top and remove the blower capacitor installed the new capacitor. Turned the power back on and it worked.
Parts Used:

-
David from Morgan City, LA
-
Difficulty Level:A Bit Difficult
-
Total Repair Time:15 - 30 mins
-
Tools:Nutdriver, Pliers
0 of 2 people
found this instruction helpful.
Was this instruction helpful to you?
Thank you for voting!
Grate Burned Up
I simply entered name of product and what I needed. You said I'll get on 12/28/09 but I actually received it 12/20 or 12/21. It's perfect. I'm pleased. Thank you so much
Parts Used:
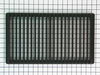
-
willie from Columbia, SC
-
Difficulty Level:Really Easy
-
Total Repair Time:Less than 15 mins
0 of 4 people
found this instruction helpful.
Was this instruction helpful to you?
Thank you for voting!
My old drip pans were no longer cleanable
Pretty simple really. Just pulled out the heating coils/elements, lifted out the old drip pans, dropped in the new ones and "plugged" the coils back in and Presto! New drip pans,
Parts Used:
-
Keith from Oklahoma City, OK
-
Difficulty Level:Really Easy
-
Total Repair Time:Less than 15 mins
Was this instruction helpful to you?
Thank you for voting!