




















89030 - Overview
Models starting with 89030
Click on the best match to narrow your results.
Exact Part matches for your search term
[Viewing 1 of 1]
COMPRESSOR DORIN H280 CC POE
This part number matches the current model number 89030
PartSelect #: PS18003453
Manufacturer #: 89030
No Longer Available
Keep searches simple, eg. "belt" or "pump".

Light Bulb - 40W
PartSelect #: PS884734
Manufacturer #: 8009
This an authentic OEM 40-Watt replacement light bulb, used in a number of household appliances. It is specially designed to withstand extreme temperatures, which is why these replacement bulbs are mos...
$24.14
In Stock
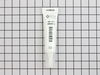
Heat Resistant Adhesive
PartSelect #: PS11728058
Manufacturer #: W10841140
This is a heat-resistant adhesive for your appliance. The heat resistance allows you to stick parts such as grate feet, gaskets, and felt seals in hot areas, such as a cooktop, without compromising th...
$28.55
In Stock
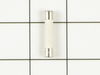
Ceramic Fuse - 20 amp
PartSelect #: PS11747931
Manufacturer #: WPM0805101
This ceramic microwave fuse is just over an inch long. It is white in the center, while each end is made of metal. This is a twenty amp fuse.
$14.95
In Stock
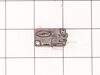

Dryer Screw
PartSelect #: PS11746840
Manufacturer #: WP90767
This screw is sold individually.
$9.85
In Stock

Range Hex Nut
PartSelect #: PS11742711
Manufacturer #: WP488130
Part may differ in appearance, but functions same as original.
$12.05
Special Order

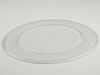
TRAY,GLASS
PartSelect #: PS3556218
Manufacturer #: 3390W1G009D
This glass tray provides a stable, heat-resistant surface for cooking or heating while allowing even energy distribution. It is replaced when chipped, cracked, or missing to restore safe operation.
$72.55
In Stock

Common Symptoms of models starting with 89030
[Viewing 5 of 5]Won’t turn on
Fixed by
these parts
these parts


Show All
No heat
Fixed by
these parts
these parts

Show All
Leaking
Fixed by
these parts
these parts

Show All
Doesn’t shut off
Fixed by
these parts
these parts
Show All
Tray won’t turn
Fixed by
these parts
these parts

Show All
Keep searches simple. Use keywords, e.g. "leaking", "pump", "broken" or "fit".
Broken door micro switch. (unit does not start heating)
Unplug the unit before servicing. Need phillips screwdriver. Open door. Use step ladder to access and remove 2 small screws from top of the room air diffuser at top of unit. Slide diffuser slightly to the left to align the diffuser's plastic tab on the left side to rotate toward you. (The wires for the front control panel are at the far left side of this difuser, but difuser is slotted for easy removal). Once the difuser is removed you will see 1 screw at the top that secures the pannel cover on the left side of the unit. Remove screw and slide this panel slightly up and out. This exposes the plastic frame that holds the upper and lower door switches. To locate the door switches and observe how they work, close and open the door and watch the door (bayonets) open and close the micro switches. Do the (red) buttons on top of the switches move up and down when the door bayonets push and release? If the buttons do not "pop" up when opened the switch is defective. The switch frame is secured with 2 screws. Remove screws and rotate the unit out for easy access to the micro switch(s). The internal (spring?) on my unit that is suposed to allow the red (visible) button on top of the switch to "pop" up when the door is opened was broken. Carefully pry the switch outward while being careful to lift the plastic holder-piece that holds the switch in place. Be careful, there is a small pin on the frame, so rotate the switch OUT toward you while lifting (carefully) the plastic holder-piece (you will see it on top of the switch). You can use an ohm meter to test the continuity of the switches. But if the buttons don't "pop" they are defective. Replace switch and reassemble.
Parts Used:
-
JAMES from BILLINGS, MT
-
Difficulty Level:Very Easy
-
Total Repair Time:30 - 60 mins
-
Tools:Screw drivers
37 of 68 people
found this instruction helpful.
Was this instruction helpful to you?
Thank you for voting!
microwave oven blew fuse
First I removed upper front grill by removing two Philips head screws on top and pulling off. This exposed the Philips head screw which holds control panel in place. After removing screw I pushed up on panel and it came off to expose fuse. With needle nose pliers I removed old fuse and again with pliers held new fuse in position. With the help of a bladed screwdriver, I pushed new fuse into holder, then replaced panel, screw and grill. This took less than 15 minutes even as one of the wires on control panel pulled out of connection and took some time to locate where to reconnect, otherwise was an easy fix
.
.
Parts Used:
-
tad from tamarack, MN
-
Difficulty Level:Really Easy
-
Total Repair Time:Less than 15 mins
-
Tools:Pliers, Screw drivers
27 of 43 people
found this instruction helpful.
Was this instruction helpful to you?
Thank you for voting!
Door sensor switch went bad. Microwave would not operate.
Watched a couple of repair videos on Youtube by searching for the model number. Found out what to do in order not to get shocked by the powerful capacitor.
Ordered the two switches (To be sure, I could have ordered a third switch as suggested in the videos.)
Bought a tamper-proof star bit to get the cover off. Followed the directions to replace the switches. - I broke the harness and had to use some super glue, but it's all good. I should have removed the harness instead of trying to get a switch out while it was still in place.
It's all back together, and the wife is happy!!
Ordered the two switches (To be sure, I could have ordered a third switch as suggested in the videos.)
Bought a tamper-proof star bit to get the cover off. Followed the directions to replace the switches. - I broke the harness and had to use some super glue, but it's all good. I should have removed the harness instead of trying to get a switch out while it was still in place.
It's all back together, and the wife is happy!!
Parts Used:
-
Randall from ARCADIA, CA
-
Difficulty Level:A Bit Difficult
-
Total Repair Time:1- 2 hours
-
Tools:Pliers, Screw drivers
15 of 29 people
found this instruction helpful.
Was this instruction helpful to you?
Thank you for voting!