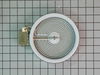
The 6” radiant cooking element with limiter fits under the glass cooktop and supplies heat to the cooking area. If your element is not heating, you can test the element for continuity with a multimete...
This part is the heatsource. This surface element is for ranges.
Surface element supplies the heat to a cooking area on top of the range.
Unplug the range or shut off the house circuit breaker ...
Ask our experts a question about this model and we'll get back to you as soon as possible!
1 question answered by our experts.
< Prev
1
Next >
Sort by:
Search filter:
Clear Filter
Your search term must have 3 or more characters.
Keep searches simple. Use keywords, e.g. "leaking", "pump", "broken" or "fit".
Sorry, we couldn't find any existing answers that matched.Try using some different or simpler keywords, or submit your new question by using the "Ask a Question" button above!
Randall
May 28, 2026
The front heating elements or eyes will come on at low to medium setting but then cuts off. If I turn the temperature knob up it will come on and stay on at the 8 or Hi setting but this temperature is too high to cook and burns food.
For model number 790-42729 700
Hi Randall, thank you for reaching out. According to our research, the issue could be with the infinite switches for the front surface elements. Their internal cycling mechanism might have worn out or broken. This failure prevents power cycling at lower settings and allows voltage to pass only when set to the uninterrupted “Hi” position. You may need to replace the infinite switches for the front surface elements; the infinite switches for the left front and right front elements are part number PS2342881. These are sold individually. We hope this solves your problem!
First we removed two screws under the rim of the range top to open the lid. Lifted the lid and removed the screws from the bracket that holds the elements, Be careful with the clips that hold the element in, if you break them or bend them there aren't any more! Also note which holes they were in, they are marked according to the different sizes of elements. Disconnected the wires, needed needlenose pliers to grip them...connected new element, popped it back in place, replaced bracket, closed top ...Easy peasy!!!
VERY IMPORTANT! kill the circuit breaker to the unit and/or unplugged it! 2 screws hold the ceramic glass top to the lip @ top of oven--remove them and the top can be lifted up to expose all the burner elements and wiring--remove the 2 end screws that hold the retainer bracket for the burners - then remove the 2 screws that hold the burner in question to the bracket-there's also a retainer pin that needs a bit of fussing with to completely free the burner--once totally free remove the wires from the bad unit to the good unit exactly as they are situated --install new unit onto bracket with screws and bracket back to its original location on the ceramic top-put top back down and replace both anchor screws--initiate power back to unit and yeeehahh--You just saved yourself lottsa money from repair bills!!!
FIRST I UNPLUGGED THE GLASS TOP RANGE. While locating the part on the PartSelect diagram I was also able to determine how to access the burned out element. It was very simply to remove three phillips head screws in the front top( above the oven)area of the range, slide the topof the range forwardand lift it up, remove one screw holding the metal bar under the element, replace the element by usinga a pair of pliers to remove the electrical wires and then reversed the process. I saved a tidy amount doing the job myself.