














79042623310 Kenmore Range - Overview
Sections of the 79042623310
[Viewing 1 of 1]
Keep searches simple, eg. "belt" or "pump".

Main Terminal Block Kit
PartSelect #: PS471605
Manufacturer #: 5304409888
Terminal blocks (also called terminal boards or strips) provide a convenient means of connecting individual electrical wires.
$48.78
In Stock

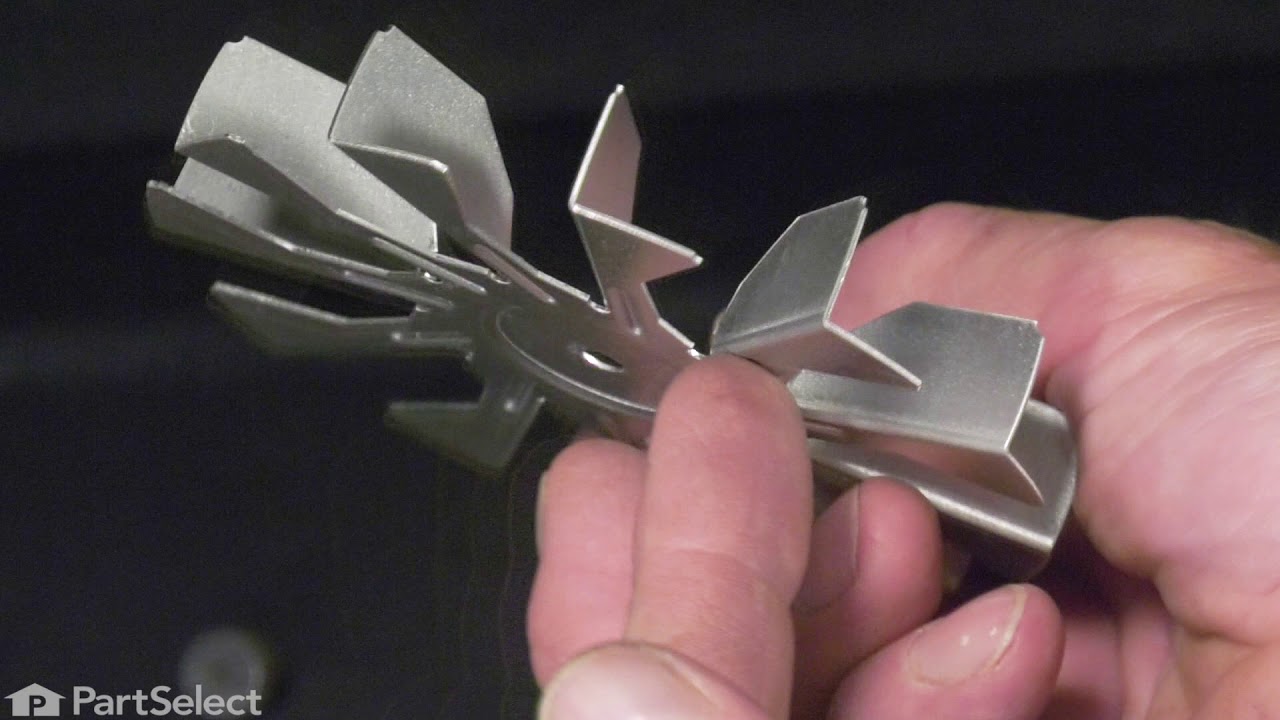
Convection Fan Blade
PartSelect #: PS3409337
Manufacturer #: 318398302
This convection fan blade is designed for use with various makes and models of range and oven and is sold as an individual part. Made of metal and measuring approximately 4.75-inches in diameter, this...
$43.07
In Stock


PROBE
PartSelect #: PS16745361
Manufacturer #: 5304525427
This genuine OEM oven temperature sensor probe monitors the internal temperature of the oven to ensure accurate and consistent cooking performance. By sending temperature readings to the control syste...
$62.31
In Stock


Light Bulb
PartSelect #: PS3502557
Manufacturer #: 318946500
This replacement light bulb provides clear illumination to improve visibility during appliance operation. It is commonly replaced when the original bulb burns out, flickers, or no longer produces adequate light.
$65.83
In Stock


SCREW
PartSelect #: PS12071114
Manufacturer #: 5304507924
This is an authentic door handle mounting screw, which works with ranges, wall ovens and microwaves.
$19.95
In Stock


Common Symptoms of the 79042623310
[Viewing 5 of 5]Little to no heat when baking
Fixed by
these parts
these parts

Show All
Will Not Start
Fixed by
these parts
these parts
Show All
Element will not heat
Fixed by
these parts
these parts
Show All
Oven not heating evenly
Fixed by
these parts
these parts
Show All
Little to no heat when broiling
Fixed by
these parts
these parts
Show All

Keep searches simple. Use keywords, e.g. "leaking", "pump", "broken" or "fit".
Cord was not tightened enough by delivery crew.
PF alarm appeared on display. Noticed clicking when cord was moved. Had arced for some time and melted original block. New part slightly different. Only has 3 lugs, old one had six. Stack using washers provided. Take note of colors before disassembly. Use caution while working through access opening. The edges are sharp. Only tools needed are phillips screwdriver, deep socket for lug nuts. Nut driver optional. Hope this is helpful.
Parts Used:
-
Timothy from Spring Valley, AL
-
Difficulty Level:Really Easy
-
Total Repair Time:15 - 30 mins
-
Tools:Screw drivers, Socket set
109 of 174 people
found this instruction helpful.
Was this instruction helpful to you?
Thank you for voting!
replacing the fan on a convection oven (fan was making a vibration noise)
This was the first time replacing the fan. It is a lot easier to work in the oven compartment with the oven door removed, only two screws on the door and the hinges were released. I found that a couple of the screws were either rusted or stripped so I used a pair of pliers to remove the screws that were holding the diffuser in place. Once there was access to the fan I found that the fan was warped and that the blades were scraping against the back wall of the oven. The next challenge was to remove the retaining nut. I used a sheet metal screw to secure the warped fan to keep it from spinning. once I figured out that you have to turn the retaining nut to the right to loosen, it came off easily. 1/2" socket with extension. When I replace the fan I used two washers for spacers to make sure that the fan would not scrape the wall of the oven. Its been tested many times and the oven does not make that horrible sound anymore.
Parts Used:
-
John from Stevensville, MD
-
Difficulty Level:A Bit Difficult
-
Total Repair Time:30 - 60 mins
-
Tools:Pliers, Screw drivers, Socket set
17 of 26 people
found this instruction helpful.
Was this instruction helpful to you?
Thank you for voting!
Oven light stayed on & smelled like electrical burning.
Wife was cooking our thanks giving turkey, when an oder of burning was noticed. I walked over to the oven and smelled the area of oven light, it was bad. I turned off and unpluged oven. Got a screw driver, unscrewed 4 screws then noticed the burned switch from under the oven top. removed 3 wires, covered w/ elec. tape, and pulled oven light switch out front. looked at part number and ordered online. We were able to cook our turkey and enjoyed our meal.
Parts Used:
-
Vincent from Brunswick, GA
-
Difficulty Level:Easy
-
Total Repair Time:15 - 30 mins
-
Tools:Screw drivers
16 of 35 people
found this instruction helpful.
Was this instruction helpful to you?
Thank you for voting!