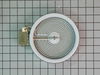
The 6” radiant cooking element with limiter fits under the glass cooktop and supplies heat to the cooking area. If your element is not heating, you can test the element for continuity with a multimete...
Having trouble with your stove or oven's light indicator? Don't fret - we have a solution for you. Our Frigidaire Range Light Lens Indicator, ideal for select Frigidaire, Electrolux, White Westinghous...
This convection fan blade is designed for use with various makes and models of range and oven and is sold as an individual part. Made of metal and measuring approximately 4.75-inches in diameter, this...
This radiant burner element delivers powerful, even heat for your cooktop, ensuring fast and efficient cooking. Measuring 9 inches and rated at 3200 watts, it is ideal for replacing a worn or malfunct...
You're in the right place if your oven's not heating properly! Our genuine OEM Frigidaire Broil Element is here to save the day. With a robust power of 4000W and 8 pass, this part is specifically craf...
Got a Frigidaire, Electrolux, White Westinghouse, or Tappan stove, oven, or range? Then, this Frigidaire Circuit Board Assembly could be just the piece you need to get your appliance back to peak perf...
$477.90
In Stock
Questions And Answers for 79041313414
Be the first to ask our experts a question about this model!
✖
Ask a Question
Ask our experts a question on this model and we'll respond as soon as we can.
First we removed two screws under the rim of the range top to open the lid. Lifted the lid and removed the screws from the bracket that holds the elements, Be careful with the clips that hold the element in, if you break them or bend them there aren't any more! Also note which holes they were in, they are marked according to the different sizes of elements. Disconnected the wires, needed needlenose pliers to grip them...connected new element, popped it back in place, replaced bracket, closed top ...Easy peasy!!!
Removed the back cover of the range. Removed the knob from the front of the switch. Removed 2 screws holding switch to range. Removed wires one at a time and connected to proper poles on replacement switch and reinstalled new switch on range
i first replaced element after old smoked & quit. replaced switch but i noticed when i started to replace the wires one at a time something didn't seem right. after checking the #s on the old one, they didn't match up with the new one.luckily i had the stove diagram from a packet on the back of the stove. i traced each wire according to the diagram and everything worked out fine. i'm just glad i didn't replace each wire to wire.the #'s were on the switch where each wire went which was different than the org. even though they looked the same.