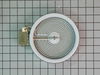
The 6” radiant cooking element with limiter fits under the glass cooktop and supplies heat to the cooking area. If your element is not heating, you can test the element for continuity with a multimete...
This oven temperature sensor is a precision component designed to measure and relay internal oven temperatures to the control board, ensuring accurate and consistent cooking performance. Commonly refe...
Struggling with a sticky, stubborn stove drawer? Our Frigidaire Range Front Drawer Glide is here to restore the easy glide of your cooker's storage or broil drawer. Produced as an authentic OEM part, ...
Have a look at our Frigidaire Door Trim Kit. This isn't just any part; it's a genuine OEM part that's custom designed to give your oven door a seamless fit and a polished finish. What's more, it's fin...
Introducing the Frigidaire Light Indicator, an authentic OEM part designed specifically for your cooking needs. This part plays a crucial safety role - it lights up to let you know when the oven or bu...
This 18 ml bottle of white appliance touch up paint is a little over two inches tall. It can be used for refrigerators, microwaves, ranges, clothes dryers, and freezers.
This oven door gasket creates a secure seal around the door to keep heat inside the oven for consistent cooking and energy efficiency. Made from high-quality, heat-resistant fiberglass with a tempered...
$168.62
In Stock
Questions And Answers for 79015032500
Be the first to ask our experts a question about this model!
✖
Ask a Question
Ask our experts a question on this model and we'll respond as soon as we can.
Cut off power at fuse panel. pulled stove out from wall went behind stove removed back panels in area of sensor that I could see from the front side, inside oven. Located sensor from rear & unpluged senser from wiring bundle reached inside oven & removed screws from sensor. Pulled sensor out & threaded wire through hole. Took old & new sensors to bench in shop. Plug on new not the same as old. Had to change plug Cut and stripped wires. Wire is very small, need to use a good stripper. Twisted wire together & soldered connection, used shrink wrap to insulate wire. Took part inside and reinstalled in reverse order. Used 1/4 inch nutdriver on total job start to finish.
I called a repair place. They charged $54 to diagnose, (said it needed a new latch motor) then wanted $220 to complete the repair. I checked online prices and did it myself for about 15 minutes work and the latch motor itself ($44?).
Was necessary to uplug the range, pull it away from the wall and remove the back panel sheet metal, then 3 screws that mount the motor. Replace motor, reattach sheet metal. Plug in. Done. Ready to bake cookies.
First we removed two screws under the rim of the range top to open the lid. Lifted the lid and removed the screws from the bracket that holds the elements, Be careful with the clips that hold the element in, if you break them or bend them there aren't any more! Also note which holes they were in, they are marked according to the different sizes of elements. Disconnected the wires, needed needlenose pliers to grip them...connected new element, popped it back in place, replaced bracket, closed top ...Easy peasy!!!