Refrigerator door bin AAP73252202 is an original equipment manufacturer (OEM) part that fits some Kenmore Elite bottom-freezer refrigerators in the following series: 7957204, 7957205, 7957209, 7957218...
This handle screw, also known as a mounting bolt, is a mounting screw to help secure the door handle to your refrigerator door. If your handle is loose, you may just need to tighten the screw. If your...
This ice maker assembly is for refrigerators. This Ice maker assembly contains the complete ice maker and housing. The assembly may include multiple parts; refer to your parts diagram for a complete ...
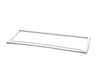
This glass shelf provides storage space in your refrigerator above the crisper. Shelves can crack and chip due to frequent use, and should be replaced immediately if cracks start to appear. This shelf...
This pipe holder secures tubing or piping in place to maintain proper alignment and routing. Its durable construction supports stable installation and reliable operation.
Struggling with an inconsistent refrigerator temperature? Our LG Evaporator Fan Motor is here to give you a hand. This part, built from top-tier materials, ensures a quality performance that lasts. ...
This evaporator fan motor assembly circulates cold air throughout the refrigerator and freezer compartments, helping maintain steady, even temperatures for reliable cooling performance. The energy-eff...
This couldn't have been easier. Two tiny screws in the front needed unscrewed, and then two plastic clips in the middle just had to be popped lose. Finally, you unplugged the power cord. Then, you just needed to reverse the process by plugging the new ice maker in, popping the clips in place, and screwing the two holes back in and turning the whole thing on. Voila! Perfect ice cubes again. And for only a little over $100.
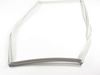
Watch YouTube videos on this topic if you are uncertain before tackling the job. The right door was easy to replace. Just pull the gasket with your fingers and it will come off easily. Place new gasket over door and use fingers to press it inside the groove few inches at a time. Pay attention to gasket orientation.
The left door is a bit harder because you need to remove the mullion at the door edge using a screw driver. Remove two screws on the center hinge and then slide the mullion up to disengage. Then unplug the wires to remove the mullion. Replace the gasket as described above and replace the mullion reversing the directions shown above.