


71313 (ASTCSE2) LG Refrigerator - Overview
Sections of the 71313
[Viewing 5 of 5]


Keep searches simple, eg. "belt" or "pump".

Door Shelf Bin
PartSelect #: PS10065040
Manufacturer #: AAP73051304
This door basket is designed to fit securely on the inner panel of select refrigerator models, providing convenient storage for items such as condiment bottles and jars. Featuring both white and clear...
$89.05
In Stock

Decor Assembly, Tray
PartSelect #: PS10065045
Manufacturer #: ACW74118101
This pantry drawer cover is a genuine replacement part designed for select refrigerator models. Made from clear, durable plastic, it seals the front of the pantry drawer to help maintain internal cond...
$75.85
In Stock

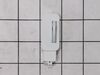
Refrigerator Door Switch
PartSelect #: PS3529268
Manufacturer #: 6600JB1010A
This door switch is used in refrigerators. It is activated by the closing and opening of the door
$46.15
In Stock

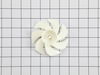
Evaporator Fan Motor
PartSelect #: PS3523323
Manufacturer #: 4681JB1027C
This 13-volt evaporator fan motor helps circulate air over the refrigerator coils. These coils will then convert the heat into cool air, which is then circulated from the freezer section to the fresh ...
$216.10
In Stock

Refrigerator Compressor Overload Protector
PartSelect #: PS3603394
Manufacturer #: 6750CL0001D
The compressor overload protector attaches to the compressor and shuts off the compressor if the compressor motor draws too much current.
$51.65
In Stock

GASKET ASSEMBLY,DOOR
PartSelect #: PS12588648
Manufacturer #: ADX73350633
This refrigerator door gasket is a durable, flexible rubber seal designed to create a tight closure around the door, helping maintain proper temperatures and overall cooling efficiency. It replaces wo...
$72.55
In Stock

Defrost Sensor Assembly
PartSelect #: PS3636324
Manufacturer #: 6615JB2005N
Looking for a reliable solution to keep your LG refrigerator or freezer in prime condition? Our genuine OEM Defrost Sensor Assembly from LG could be just what you need. Designed specifically to fit ...
$57.15
In Stock

SENSOR,TEMPERATURE
PartSelect #: PS7792212
Manufacturer #: EBD60925804
This temperature sensor monitors internal conditions and provides accurate feedback to the control system. Precise sensing helps maintain stable performance and efficiency. Replacing a faulty sensor r...
$38.26
In Stock


Freezer Fan Assembly
PartSelect #: PS8749044
Manufacturer #: ADP73694301
Feel the difference a premium part like the FAN ASSEMBLY from LG can make in getting your appliance back in optimal shape. This isn't your run-of-the-mill replacement - this is an original OEM item de...
$18.65
On Order
Common Symptoms of the 71313
[Viewing 5 of 5]Light not working
Fixed by
these parts
these parts
Show All
Noisy
Fixed by
these parts
these parts

Show All
Fridge too warm
Fixed by
these parts
these parts
Show All
Fridge and Freezer are too warm
Fixed by
these parts
these parts

Show All
Door Sweating
Fixed by
these parts
these parts

Show All

Keep searches simple. Use keywords, e.g. "leaking", "pump", "broken" or "fit".
Remove and replace light switch
Video makes it look easy. Kenmore refrigerator does not have "groove" along the right hand side of switch that allows for pushing down on release. Used a thin screwdriver to get under to push while holding switch edge with pliers. Kept slipping. Tape sides to avoid scratching inside of refrigerator.
Parts Used:
-
Debbie from Waltham, MA
-
Difficulty Level:A Bit Difficult
-
Total Repair Time:30 - 60 mins
-
Tools:Pliers, Screw drivers
45 of 89 people
found this instruction helpful.
Was this instruction helpful to you?
Thank you for voting!
Original gasket became deformed creating bad seal.
Soak new gasket in hot water in bathtub to soften while removing old gasket. No tools required, it was a little difficult pulling old gasket out but once you get it started part way out it will come out real easy. By the time you get the old gasket out the new gasket will be warm and easy to get started into the groove it pops into. Starting on back (hinged) side is of door, begin pushing new gasket into groove. Work up and down pushing gasket into place working towards the corners and around to the front side of door. Your all done. This is a job I went into a little nervous thinking I might be calling a service man out to fix, but it turned out to be really easy.
Parts Used:
-
Stanley from Armona, CA
-
Difficulty Level:Very Easy
-
Total Repair Time:Less than 15 mins
7 of 7 people
found this instruction helpful.
Was this instruction helpful to you?
Thank you for voting!
Fridge light would not come on.
After watching a few iTunes videos I was able to order the light switch from part select and within a week I had the new switch. I had a little trouble getting the switch out. I used a flat screw driver and taped around the edge to keep from damaging the wall inside. I found the clip on the right side and had to use some force to get it popped out, you may need to use pliers to disconnect the switch.
Parts Used:
-
Grace from GALLOWAY, NJ
-
Difficulty Level:A Bit Difficult
-
Total Repair Time:15 - 30 mins
-
Tools:Screw drivers
10 of 22 people
found this instruction helpful.
Was this instruction helpful to you?
Thank you for voting!