


66222 LG - Overview
Models starting with 66222
Click on the best match to narrow your results.
Exact Part matches for your search term
[Viewing 2 of 2]
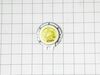
THERMOSTAT GASKET
This part number matches the current model number 66222
PartSelect #: PS659542
Manufacturer #: 66222
No Longer Available
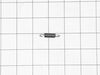
SVC-HOOD DUCT;66222,PMOR30B
This part number matches the current model number 66222
PartSelect #: PS16632727
Manufacturer #: DE81-10232A
No Longer Available
Keep searches simple, eg. "belt" or "pump".


Glass Cooking Tray
PartSelect #: PS3518835
Manufacturer #: 3390W1A044B
This tray rotates in your microwave ensuring more even temperatures.
$53.85
In Stock

Microwave Turntable Assembly
PartSelect #: PS12115010
Manufacturer #: AJS73149201
The turntable support assembly is also known as a roller guide, fits under the cooking tray and is used to support the tray and to engage the rotating coupler. If your cooking tray will not turn, or r...
$42.99
In Stock

Guide Rail Assembly - Right Side
PartSelect #: PS3524811
Manufacturer #: 4975JJ2002A
$59.35
Special Order

Magnetron
PartSelect #: PS3529034
Manufacturer #: 6324W1A001L
This part is used to generate microwave energy/heat.
$120.07
In Stock


Common Symptoms of models starting with 66222
[Viewing 11 of 11]No heat
Fixed by
these parts
these parts


Show All
Tray won’t turn
Fixed by
these parts
these parts

Show All
Won’t turn on
Fixed by
these parts
these parts

Show All
Door won’t open or close
Fixed by
these parts
these parts

Show All
Will Not Start
Fixed by
these parts
these parts

Show All
Door not closing properly
Fixed by
these parts
these parts
Show All
Doesn’t shut off
Fixed by
these parts
these parts
Show All
Fridge too warm
Fixed by
these parts
these parts
Show All
Clicking sound
Fixed by
these parts
these parts
Show All
Noisy
Fixed by
these parts
these parts
Show All
Fridge and Freezer are too warm
Fixed by
these parts
these parts
Show All
Keep searches simple. Use keywords, e.g. "leaking", "pump", "broken" or "fit".
Motor Burned Out On Turntable
My 8 year old daughter cleaned the inside of the microwave with enough water to rival a tsunami. Resulted in a clean microwave with a fried out motor that no longer revolved. Part came quickly. Took cover and bottom off to get to the part. One screw held it on and a plug. Removed those, put on new part and she was good to go. No trip to home depot today.
Parts Used:

-
Steven from Oak Forest, IL
-
Difficulty Level:Really Easy
-
Total Repair Time:15 - 30 mins
-
Tools:Screw drivers
37 of 49 people
found this instruction helpful.
Was this instruction helpful to you?
Thank you for voting!
everything worked except it wouldnt cook
tested all 3 of the door switche for continuity, the top switch was faulty, replaced it,for approx $4.00 and saved a $350 dollar microwave.
Parts Used:
-
Joseph from N VERSAILLES, PA
-
Difficulty Level:Very Easy
-
Total Repair Time:30 - 60 mins
-
Tools:Screw drivers
11 of 21 people
found this instruction helpful.
Was this instruction helpful to you?
Thank you for voting!
Magnitron failed
Over the stove microwave installed in top cabinet row.
1. Unplug device.
2. Two people to remove from wall/cabinet (remove two, large, top mounting screws and rotate entire microwave down and off the wall mount). Should be some wood spacers between top of device and bottom of cabinet.
3. Remove screws from sheet metal cover.
4. Remove one screw holding blowers in place and rotate out of the way, in order to gain access to 2 of 5 screws that hold the magnetron in place.
5. Unplug magnetron and remove the 5 screws.
6. Drop in new magnetron and re-assemble microwave in reverse order (steps 5-3).
7. Two people restore micro to wall/cabinet. Replace wood spacers, re-install two, large mounting screws (finger-tight). Test device. Secure the two large screws.
Parts Used:
-
Joseph from WILTON, NH
-
Difficulty Level:A Bit Difficult
-
Total Repair Time:1- 2 hours
-
Tools:Screw drivers
8 of 13 people
found this instruction helpful.
Was this instruction helpful to you?
Thank you for voting!