




















62942865 Kenmore Cooktop - Instructions
Keep searches simple. Use keywords, e.g. "leaking", "pump", "broken" or "fit".
Burned out burner
Pulled out the old burner and plugged in the new!
Parts Used:
-
Esther from Alexandria, VA
-
Difficulty Level:Really Easy
-
Total Repair Time:Less than 15 mins
1 of 2 people
found this instruction helpful.
Was this instruction helpful to you?
Thank you for voting!
The radiant ring element had broken
-
Martin from Alexandria, VA
-
Difficulty Level:Really Easy
-
Total Repair Time:Less than 15 mins
-
Tools:Screw drivers
1 of 2 people
found this instruction helpful.
Was this instruction helpful to you?
Thank you for voting!
stove top burner would not heat
new element plugged into burner connection- an easy fix
Parts Used:
-
Marjorie from Indianapolis, IN
-
Difficulty Level:Really Easy
-
Total Repair Time:Less than 15 mins
1 of 2 people
found this instruction helpful.
Was this instruction helpful to you?
Thank you for voting!
8 inch element not heating in cooktop
I removed the old element. I then plugged the new element in place. Simple repair, no tools required. Turned the cooktop element on to test for proper functioning. It heated properly. Repair completed.
Ordering the part was easy and it arrived within 2 days. Very happy with Parts Select service.
Ordering the part was easy and it arrived within 2 days. Very happy with Parts Select service.
Parts Used:
-
LouAnn from Maquoketa, IA
-
Difficulty Level:Really Easy
-
Total Repair Time:Less than 15 mins
1 of 2 people
found this instruction helpful.
Was this instruction helpful to you?
Thank you for voting!
center piece of the heating element broke off
so easy, just ordered the part, the part came and inserted the element into the stovetop
Parts Used:
-
Elaine from Atascadero, CA
-
Difficulty Level:Really Easy
-
Total Repair Time:Less than 15 mins
1 of 2 people
found this instruction helpful.
Was this instruction helpful to you?
Thank you for voting!
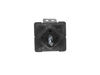
Broken Surface Burner control
Remove 4 screws that holds down panel;removed dial;removed screw that held switch to panel. Took off wire one at a time ann put on corresponding lug. Repeated above in reverse.
Parts Used:
-
Thomas from Batavia, NY
-
Difficulty Level:Easy
-
Total Repair Time:30 - 60 mins
-
Tools:Pliers, Screw drivers
1 of 2 people
found this instruction helpful.
Was this instruction helpful to you?
Thank you for voting!
burned burner control out of warranty
switch power supply off at breaker panel
unscrew control box assembly from stove
slide control out of stove
unscrew burner control out of assembly
transfer wiring from old control to new in same relative location
reassemble in reverse order
restore power
test burner in all positions
unscrew control box assembly from stove
slide control out of stove
unscrew burner control out of assembly
transfer wiring from old control to new in same relative location
reassemble in reverse order
restore power
test burner in all positions
Parts Used:
-
Daniel from Temple, TX
-
Difficulty Level:A Bit Difficult
-
Total Repair Time:30 - 60 mins
-
Tools:Pliers, Screw drivers
1 of 2 people
found this instruction helpful.
Was this instruction helpful to you?
Thank you for voting!
Drip pans were a mess
-
Chhristopher from Houston, TX
-
Difficulty Level:Really Easy
-
Total Repair Time:Less than 15 mins
1 of 2 people
found this instruction helpful.
Was this instruction helpful to you?
Thank you for voting!
My electric range burner was not heating.
All I had to do was remove the old burner and push the new burner into place. It couldn't have been easier.
Parts Used:
-
Joyce from Oceanside, CA
-
Difficulty Level:Really Easy
-
Total Repair Time:Less than 15 mins
1 of 2 people
found this instruction helpful.
Was this instruction helpful to you?
Thank you for voting!
Control switch would not operate
Looked up schematic. Removed 3 screws holding cover. after I shut power off of course. Took off knob. Oriented new control to the one on panel. Disconnected each wire one at at time and immediately attached it to the new control for each wire. Removed screws holding old control and inserted and screwed to the new control and put the knob back on. Put the cover back on. Worked fine. Probably should replace the others as they don't turn as easily as the new one. Probably will spray some contact cleaner which will give me a few more years.
Parts Used:
-
Thomas from Batavia, NY
-
Difficulty Level:Easy
-
Total Repair Time:15 - 30 mins
-
Tools:Pliers, Screw drivers
1 of 2 people
found this instruction helpful.
Was this instruction helpful to you?
Thank you for voting!
burned up switch
Opened the back of the cooktop and found upper right element control switch burned. I removed the retaining screws and wires and spent two weeks chasing the switch at a local dealer. Found exactly what I needed at PartSelect.com and paid less even with shipping than at the local. Installed the switch with original screws and presto!! it worked.
Parts Used:
-
Scott from Chehalis, WA
-
Difficulty Level:Really Easy
-
Total Repair Time:15 - 30 mins
-
Tools:Screw drivers, Socket set
1 of 2 people
found this instruction helpful.
Was this instruction helpful to you?
Thank you for voting!
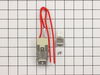
The burner was shortening out and would work sometime. The first time I replace the burner but the new one shorted out quickly.
I unplugged the stove. Took out the burner and removed receptacle by pulling it out of the bracket and clipping the wires. One thing you want to make sure is that when you clip the wires from the receptacle you're replacing you leave enough wire so that you can connect them to the wires on the new receptacle when it is in place on the stove. I had just enough but would have liked more. The bracket I received didn't match the one on the stove so I used the one on the stove since the receptacle itself was the same as the one I was replacing.
Parts Used:
-
shawn from Vancouver, WA
-
Difficulty Level:Really Easy
-
Total Repair Time:Less than 15 mins
-
Tools:Pliers
1 of 3 people
found this instruction helpful.
Was this instruction helpful to you?
Thank you for voting!
front burner stayed on high
We unplugged the range from the wall first so as not to get electrocuted. We removed the face of the control panel by removing the screws and 2 hex nuts underneath that hold it in place, and removed the trim. Then we disconnected the malfunctioning control switch, taking note of what order the wires go in. Hooked the new switch up and popped it through the face of the control panel. We then put the trim back, and reattached the control panel with the screws. Very easy!!
Parts Used:
-
Natalie from North Reading, MA
-
Difficulty Level:Really Easy
-
Total Repair Time:Less than 15 mins
-
Tools:Screw drivers, Wrench (Adjustable)
1 of 3 people
found this instruction helpful.
Was this instruction helpful to you?
Thank you for voting!
Receptacle had become bad poor connection.
First I disconnect the breaker. I removed the defected receptacle and cut the wires. I connected the new receptacle with parts with the new part. Turned the breaker back on and everthing worked fine.
Parts Used:
-
JAMES from Harrodsburg, KY
-
Difficulty Level:Really Easy
-
Total Repair Time:Less than 15 mins
-
Tools:Pliers, Screw drivers
1 of 3 people
found this instruction helpful.
Was this instruction helpful to you?
Thank you for voting!
element shorted out
Replaced the element. The part came the next day which was great. Good customer service!
Parts Used:
-
David from Pittsburgh, PA
-
Difficulty Level:Really Easy
-
Total Repair Time:Less than 15 mins
2 of 6 people
found this instruction helpful.
Was this instruction helpful to you?
Thank you for voting!