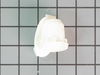
This hinge bracket, also known as a door stop, is attached to the bottom of the door and is used to limit how far the door swings out to protect the refrigerator itself, and any surrounding cabinets f...
$17.95
In Stock
Order within the next 4 hrs and your part ships today!
This refrigerator meat drawer shelf frame provides structural support for the meat drawer, allowing it to slide smoothly in and out of the compartment. Constructed from durable white plastic, the fram...
$61.79
In Stock
Order within the next 4 hrs and your part ships today!
This temperature sensor is for refrigerators.
The temperature sensor senses the temperature inside the refrigerator and sends information to the electronic control.
Unplug the refrigerator and s...
$54.95
In Stock
Order within the next 4 hrs and your part ships today!
Facing challenges with your refrigerator organization? Here's the answer to your problem ? our genuine Whirlpool Door Bin Cantilever. This is more than just a part; it's a practical solution designed ...
$77.98
In Stock
Order within the next 4 hrs and your part ships today!
Is your refrigerator not maintaining the perfect temperature for your food? The Whirlpool Thermistor could be exactly what you need. This temperature sensor plays a key role in your refrigerator, cons...
$97.59
In Stock
Order within the next 4 hrs and your part ships today!
This genuine OEM ice maker kit is designed to fit refrigerators that did not originally come with an ice maker. This kit contains everything needed to install the new ice maker on your refrigerator in...
$158.59
In Stock
Order within the next 4 hrs and your part ships today!
Don't let a faulty door bin disrupt your fridge's potential'let us help! We've got the perfect solution'the Whirlpool Cantilever Door Bin. This genuine part is perfect for keeping your bottles and jar...
$79.74
In Stock
Order within the next 4 hrs and your part ships today!
This stainless steel refrigerator or freezer door handle is a genuine OEM part designed to replace broken or damaged handles. Made from durable stainless steel, it ensures long-lasting use and a modern look.
$217.55
In Stock
Order within the next 4 hrs and your part ships today!
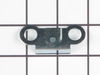
Have a Whirlpool refrigerator that's not functioning properly due to a faulty door hinge? We understand your problem and we have just the right solution for you ? the authentic OEM Insert Hinge Shim, ...
$17.80
In Stock
Order within the next 4 hrs and your part ships today!
Questions And Answers for 5WT519SFEW00
Ask our experts a question about this model and we'll get back to you as soon as possible!
2 questions answered by our experts.
< Prev
1
Next >
Sort by:
Search filter:
Clear Filter
Your search term must have 3 or more characters.
Keep searches simple. Use keywords, e.g. "leaking", "pump", "broken" or "fit".
Sorry, we couldn't find any existing answers that matched.Try using some different or simpler keywords, or submit your new question by using the "Ask a Question" button above!
John
February 17, 2020
This is brand new. Frost builds up in freezer.The temperature in freezer and refrigerator is correct.
the local technician has no answer.
apparently this issue is common.
do you have a suggestion
For model number 5WT519SFEW00
Hello John, thank you for your question. There are a few parts we would recommend testing. The evaporator fan motor, damper assembly. You can also check the gasket to be sure you are getting a tight seal with the cabinet. Too much warm air into the freezer will cause frost buildup. I hope this helps.
1 personfound this helpful.
Was this helpful?
Thank you for voting!
John
February 23, 2020
I have a brand new fridge. The temperatures are perfect in freezer and fridge. But frost builds up in the freezer. The gaskets have been checked. I have no idea about these things, but I read that a drain line that freezes up might cause this issue. Any suggestions would help. We are not getting answers from where we purchased the unit. Thanks
For model number 5WT519SFEW00
Hello John, Thank you for the question. You can check the drain to see if it is frozen over or of there is a frozen puddle on the floor of the freezer. In most cases the frost build up indicates it is not going into the defrost cycle properly. The defrost cycle on this model is controlled by the Main Control Board. We hope this helps.
I used a flat-head screwdriver to pop out the old light rocker switch. Then, I unplugged the wires, plugged them into the new light rocker switch, and then popped the new switch into the hole. That's it! Lights began working again.
An easy job for smaller hands. Removed the two bolts holding the light cover. Removed two electrical connections from the old switch by pinching the retaining clip,removed the switch, snapped in the new one and re-attached the connectors. Your online illustrations helped me to know that the plastic housing for the light switch would only swing down so far and was not intended to be removed. Saved me from breaking that plastic cover's tabs. This home repair saved me more than 5 times the cost of hiring a professional to do it. Very happy homeowner.
Spoke to a repair technician online described what was happening as food keep freezing in the fridge. He advised me to change the thermistor and if that didn't work the control board as those are the only 2 things that would cause food to freeze. Changed thermistor and fridge is running at proper temp very disappointed with whirlpool as fridge is only 2 years old and had issues already . Now that its repaired its Time for a COLD beer !!!