




















59679543015 Kenmore Refrigerator - Instructions
Keep searches simple. Use keywords, e.g. "leaking", "pump", "broken" or "fit".
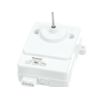
Refrigerator would cool for a very short period of time. Then the compressor would shutdown via internal thermal overload or high head pressure. This was caused by the lack of airflow across the condenser coils and compressor.
(1) Slide out appliance and remove power source. (2) Removed lower access cover on rear of refrigerator. (3) Disconnected plug to the condenser fan motor. (4) remove blades by pulling gently forward (5) remove mounting hardware holding the fan motor (3 screws) (6) motor is now free and new motor can be installed
Parts Used:
-
Daniel from RICHTON, MS
-
Difficulty Level:Very Easy
-
Total Repair Time:Less than 15 mins
-
Tools:Nutdriver, Pliers
10 of 18 people
found this instruction helpful.
Was this instruction helpful to you?
Thank you for voting!
Broken latch on water filter cover.
Reviewed replacement instructions video on your website. Just followed the easy instructions to pop out old cover and pop in new cover. I would not have tried to replace it myself had I not seen your video. Super easy.
Parts Used:
-
Gloria from Laurinburg, NC
-
Difficulty Level:Really Easy
-
Total Repair Time:Less than 15 mins
6 of 6 people
found this instruction helpful.
Was this instruction helpful to you?
Thank you for voting!
Broken tab that holds the pantry door on
I broke the left side end cap the holds the pantry door on.
I search the internet for the part and happened to run across part select. I order the part and received the part with in 3 business days. It took less than 30 minutes to replace the end cap.
The great reviews help me with my choice to order the part from part select. I will order parts from them again.
Thanks for helping me fix my fridge.
I search the internet for the part and happened to run across part select. I order the part and received the part with in 3 business days. It took less than 30 minutes to replace the end cap.
The great reviews help me with my choice to order the part from part select. I will order parts from them again.
Thanks for helping me fix my fridge.
Parts Used:
-
Craig from Pueblo, CO
-
Difficulty Level:Really Easy
-
Total Repair Time:15 - 30 mins
-
Tools:Nutdriver
7 of 9 people
found this instruction helpful.
Was this instruction helpful to you?
Thank you for voting!
a piece broke off that caused a shelf lid to not open and close correctly.
It was a very simple operation and was done in no time.
Doing it myself saved me at least $100.00 or more.
I was very happy and satisfied with the part and how doing it myself saved me a lot of time and money.
Doing it myself saved me at least $100.00 or more.
I was very happy and satisfied with the part and how doing it myself saved me a lot of time and money.
Parts Used:
-
Denise from Sammamish, WA
-
Difficulty Level:Really Easy
-
Total Repair Time:15 - 30 mins
-
Tools:Screw drivers, Socket set, Wrench (Adjustable), Wrench set
7 of 9 people
found this instruction helpful.
Was this instruction helpful to you?
Thank you for voting!
hinge pin broke off
take out two nut driver screws remove piece, take off track two philips head screws. transfer temp control rod, really easy then put track back on and install piece. probable took as long to remove the two veg crispers and glass top. this is a very easy fix. i did notice that the pin on the original was about 3/8 of an inch forward so flapper door did not quite line up and im sure caused the pin to snap off. the replacement part, the pin is exactly the same position as the other side. i believe the original was defective from the mfgr.
Parts Used:
-
eugene from kissimmee, FL
-
Difficulty Level:Really Easy
-
Total Repair Time:15 - 30 mins
-
Tools:Nutdriver, Screw drivers
6 of 7 people
found this instruction helpful.
Was this instruction helpful to you?
Thank you for voting!
Plastic pin that supports the plastic drawer cover was broken.
After removing the shelves and drawers to gain access to the End Cap unit. I removed the screws and detached the unit which was a little tricky without any actual drawing details. After removing the unit I had to undo the plastic temperature control arm without breaking same. I then transferred the shelve draw slide and reconnected the control arm assembly to the new End Cap unit . At that point it was a simple installation, the drawer works better then new. Note: I did find some loose packing material behind the End Cap assembly unit that might have caused the failure of the drawer and door mechanism during its original factory fabrication. Other than that the project was a complete success. Dick S.
Parts Used:
-
RICHARD from LINBROOK, NY
-
Difficulty Level:A Bit Difficult
-
Total Repair Time:30 - 60 mins
-
Tools:Screw drivers, Socket set
7 of 10 people
found this instruction helpful.
Was this instruction helpful to you?
Thank you for voting!
Broken glass on pantry door
Pulled the broken pantry door off, and snapped the new door in place. Vry simple.
Parts Used:
-
Michael from Roseville, MI
-
Difficulty Level:Really Easy
-
Total Repair Time:Less than 15 mins
6 of 7 people
found this instruction helpful.
Was this instruction helpful to you?
Thank you for voting!
Tab for deli cover broke off...after 1 year ordred part,
Took off old cover 3 screws...removed metal track and 2 other plastic sliding bars for air flow..put on new cover and carefully put back deli cover on plastic pins..easy fix...lousy design by maytag again! Thanks to PartSelect easy and prompt service and delivery!
Parts Used:
-
Cranson from San Francisco, CA
-
Difficulty Level:Really Easy
-
Total Repair Time:15 - 30 mins
-
Tools:Nutdriver
6 of 7 people
found this instruction helpful.
Was this instruction helpful to you?
Thank you for voting!
Broken guide rail
This took 30 seconds. Lift out shelf glass, remove broken pieces, snap new part into place.
Parts Used:

-
Adam from Los Angeles, CA
-
Difficulty Level:Really Easy
-
Total Repair Time:Less than 15 mins
6 of 7 people
found this instruction helpful.
Was this instruction helpful to you?
Thank you for voting!
chef drawer cover
take the old one out replace with new once - no instructions required, no tools needed
Parts Used:
-
Maria from Cream Ridge, NJ
-
Difficulty Level:Really Easy
-
Total Repair Time:Less than 15 mins
6 of 7 people
found this instruction helpful.
Was this instruction helpful to you?
Thank you for voting!
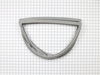
FROST, ICE buildup along and inside the bottom of freezer and door
Removed old gasket by carefully pulling it out of the retaining groove. Installed the new gasket starting the corners first and then seating the upper and lower straight portion gently in the retainer groove. Total time for installation was at most 5 minutes. After a week no ice or frost has been found along the bottom of door or freezer. Note: the new gasket came in a small box for shipping purposes and the new gasket was twisted in a v for this purpose. Upon arrival, I laid it out flat on table overnight so it could cool to room temperature and straighten. I would recomend this procedure for a perfect installation.
Parts Used:
-
Jerry from SNELLVILLE, GA
-
Difficulty Level:Very Easy
-
Total Repair Time:Less than 15 mins
6 of 7 people
found this instruction helpful.
Was this instruction helpful to you?
Thank you for voting!
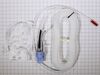
Had to replace the water reservoir on my refrigerator
The replacement part provided was not an exact replacement. The part did not include a water reservoir. Instead, it had a 25 ft long water line that ran from the water filter to the water connection behind the fridge. The long water line was difficult to deal with, did not fit easily into the space provided for the water reservoir, and is coiled up behind my fridge. The part did work, but I'm unhappy with not having the resevoir.
Parts Used:
-
Jeffery from RUSTON, LA
-
Difficulty Level:A Bit Difficult
-
Total Repair Time:30 - 60 mins
-
Tools:Nutdriver, Screw drivers, Wrench set
6 of 7 people
found this instruction helpful.
Was this instruction helpful to you?
Thank you for voting!
light bulb in water ice freezer door went bad
I didn't. Don't know how to get to light bulb to change it for this specific model
Parts Used:

-
Carl from RIVERSIDE, CA
-
Difficulty Level:Very Difficult
-
Total Repair Time:More than 2 hours
-
Tools:Screw drivers
8 of 14 people
found this instruction helpful.
Was this instruction helpful to you?
Thank you for voting!
Torn door gaskets
Took out the old and installed the new.. The fit was perfect.
Parts Used:

-
Charles from LARGO, FL
-
Difficulty Level:Very Easy
-
Total Repair Time:Less than 15 mins
5 of 5 people
found this instruction helpful.
Was this instruction helpful to you?
Thank you for voting!
The orignal proberm was broken hinge on End Cap
There was little or almost nothing to change out the End Cap, two screws on the End Cap and two screws on slide. It took longer to removed and replace the two drawers and shelve than it did to replace the End Cap. The part I ordered was exactly what I needed.
Parts Used:
-
David L. from Red Rock, TX
-
Difficulty Level:Really Easy
-
Total Repair Time:Less than 15 mins
-
Tools:Nutdriver
5 of 5 people
found this instruction helpful.
Was this instruction helpful to you?
Thank you for voting!