




















59679542014 Kenmore Refrigerator - Instructions
Keep searches simple. Use keywords, e.g. "leaking", "pump", "broken" or "fit".
ice maker wouldn't work
The repair went well. Before I ordered this ice tray assemble, I replaced the water inlet valve thinking that was the problem. The new ice tray came with 2 new wiring harnesses. It wasn't hard to see which one was needed for the new system. Changing the tray out was not hard at all nor was the new electrical harness. The only problem was the inlet valve sent too much water into the ice tray. After seeing the ice tray leaking, I removed it again to see why. The only thing I could come up with was too much water was being put into the ice tray. I had the old inlet valve and reinstalled it and the ice maker has worked flawlessly ever since. There was nothing wrong with the old inlet valve only the ice tray assembly.
So all good and doing a great job once again.
So all good and doing a great job once again.
Parts Used:
-
Jeannette from MESA, AZ
-
Difficulty Level:Really Easy
-
Total Repair Time:30 - 60 mins
-
Tools:Nutdriver, Screw drivers
2 of 2 people
found this instruction helpful.
Was this instruction helpful to you?
Thank you for voting!
Empty box sent with no part!!!! No customer service help because of covid
No product was sent in the box for the shaft I received an empty box from them cannot perform any repairs because I got no product from this company. Called customer service said due to Covid no customer service available when online and receive no customer service no refund no product no help
Parts Used:

-
Jeffery from MIDLOTHIAN, VA
-
Difficulty Level:Very Difficult
-
Total Repair Time:More than 2 hours
2 of 2 people
found this instruction helpful.
Was this instruction helpful to you?
Thank you for voting!
Door on the pullout lower "Pantry" had cracked
Part was pretty ubiquitous so plastic door pins part fits a lot of refrigs, no tools necessary, new part is flexible enough to bend slightly to fit over pins at side. Mine was a bottom freezer type.
Parts Used:
-
Donald from RICHMOND, IN
-
Difficulty Level:Really Easy
-
Total Repair Time:30 - 60 mins
2 of 2 people
found this instruction helpful.
Was this instruction helpful to you?
Thank you for voting!
ice will not dispense ice from storage bin to out the door. Auger does not turn
Replaced motor it was not issue. Now I am stuck with a $300 motor I cannot return. When I say will not dispense ice everyone thinks it does not make ice. Auger does not turn to push ice out the door. Reason I thought it was auger motor when you push lever on door the auger turns about one eight of a turn. So, it would seem it is getting signal and power. Cannot find any articles on this specific issue. If anyone has a suggestion, please share.
Parts Used:
-
JOEL from LUMBERTON, MS
-
Difficulty Level:Really Easy
-
Total Repair Time:30 - 60 mins
-
Tools:Nutdriver, Screw drivers
2 of 2 people
found this instruction helpful.
Was this instruction helpful to you?
Thank you for voting!
Cracked lid, broken hinge - right side
Two phillips head screws out to remove drawer slide. Three screws to remove right side drawer support. New support placed, new lid snapped into place. The right side has an adjustment lever. Re-routing that took the longest. The arm had to be removed and twisted to get the adjustment knob off and on.
Parts Used:
-
David from Plattsburgh, NY
-
Difficulty Level:Really Easy
-
Total Repair Time:15 - 30 mins
-
Tools:Nutdriver, Screw drivers
2 of 2 people
found this instruction helpful.
Was this instruction helpful to you?
Thank you for voting!
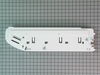
Plastic hinge pin broken on original endcap
Really easy - Remove drawers, remove glass shelf and associated support rails, remove drawer slide from old endcap, remove old endcap, reverse proceedure installing new endcap - now the hard part, have a cool softdrink while you carry the old endcap and packing material from the new one out to the trash.
By the way - the part got here really fast - thanks for the great service.
By the way - the part got here really fast - thanks for the great service.
Parts Used:
-
ROBERT from Lufkin, TX
-
Difficulty Level:Really Easy
-
Total Repair Time:30 - 60 mins
-
Tools:Nutdriver, Screw drivers
2 of 2 people
found this instruction helpful.
Was this instruction helpful to you?
Thank you for voting!
Unplug and remove existing wiring harness and old ice maker if need to.
Got lucky ordered new ice maker then current one started working again ???????
Parts Used:
-
Brent from SCOTTVILLE, MI
-
Difficulty Level:Really Easy
-
Total Repair Time:15 - 30 mins
-
Tools:Nutdriver, Screw drivers
2 of 2 people
found this instruction helpful.
Was this instruction helpful to you?
Thank you for voting!
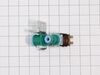
crack in inlet valve
-
Steve from Paola, KS
-
Difficulty Level:Really Easy
-
Total Repair Time:Less than 15 mins
-
Tools:Nutdriver, Wrench set
41 of 119 people
found this instruction helpful.
Was this instruction helpful to you?
Thank you for voting!
Replacing the bulb in the freezer side
Removed the ice brucket,
Removed the light shield by releasing one screw using a nutdriver.
Replacing the bulb and reinstalled the light shield.
Your web site is one of the best and most helpfull service sites I ever used. Just wish that in the future you will ship parts overseas.
Removed the light shield by releasing one screw using a nutdriver.
Replacing the bulb and reinstalled the light shield.
Your web site is one of the best and most helpfull service sites I ever used. Just wish that in the future you will ship parts overseas.
Parts Used:

-
Yafa (and David) from Bothell, WA
-
Difficulty Level:Easy
-
Total Repair Time:Less than 15 mins
-
Tools:Nutdriver
5 of 11 people
found this instruction helpful.
Was this instruction helpful to you?
Thank you for voting!
Broken plastic hinge holding bottom drawer lid.
Took the food out. A couple of screw removals. Put drawer lid on and then put the screws in. Nothing to it.
Parts Used:
-
Bob from Blair, NE
-
Difficulty Level:Really Easy
-
Total Repair Time:Less than 15 mins
-
Tools:Nutdriver
2 of 2 people
found this instruction helpful.
Was this instruction helpful to you?
Thank you for voting!
Hinge on 'goumet lid' in front broke off
Wasn't a big deal. Removed the the shelves and glass immediately above the endcap as well as the large 'goumet' draw. Used a nutdriver to remove two screws. Popped off the old endcap and did everything in reverse. Replaced the long clear goumet draw cover that was still intact. Thanks for making it easy!!!!
Parts Used:
-
Erik from Cumming, GA
-
Difficulty Level:Easy
-
Total Repair Time:Less than 15 mins
-
Tools:Nutdriver
2 of 2 people
found this instruction helpful.
Was this instruction helpful to you?
Thank you for voting!
pantry lid cracked
The broken one just popped out and the new one popped right in! This company shipped out the part I needed immediately I had it in two days!! I highly recommend them!!
Parts Used:
-
kathleen from south yarmouth, MA
-
Difficulty Level:Really Easy
-
Total Repair Time:Less than 15 mins
2 of 2 people
found this instruction helpful.
Was this instruction helpful to you?
Thank you for voting!
The right end cap hinge broke for the pantry door.
I replaced both side. The left side I very easy to replace. It has 2 screws holding the end cap in place and the tracking has 2 screws holding it in. Undo the 4 screws and put the track on the new end cap and then you are good to go to install the new end cap on the left side. Now for the right side is easy, but you now have to also undo 2 screws and other 2 for the track just like left side but also you are going to have to undo the humidity control stuff and put it on the new end cap.
Parts Used:
-
Justin from KANSAS CITY, KS
-
Difficulty Level:Really Easy
-
Total Repair Time:Less than 15 mins
-
Tools:Nutdriver, Socket set
2 of 2 people
found this instruction helpful.
Was this instruction helpful to you?
Thank you for voting!
not making ice
watched video
took me less than 5min. to replace inlet valve.
an cleaned my frig at the same time that took me longer to do.
took me less than 5min. to replace inlet valve.
an cleaned my frig at the same time that took me longer to do.
Parts Used:

-
Robert from Allentown, PA
-
Difficulty Level:Really Easy
-
Total Repair Time:Less than 15 mins
-
Tools:Screw drivers
2 of 2 people
found this instruction helpful.
Was this instruction helpful to you?
Thank you for voting!
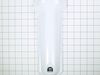
the locking latch to the water filter cover had been broken for a while
Open the existing cover and carefully with the thumb and index fingers, pry the cover at over the left pin and remove the cover. Place the replacement onto the right pin and pry the left placing it over the left and you are done.
Parts Used:
-
Mario from EL PASO, TX
-
Difficulty Level:Very Easy
-
Total Repair Time:Less than 15 mins
2 of 2 people
found this instruction helpful.
Was this instruction helpful to you?
Thank you for voting!