




















59679249017 Kenmore Refrigerator - Instructions
Keep searches simple. Use keywords, e.g. "leaking", "pump", "broken" or "fit".
Would not make ice.
Removed the whole ice maker unplug one wire harness replaced ice tray with new one.
Very simple.
Very simple.
Parts Used:
-
William from OTSEGO, MI
-
Difficulty Level:Very Easy
-
Total Repair Time:30 - 60 mins
-
Tools:Nutdriver
3 of 4 people
found this instruction helpful.
Was this instruction helpful to you?
Thank you for voting!
Seal would not stay on, letting cold air out of ice maker - did not make ice.
The old plactic ring can be removed with flat bladed screw driver, starting on the right side prying it up worked best for me. The new seal snaps in only one way take your time to get it wright.
Parts Used:

-
Larry from PALMDALE, CA
-
Difficulty Level:Really Easy
-
Total Repair Time:Less than 15 mins
-
Tools:Screw drivers
3 of 4 people
found this instruction helpful.
Was this instruction helpful to you?
Thank you for voting!
I purchased a display model that was missing a part.
-
Monte from Longview, WA
-
Difficulty Level:Really Easy
-
Total Repair Time:Less than 15 mins
3 of 4 people
found this instruction helpful.
Was this instruction helpful to you?
Thank you for voting!
I had a loose fitting old condensor fan blade on my new motor.
I made a temporary repair by drilling the old blade plastic hub and put a small screw in it to hold it on to the shaft until the new blade arrived. The new blade came in within the two days I needed before Thanksgiving. I removed the old and pushed on the new. There were 8 screws on the back guard and two to hold the motor on. It was a snap.
Thank you PartSelect.com The wife is very, very happy now, we had 51 coming over for Thanksgiving. :)
Thank you PartSelect.com The wife is very, very happy now, we had 51 coming over for Thanksgiving. :)
Parts Used:
-
Roger from SMITHFIELD, RI
-
Difficulty Level:Very Easy
-
Total Repair Time:Less than 15 mins
-
Tools:Nutdriver
3 of 4 people
found this instruction helpful.
Was this instruction helpful to you?
Thank you for voting!
This is almost embarassing but you asked....
Once the part arrived, which was very quickly BTW..all I had to do was remove the old filter and then just screw the new one into place....Now I just happen to be both female and blonde but was able to get the job done in less than 15 minutes (that includes opening the box) and with very little water dripping from the old filter!!! Looks like I could work as the Maytag repair woman soon!!
Parts Used:
-
laurie from gold canyon, AZ
-
Difficulty Level:Really Easy
-
Total Repair Time:Less than 15 mins
3 of 4 people
found this instruction helpful.
Was this instruction helpful to you?
Thank you for voting!
The old shelf shattered when we tried to clean it

-
Michael from COAL VALLEY, IL
-
Difficulty Level:Easy
-
Total Repair Time:30 - 60 mins
2 of 2 people
found this instruction helpful.
Was this instruction helpful to you?
Thank you for voting!
The center rail was broken
The part just snapped in. super easy.
Parts Used:

-
Joella from THE DALLES, OR
-
Difficulty Level:Very Easy
-
Total Repair Time:Less than 15 mins
2 of 2 people
found this instruction helpful.
Was this instruction helpful to you?
Thank you for voting!
I scratched the door handle while moving the refrigerator into my house.
With a small allen wrench, I was able to loosen the two screws to remove the door handle and replace the new on without any problems. A very simple operation.
Parts Used:

-
Ron from Hardin, MT
-
Difficulty Level:Really Easy
-
Total Repair Time:Less than 15 mins
2 of 2 people
found this instruction helpful.
Was this instruction helpful to you?
Thank you for voting!
broken light switch in the freezer
We removed the old switch, unplugged it, plugged the new one in and it was easy to do. But when we tried to put the switch back in we had a very hard time doing it. Eventually got it in, but if it had not been for the difficulty we had getting the new switch to snap in to place, it would have taken under 5 minutes.
Parts Used:

-
kathleen from GREEN VALLEY, AZ
-
Difficulty Level:Easy
-
Total Repair Time:Less than 15 mins
-
Tools:Screw drivers
2 of 2 people
found this instruction helpful.
Was this instruction helpful to you?
Thank you for voting!
Cracked humid drawer

-
Julie from BATH, PA
-
Difficulty Level:Very Easy
-
Total Repair Time:Less than 15 mins
2 of 2 people
found this instruction helpful.
Was this instruction helpful to you?
Thank you for voting!
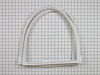
Gasket torn
Pulled old gasket off door put new one in channel on door pushed gasket in channel less than 10 minutes
Parts Used:
-
Ronald from ALIQUIPPA, PA
-
Difficulty Level:Very Easy
-
Total Repair Time:Less than 15 mins
2 of 2 people
found this instruction helpful.
Was this instruction helpful to you?
Thank you for voting!
Drawer door broke
-
Linda from VINEYARD HVN, MA
-
Difficulty Level:Really Easy
-
Total Repair Time:15 - 30 mins
2 of 2 people
found this instruction helpful.
Was this instruction helpful to you?
Thank you for voting!
original ice maker would make ice and then water would over flow into ice bin and freeze
stick the very small screw driver in the hole on the left side cover and lift up to release the keeper tab,pull out to expose the wire connecter.insert the small screw driver in the slot on the left side to release the tab while pulling apart the two connectors.tuck the wires tight to side and pull out the ice maker.I thought I was getting the whole ice maker assembly,but just got a part of it,so I had take it apart and put it back together.the hardest thing to change over was the stop lever arm that senses the level of ice in the bin.after all this,it didn't work at all.not happy around here.back to filling ice trays
Parts Used:
-
Michael from WALLA WALLA, WA
-
Difficulty Level:Difficult
-
Total Repair Time:30 - 60 mins
-
Tools:Screw drivers
2 of 2 people
found this instruction helpful.
Was this instruction helpful to you?
Thank you for voting!
My refrigerator vegetable bins were sagging when I placed veggies in it.
I came across this site and looked at the diagrams. Instead of buying a new crisper bin frame, I noticed that the crisper bin frame was missing the frame brace. I purchased the frame brace and installed it in the crisper frame, which was easy to push into the slot. This solved my problem. No more sag!!
Parts Used:

-
Lee from SAMMAMISH, WA
-
Difficulty Level:Easy
-
Total Repair Time:30 - 60 mins
-
Tools:Screw drivers
2 of 2 people
found this instruction helpful.
Was this instruction helpful to you?
Thank you for voting!
Replacing the bulb in the freezer side
Removed the ice brucket,
Removed the light shield by releasing one screw using a nutdriver.
Replacing the bulb and reinstalled the light shield.
Your web site is one of the best and most helpfull service sites I ever used. Just wish that in the future you will ship parts overseas.
Removed the light shield by releasing one screw using a nutdriver.
Replacing the bulb and reinstalled the light shield.
Your web site is one of the best and most helpfull service sites I ever used. Just wish that in the future you will ship parts overseas.
Parts Used:

-
Yafa (and David) from Bothell, WA
-
Difficulty Level:Easy
-
Total Repair Time:Less than 15 mins
-
Tools:Nutdriver
5 of 11 people
found this instruction helpful.
Was this instruction helpful to you?
Thank you for voting!