




















59673502201 Kenmore Refrigerator - Instructions
Keep searches simple. Use keywords, e.g. "leaking", "pump", "broken" or "fit".
Piece that makes the left side door close
Awesome! Couldn't ask for it any better. I watched the video from Partselect multiple time and was just as easy as they said it would be. It took me longer to watch the video four times than it did for me to install it. I have a habit of 10 minute projects turning into a couple hours and this took about 10 minutes. Thanks.
Parts Used:

-
William from PENNSVILLE, NJ
-
Difficulty Level:Really Easy
-
Total Repair Time:Less than 15 mins
5 of 5 people
found this instruction helpful.
Was this instruction helpful to you?
Thank you for voting!
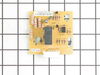
Fridge side not cold when freezer is blasting cold
I knew it was either the thermostat or defrost control board. Checked resistance with multimeter across the thermostat and heater element. Both check out ok so I replaced the board and all is good. Board on my model was in the controls panel.
Parts Used:
-
Daniel from Bellflower, CA
-
Difficulty Level:Really Easy
-
Total Repair Time:Less than 15 mins
-
Tools:Socket set
7 of 11 people
found this instruction helpful.
Was this instruction helpful to you?
Thank you for voting!
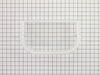
The door bin on a friend's refrigerator had a crack in it that quickly grew to a much bigger crack.
You just take the old door bin out by sliding it up and replace with the new bin by sliding it down in the door.
Parts Used:
-
Janet from Bend, OR
-
Difficulty Level:Really Easy
-
Total Repair Time:Less than 15 mins
6 of 8 people
found this instruction helpful.
Was this instruction helpful to you?
Thank you for voting!
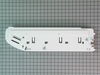
The orignal proberm was broken hinge on End Cap
There was little or almost nothing to change out the End Cap, two screws on the End Cap and two screws on slide. It took longer to removed and replace the two drawers and shelve than it did to replace the End Cap. The part I ordered was exactly what I needed.
Parts Used:
-
David L. from Red Rock, TX
-
Difficulty Level:Really Easy
-
Total Repair Time:Less than 15 mins
-
Tools:Nutdriver
5 of 5 people
found this instruction helpful.
Was this instruction helpful to you?
Thank you for voting!
Power cord was cut
I removed the 5/16 inch hex head nuts holding the rear access panel where the power cord was connected. Once removed, I released the Molex plug and ground wire. I connected the new cord, screwed in the ground and installed the rear panel. Having the exact OEM part made the job quick and easy.
Parts Used:

-
Frederick from Hanover, MA
-
Difficulty Level:Easy
-
Total Repair Time:15 - 30 mins
-
Tools:Nutdriver
6 of 8 people
found this instruction helpful.
Was this instruction helpful to you?
Thank you for voting!
RH door closure broke
Removed the door and replaced the broken door closure bushing. I had courteous help and responce from Parts Select people. Excelent turn around time on parts delivery.
Parts Used:

-
Estel from Luling, TX
-
Difficulty Level:Easy
-
Total Repair Time:1- 2 hours
-
Tools:Nutdriver, Screw drivers
10 of 21 people
found this instruction helpful.
Was this instruction helpful to you?
Thank you for voting!
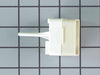
not cooling ... ocassional "clicking" sound
I followed Isako From Burlingame CA's step by step instructions above and completed the replacement/repair in a snap.
Parts Used:
-
Amir from Brooklyn, NY
-
Difficulty Level:Really Easy
-
Total Repair Time:15 - 30 mins
-
Tools:Nutdriver, Screw drivers
5 of 6 people
found this instruction helpful.
Was this instruction helpful to you?
Thank you for voting!
Did not need filter
-
Geraldine from MUNDELEIN, IL
-
Difficulty Level:Very Easy
-
Total Repair Time:15 - 30 mins
5 of 6 people
found this instruction helpful.
Was this instruction helpful to you?
Thank you for voting!
top support clip broke
.screw held in the center of the rail,pull it out,slide the rail up off the support brackets on the door,unplug the old one & plug in the new one,slide on, & replace the screw! That Easy
Parts Used:
-
Gregory from South Glens Falls, NY
-
Difficulty Level:Really Easy
-
Total Repair Time:Less than 15 mins
-
Tools:Nutdriver
5 of 6 people
found this instruction helpful.
Was this instruction helpful to you?
Thank you for voting!
Freezer cold, Refrigerator warm
I did some research online, and was sure that it was the evaporator fan motor that was not working. So I paid more for overnight shipping than I did for the fan motor to have it over-nighted. I removed the botttom freezer door by simply pulling out and lifting it up. I then removed the wire shelf by pulling it straight out. Removed the ice maker by removing the three screws that held it in place . Disconnected the the wire harness, and pulled it out. Then I popped off the plastic vent at the top of the freezer's interior rear cover. Removed the rear cover by removing the four or so screws holding it on to expose the evap fan motor and the freezer coil. Careful, the fins are fragile and sharp. I inspected the fan motor and it seemed to be working fine. I unplugged the fridge and plugged it back in. It went through a defrost cycle and I put it all back together again. Cranked the frige unit up to 7, and was able to lower the freezer to 4. It's been working ever since. Eventually I was able to lower the fridge back down to 6. Long of the short is I paid $60 for nothing.
Parts Used:
-
Randall from Nashville, TN
-
Difficulty Level:Really Easy
-
Total Repair Time:Less than 15 mins
-
Tools:Nutdriver, Screw drivers
7 of 12 people
found this instruction helpful.
Was this instruction helpful to you?
Thank you for voting!
Refrigerator light would not stay on
Removed the 2 screws holding the light bulb shield, then the 4 uolding the metal panel. Unplugged the olw door switch and replaced.
reassembled the pieces.
reassembled the pieces.
Parts Used:

-
Dave from Manchester Center, VT
-
Difficulty Level:Easy
-
Total Repair Time:15 - 30 mins
-
Tools:Nutdriver, Socket set
4 of 4 people
found this instruction helpful.
Was this instruction helpful to you?
Thank you for voting!
Did not have the right size ratchet head
Receive the parts. Review the video. Thought I can do this got down to the screw and I didn’t have is a ratchet small enough to remove the screw so I had to call D.O.C appliances to do the install Michael was here less than 15 minutes
Parts Used:

-
Francis from SHELBY TWP, MI
-
Difficulty Level:Really Easy
-
Total Repair Time:30 - 60 mins
4 of 4 people
found this instruction helpful.
Was this instruction helpful to you?
Thank you for voting!
broken roller
proped up frig, loosened screws, cut pin, installed rooler w/ new pin, rounded pin end, reistalled, lowered frig...everyone happy, thanks again partselect.
Parts Used:

-
John from Capac, MI
-
Difficulty Level:Really Easy
-
Total Repair Time:15 - 30 mins
-
Tools:Nutdriver
4 of 4 people
found this instruction helpful.
Was this instruction helpful to you?
Thank you for voting!
Insulation was disintegrating.
On the back of the refrigerator, I unscrewed and removed the lower-right panel. As I peeled the insulation off the panel, the insulation would disintegrate, so I used a vacuum-cleaner hose to remove most of the insulation. I removed the remaining adhesive with my fingers. I peeled the backing off the new insulation, and stuck it to the panel.
I had ordered two pieces of insulation, hoping to also replace the insulation behind the compressor, but removing the compressor was complicated and risky, so I returned the second piece of insulation.
I had ordered two pieces of insulation, hoping to also replace the insulation behind the compressor, but removing the compressor was complicated and risky, so I returned the second piece of insulation.
Parts Used:
-
Julie from San Diego, CA
-
Difficulty Level:Really Easy
-
Total Repair Time:15 - 30 mins
-
Tools:Screw drivers
4 of 4 people
found this instruction helpful.
Was this instruction helpful to you?
Thank you for voting!
Compressor stopped running
I opened up the back panel, and with a multimeter found that the compressor was not getting power. The voltage stopped at the connection socket and run capacitor. Unplugged the fridge and discharged the capacitor, CAREFULLY removed these parts and replaced them. Fridge works now. The repair guy gave me an estimate of $900, but with partselect, I fixed my fridge for $63 including overnight shipping.
Remember to unplug the fridge before removing the back panel, and vacuum any dust and dirt before you work. The power to the compressor is at WALL OUTLET LEVELS and can cause serious injury or death. Please be careful and wear proper protective equipment. The repair may extremely simple, but that does not mean you should be careless.
Remember to unplug the fridge before removing the back panel, and vacuum any dust and dirt before you work. The power to the compressor is at WALL OUTLET LEVELS and can cause serious injury or death. Please be careful and wear proper protective equipment. The repair may extremely simple, but that does not mean you should be careless.
Parts Used:

-
Stephen from Tuscaloosa, AL
-
Difficulty Level:Easy
-
Total Repair Time:15 - 30 mins
-
Tools:Screw drivers, Socket set
5 of 7 people
found this instruction helpful.
Was this instruction helpful to you?
Thank you for voting!