




















59663222200 Kenmore Refrigerator - Instructions
Keep searches simple. Use keywords, e.g. "leaking", "pump", "broken" or "fit".
light bulb in water ice freezer door went bad
I didn't. Don't know how to get to light bulb to change it for this specific model
Parts Used:

-
Carl from RIVERSIDE, CA
-
Difficulty Level:Very Difficult
-
Total Repair Time:More than 2 hours
-
Tools:Screw drivers
8 of 14 people
found this instruction helpful.
Was this instruction helpful to you?
Thank you for voting!
Refrigerator and freezer was not cooling. The compressor would not stay running. When the compressor kicked on it would only run for a few seconds and got warm real quickly. I replaced both the overload relay combination and the running capacitor. Don't know what the problem is. I thought for sure t
disconnected wire connections, pulled old overload relay and running capacitor out like a plug and plug in the new one then reconnected the wires.
Parts Used:

-
Ronald from Monroe, WA
-
Difficulty Level:Really Easy
-
Total Repair Time:15 - 30 mins
-
Tools:Nutdriver, Screw drivers
6 of 8 people
found this instruction helpful.
Was this instruction helpful to you?
Thank you for voting!
The Switch Broke...Absolutely Fell Apart.
I simply removed the old switch using 2 small screwdrivers and the old switch case popped out. I then upluged the wires from the old switch and reversed the process. Didn't take longer than 5 minutes begining to end! Thank you for the great service! Duncan quaid
Parts Used:

-
Duncan from Metairie, LA
-
Difficulty Level:Really Easy
-
Total Repair Time:Less than 15 mins
-
Tools:Screw drivers
5 of 5 people
found this instruction helpful.
Was this instruction helpful to you?
Thank you for voting!
needed a replacement crisper pan drawer for fridge
The part came the next day, very quick. The wrong size ended up in box we recieved. The part # we ordered was correct, just a mix up in the packaging process. I called and the customer service dept. had a new correct crisper pan delivered to my door two days later. Even with the mix up it was very fast and a good price compared to other sites. I would order again in the future.
Parts Used:

-
Angela from Oconomowoc, WI
-
Difficulty Level:Really Easy
-
Total Repair Time:Less than 15 mins
5 of 6 people
found this instruction helpful.
Was this instruction helpful to you?
Thank you for voting!
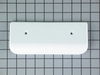
Appliance has Freezer on bottom and Someone dropped Item on handle a broke it
-
David from Valley Grande, AL
-
Difficulty Level:Really Easy
-
Total Repair Time:Less than 15 mins
-
Tools:Screw drivers
5 of 6 people
found this instruction helpful.
Was this instruction helpful to you?
Thank you for voting!
refrigerator not cooling properly
Replaced refrigerator cooling control. No luck. Replaced freezer cooling control. No luck. Coils were icing up. Unplugged frig and allowed coils to defrost. After more poking around, found that condenser fan was not spinning. Touch it and it'd start. That was definitely in need of replacement. Replacement was easy. Refrigerator is now running as it should.
Parts Used:

-
Ernie from Windsor, CA
-
Difficulty Level:Really Easy
-
Total Repair Time:1- 2 hours
6 of 9 people
found this instruction helpful.
Was this instruction helpful to you?
Thank you for voting!
half of the freezer handle broke off
Not much to describe. Just used philips screwdriver and removed the two screws holding the handle in place. Discarded the broken handle, washed the area where the original handle was and replaced it with a brand new white handle (not yellowed with age)by replacing the two screws.
Parts Used:
-
dave from williamsville, NY
-
Difficulty Level:Really Easy
-
Total Repair Time:Less than 15 mins
-
Tools:Screw drivers
4 of 4 people
found this instruction helpful.
Was this instruction helpful to you?
Thank you for voting!
Ice maker eitehr wouldn't make ice, or made odd shaped cubes
First, I shut off the water going to the refrigerator, then removed the ice bin. Then I loosened the two screws on the top of the ice maker (the one toward the front was a little tricky, since you can't see it at all), then removed the screw that fastens the lower bracket to the side of the frig. Then I lifted up on it slightly to remove it from the two upper screws, then unplugged the wiring harness from the side of the refrigerator and lifted the whole unit out of the frig.
I then removed the plastic cover on the front of the ice maker, pressed on the tab to remove the wiring harness from the old ice maker, and installed it on the new ice maker. I then removed the metal arm from the old ice maker and installed it on the new unit as well. The last part that I moved from the old ice maker to the new one was the lower bracket, as the bracket on the new ice maker was bent during shipping.
Once those parts were swapped, I put the plastic cover on the new ice maker, plugged the wiring harness back into the side of the frig, routed the fill tube into the back on the ice maker assembly, and set the unit back on the two upper screws. I then put the screw back in the lower bracket, tightened the two upper screws, and then put the ice bin back in and turned the water back on. After a couple of hours, I threw out the first couple of batches of ice and it is now working as it had in the past.
I also noticed, when looking at the old ice maker, that the black plastic coating was coming off the ice cube tray, so it was a good time to be replacing it anyway. Overall, a very easy job (I was prepared for swearing, parts being slightly off, etc.) and it would have been a shame to have paid someone to do it.
I then removed the plastic cover on the front of the ice maker, pressed on the tab to remove the wiring harness from the old ice maker, and installed it on the new ice maker. I then removed the metal arm from the old ice maker and installed it on the new unit as well. The last part that I moved from the old ice maker to the new one was the lower bracket, as the bracket on the new ice maker was bent during shipping.
Once those parts were swapped, I put the plastic cover on the new ice maker, plugged the wiring harness back into the side of the frig, routed the fill tube into the back on the ice maker assembly, and set the unit back on the two upper screws. I then put the screw back in the lower bracket, tightened the two upper screws, and then put the ice bin back in and turned the water back on. After a couple of hours, I threw out the first couple of batches of ice and it is now working as it had in the past.
I also noticed, when looking at the old ice maker, that the black plastic coating was coming off the ice cube tray, so it was a good time to be replacing it anyway. Overall, a very easy job (I was prepared for swearing, parts being slightly off, etc.) and it would have been a shame to have paid someone to do it.
Parts Used:

-
J. Bradley from Wellsville, NY
-
Difficulty Level:Easy
-
Total Repair Time:Less than 15 mins
-
Tools:Nutdriver
4 of 4 people
found this instruction helpful.
Was this instruction helpful to you?
Thank you for voting!
broken roller
proped up frig, loosened screws, cut pin, installed rooler w/ new pin, rounded pin end, reistalled, lowered frig...everyone happy, thanks again partselect.
Parts Used:

-
John from Capac, MI
-
Difficulty Level:Really Easy
-
Total Repair Time:15 - 30 mins
-
Tools:Nutdriver
4 of 4 people
found this instruction helpful.
Was this instruction helpful to you?
Thank you for voting!
Refrigerator light would not stay on
Removed the 2 screws holding the light bulb shield, then the 4 uolding the metal panel. Unplugged the olw door switch and replaced.
reassembled the pieces.
reassembled the pieces.
Parts Used:
-
Dave from Manchester Center, VT
-
Difficulty Level:Easy
-
Total Repair Time:15 - 30 mins
-
Tools:Nutdriver, Socket set
4 of 4 people
found this instruction helpful.
Was this instruction helpful to you?
Thank you for voting!
Thought motor was bad freezer cold fridge hot
Ordered new fan motor
Got part took fridge apart
Result was the motor was running
The fan blade had come off the motor
Replaced the motor anyway and reinstalled the fan, working well
Got part took fridge apart
Result was the motor was running
The fan blade had come off the motor
Replaced the motor anyway and reinstalled the fan, working well
Parts Used:

-
Wayne from PENNINGTON, NJ
-
Difficulty Level:Really Easy
-
Total Repair Time:30 - 60 mins
4 of 4 people
found this instruction helpful.
Was this instruction helpful to you?
Thank you for voting!
Water Fill Cup Broke
The Ice maker unit had to be removed and the shaft had to also be removed, which required dis-assembling the motor drive. The thickness of the shaft and the bearing fill cup prevents it from simply pushing it in place. Other than that I have Ice.
Parts Used:

-
Sam from Las Vegas, NV
-
Difficulty Level:A Bit Difficult
-
Total Repair Time:30 - 60 mins
-
Tools:Screw drivers
5 of 7 people
found this instruction helpful.
Was this instruction helpful to you?
Thank you for voting!
Broke the Rocker Switch in Fridge side
Popped out with butter knife and unplugged 3 prong connector and reversed with anew switch.
But, unfortunately it got broken again exactly same way as before.
So, I ordered same switch again for 2nd time.
Maytag should recall that Rocker Switch and build with better materials.
But, unfortunately it got broken again exactly same way as before.
So, I ordered same switch again for 2nd time.
Maytag should recall that Rocker Switch and build with better materials.
Parts Used:

-
Sung-Su from BISMARCK, ND
-
Difficulty Level:Very Easy
-
Total Repair Time:Less than 15 mins
4 of 4 people
found this instruction helpful.
Was this instruction helpful to you?
Thank you for voting!
Ice Maker was leaking
Used socket set to remove screws. Removed the wire harness, then removed lift arm from old ice maker and then put lift arm on the new ice maker. Reinstall wire harness then installed back in freeze with the screws. Video was very helpful. I will do business with Partselect in the future. Shipping was very fast. Thanks Partselect
Parts Used:
-
Robert from Severn, MD
-
Difficulty Level:Really Easy
-
Total Repair Time:Less than 15 mins
-
Tools:Screw drivers, Socket set
4 of 4 people
found this instruction helpful.
Was this instruction helpful to you?
Thank you for voting!
Water overflowing ice maker
Removed the 3 screws that hold the ice maker in place and remove the cover and level wire. Put the cover and wire on new part and install the 3 screws. Had ice within 1 hour. A very easy job for the do it yourselfer. Suspect the heat coil that melts the cubes was not working in the old unit and cubes stayed in the tray.
Parts Used:
-
James from Denver, NC
-
Difficulty Level:Really Easy
-
Total Repair Time:Less than 15 mins
-
Tools:Nutdriver
5 of 8 people
found this instruction helpful.
Was this instruction helpful to you?
Thank you for voting!