




















596467934951 Kenmore Refrigerator - Instructions
Keep searches simple. Use keywords, e.g. "leaking", "pump", "broken" or "fit".
Freezer Bulb failed
-
Kevin from SWANVILLE, ME
-
Difficulty Level:Very Easy
-
Total Repair Time:Less than 15 mins
3 of 5 people
found this instruction helpful.
Was this instruction helpful to you?
Thank you for voting!
Freezer not defrosting and making fridge run warm.
Super simple following the instruction video you posted. Thanks!
Parts Used:

-
Brent from PRESCOTT, AZ
-
Difficulty Level:Really Easy
-
Total Repair Time:30 - 60 mins
-
Tools:Nutdriver
2 of 2 people
found this instruction helpful.
Was this instruction helpful to you?
Thank you for voting!
My refrigerator vegetable bins were sagging when I placed veggies in it.
I came across this site and looked at the diagrams. Instead of buying a new crisper bin frame, I noticed that the crisper bin frame was missing the frame brace. I purchased the frame brace and installed it in the crisper frame, which was easy to push into the slot. This solved my problem. No more sag!!
Parts Used:

-
Lee from SAMMAMISH, WA
-
Difficulty Level:Easy
-
Total Repair Time:30 - 60 mins
-
Tools:Screw drivers
2 of 2 people
found this instruction helpful.
Was this instruction helpful to you?
Thank you for voting!
Refridgerator was not cooling as cold as normal
Removed the freezer door, by loosening 4 screws and pulling upwards to disengage door from frame. Removed the top basket by pulling up on both slides on the gear shaft sides, note they have retaining tabs you must push in. once the slide / guards are up the top basket comes out. Remove the bottom basket. Remove to angled screws on the top tracks and remove. Remove 6 screws on bottom slides, 3 per side and slide out as a whole unit. Unplug the ice maker, remove 3 screws for it to come out. Note I cleaned mine while it was out with vinegar to remove the mineral build up on it. Remove the screws in the back panel, and pull it forwards. The top vent has 2 clips that hold it in and you will need to remove it prior to fully removing the plate. The plug for the icemaker needs to be removed also. Pull the back plate out. Once the plate is out you can see the fan and access it. Unplug the clips that hold the wiring harness secure. 2 screws to remove the fan assembly. Once fan assembly is out, disassemble it, then reverse assemble it with new parts and fire it up. Mine took right off and running like its brand new.
Parts Used:

-
Frank from Winchester, IN
-
Difficulty Level:Easy
-
Total Repair Time:30 - 60 mins
-
Tools:Nutdriver, Screw drivers
2 of 2 people
found this instruction helpful.
Was this instruction helpful to you?
Thank you for voting!
Broke shelf holder hook
This is the small part that is critical to having a fully usable refrigerator but one that no one (even an authorized shop) has in stock. Just pop it back in, and you're done.
Parts Used:
-
Stanley from Pompton Lakes, NJ
-
Difficulty Level:Easy
-
Total Repair Time:Less than 15 mins
3 of 5 people
found this instruction helpful.
Was this instruction helpful to you?
Thank you for voting!
Ladder hooks broke
Pulled out broken parts and snapped/ pushed into place new ladder hooks 15 min max
Parts Used:
-
Miguel from ESCONDIDO, CA
-
Difficulty Level:Very Easy
-
Total Repair Time:Less than 15 mins
2 of 2 people
found this instruction helpful.
Was this instruction helpful to you?
Thank you for voting!
Ice maker quit working
Unplugged wire plug, removed mounting screws and removed ice maker. Installed new unit by reversing steps--
Parts Used:
-
Lloyd from Algona, IA
-
Difficulty Level:Really Easy
-
Total Repair Time:30 - 60 mins
-
Tools:Nutdriver
2 of 2 people
found this instruction helpful.
Was this instruction helpful to you?
Thank you for voting!
Clips on old toe kick plate were broken on one side. Would not stay on
Took the new kick plate out of the box. Snapped it into position. I have had a repairman for this refrigerator before. I would rather repair an appliance than buy a new one. I'm very proud that I thought to get a replacement part myself instead of calling my friendly repairman again. Saved a few dollars.
Parts Used:

-
Janet from SOUTH ST PAUL, MN
-
Difficulty Level:Very Easy
-
Total Repair Time:Less than 15 mins
2 of 2 people
found this instruction helpful.
Was this instruction helpful to you?
Thank you for voting!
the freezer and refrigerator number would lower it self and eventually get to "-" and "-" essentially shutting it self off!!
I replaced the Control Board...
the two boards need to be installed first . than plug in the connectors
(refrigerator was unplugged of course.!) i plugged in the connectors first. and had to disconnect them. install the boards first. than plug in the electrical connectors.. strange for a day or two it still did not work properly and than one day. it started working ok 7 on the freezer and 3 on the refrigerator. I do not know why..
the two boards need to be installed first . than plug in the connectors
(refrigerator was unplugged of course.!) i plugged in the connectors first. and had to disconnect them. install the boards first. than plug in the electrical connectors.. strange for a day or two it still did not work properly and than one day. it started working ok 7 on the freezer and 3 on the refrigerator. I do not know why..
Parts Used:
-
Marc from SEASIDE, CA
-
Difficulty Level:A Bit Difficult
-
Total Repair Time:30 - 60 mins
-
Tools:Screw drivers
2 of 2 people
found this instruction helpful.
Was this instruction helpful to you?
Thank you for voting!
Ice was not ejecting - motor was dead
Followed some online videos. The replacement part actually matched exactly what the videos I found showed. It was my refrigerator that was slightly different where the unit would mount/screw into. The old unit had a bracket which easily attached to the replacement part. It is less than a 1 hour repair for sure. But it took me a few minutes to figure out the bracket adapter. Plus I forgot to seat the ice maker shut off bar and had to disassemble some things again to get in there to seat it properly. Part was shipped quickly and securely !
Parts Used:
-
David from PITTSBORO, NC
-
Difficulty Level:Really Easy
-
Total Repair Time:1- 2 hours
-
Tools:Nutdriver, Screw drivers
2 of 2 people
found this instruction helpful.
Was this instruction helpful to you?
Thank you for voting!
Freezer cold ; fridge warm . Freezer not defrosting.
Unplugged fridge
Pulled light cover off
Used screwdrivers to press in on tabs holding control board cover.
Unplug wiring harnesses.
Snapped board in two.
Install in cover
Reattach wires
Done
Pulled light cover off
Used screwdrivers to press in on tabs holding control board cover.
Unplug wiring harnesses.
Snapped board in two.
Install in cover
Reattach wires
Done
Parts Used:
-
Tim from Oxford, MA
-
Difficulty Level:Really Easy
-
Total Repair Time:1- 2 hours
-
Tools:Screw drivers
2 of 2 people
found this instruction helpful.
Was this instruction helpful to you?
Thank you for voting!
Rear mount tab broken on Center Crisper Rail
It took longer to empty the glass shelf above the Crisper Bins than to replace the rail. Since the part simply snaps in place, no tools were required
Parts Used:
-
Joseph from Live Oak, FL
-
Difficulty Level:Really Easy
-
Total Repair Time:Less than 15 mins
2 of 2 people
found this instruction helpful.
Was this instruction helpful to you?
Thank you for voting!
Did not have a ice pan

-
DEBRA from STATE COLLEGE, PA
-
Difficulty Level:Really Easy
-
Total Repair Time:Less than 15 mins
2 of 2 people
found this instruction helpful.
Was this instruction helpful to you?
Thank you for voting!
Ice in the freezer/ condensation in the refrigerator
The icing n the freezer and wetness/ humidity in the fridge would not stop. I reasoned the freezer seal was bad and letting the outside humidity in. This fridge had been moved to the garage after a new one was put in my house. The new door seals completely fixed the problem, works perfectly now.
Parts Used:
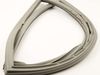
-
Ken from Santa Rosa Beach, FL
-
Difficulty Level:Really Easy
-
Total Repair Time:Less than 15 mins
2 of 2 people
found this instruction helpful.
Was this instruction helpful to you?
Thank you for voting!
The center rail was broken
The part just snapped in. super easy.
Parts Used:
-
Joella from THE DALLES, OR
-
Difficulty Level:Very Easy
-
Total Repair Time:Less than 15 mins
2 of 2 people
found this instruction helpful.
Was this instruction helpful to you?
Thank you for voting!