




















41794092500 Kenmore Dryer - Instructions
Keep searches simple. Use keywords, e.g. "leaking", "pump", "broken" or "fit".
loud persistent rubbing noise
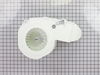
Blower wheel came apart from molded-in nut, was loose, was rubbing on housing wall, and was likelynot moving to much air. I read some troubled stories about separating the wheel nut from the motor shaft so bought a new motor and blower housing and install wall pretty easy. There are videos on the teardown process and does that long and not alot of parts to keep track of either. I have already done the felt drum liner and rear drum ball and belt so if it's older than 15 years and your going to take the dryer apart, replace all these parts and you will about have new dryer at half the cost of new.
Parts Used:
-
Alan from ROCHESTER, MN
-
Difficulty Level:Really Easy
-
Total Repair Time:30 - 60 mins
-
Tools:Screw drivers
1 person
found this instruction helpful.
Was this instruction helpful to you?
Thank you for voting!
Dryer making metal on metal noise....
Just like in the video, but with a stackable washer/dryer unit, works like new now....
Parts Used:

-
James from RACINE, WI
-
Difficulty Level:Easy
-
Total Repair Time:1- 2 hours
-
Tools:Nutdriver, Screw drivers
1 person
found this instruction helpful.
Was this instruction helpful to you?
Thank you for voting!
Had a squelch/squeak coming from the rear of the unit
I looked up a YouTube video on my specific model. Found one that said “basic disassembly”. I watched that and had it apart and back together in no time. Very easy to take apart and put new parts back in it. Re-assembled and since the repair no squeaking.
Parts Used:
-
Stephen from HICKSVILLE, OH
-
Difficulty Level:Really Easy
-
Total Repair Time:30 - 60 mins
-
Tools:Screw drivers, Socket set
1 person
found this instruction helpful.
Was this instruction helpful to you?
Thank you for voting!
Tumbler not moving
Removed back panel. Popped off top of dryer, then removed front of dryer. Slid belt onto tumbler, put front cover back on, put top back on and adjusted belt frombottom panel cover.
Parts Used:
-
Francis from Middletown, NY
-
Difficulty Level:Easy
-
Total Repair Time:15 - 30 mins
-
Tools:Nutdriver, Socket set
2 of 4 people
found this instruction helpful.
Was this instruction helpful to you?
Thank you for voting!
Dryer was very noisy, like a vibration,or bad bearing
First i replaced the drum bushing on the rear of the drum ,it was definitely bad but noise was still there
Decided it was the blower assy , pulled the dryer out disconnected the power,took off the frt panel with the door, disconnected the wiring to motor remover motor and fan assy, most trouble i had was fan is on motor with reverse threads messed with removing fan until I figured out it was backwards after that removed old fan and housing installed new one ,put dryer back together,started it and only normal noises
Good for another 5 years
Chuck
Decided it was the blower assy , pulled the dryer out disconnected the power,took off the frt panel with the door, disconnected the wiring to motor remover motor and fan assy, most trouble i had was fan is on motor with reverse threads messed with removing fan until I figured out it was backwards after that removed old fan and housing installed new one ,put dryer back together,started it and only normal noises
Good for another 5 years
Chuck
Parts Used:
-
Charles from PITTSBURGH, PA
-
Difficulty Level:A Bit Difficult
-
Total Repair Time:1- 2 hours
-
Tools:Screw drivers, Socket set
1 person
found this instruction helpful.
Was this instruction helpful to you?
Thank you for voting!
noisy dryer
I followed the instillation instructions provided on your website. They were very informative and spot on. My only problem was my strength. I could not get the drum off of the rear bearing myself, but then I am a 61 year old female.
Parts Used:
-
Christy from BRIDGEPORT, OH
-
Difficulty Level:Easy
-
Total Repair Time:1- 2 hours
-
Tools:Screw drivers, Socket set
1 person
found this instruction helpful.
Was this instruction helpful to you?
Thank you for voting!
Could not do as video.
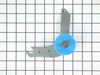
Had to open back side vent & use needle nose to secure spring.
Parts Used:
-
Linda from COVINGTON, KY
-
Difficulty Level:A Bit Difficult
-
Total Repair Time:1- 2 hours
-
Tools:Pliers, Screw drivers
1 person
found this instruction helpful.
Was this instruction helpful to you?
Thank you for voting!
Very loud squeak
First I unplugged the dryer. Then I gently pryed the top of the dryer. This was done from the front using a flat screw driver. Do this gently pushing up on the handle of the tool. It will pop up one side at a time. No need to remove the screws and clips on the the rear top of the dryer. Set the top aside. Then from the inside front of the dryer using a phillips screw driver I removed two screws, one on each side. This allowed me to lift the front of the dryer up and away from the unit, off the two clips on the bottom front of the unit. I set the front cover on top of the dryer. There is no need to disconnect any wires. Next removed the rear vented cover on the back of the dryer so I could acess the belt pullies. From here I pushed the upper left pully to the right to ease belt tension and take the belt off that pully. Slide the belt to the rear of the drum. Next I removed the three screws from the center most part of the inside of the dryer drum. My dryer required the use of a square head driver tool. This allowed me to easily bring the dryer drum out the front of the unit. Set it out of your way. Then I vacuumed the dust out of the dryer. Then I lifted out the metal part that resembles a trailer hitch which had been attached to the dryer drum. Next using a nut driver I removed the two screws which hold the white plastic part of the bearing assembly to the rear of the dryer. That is all the taking apart work.
Putting it all back together was not too difficult. First install the new white plastic part of the bearing assmbly inside the dryer along with the metal part on the outside rear. The little metal ball bearing goes on the OUTSIDE between the little metal part and the rear wall of the dryer. Do not leave it out as it provides electrical grounding between the dryer drum and the body of the dryer. Next attach the new bearing part that looks like a trailer hitch to the rear of the dryer drum. This is the three screw part. Then lift the drum back into the dryer. Do not yet set the drum all the way in. The dryer belt must be looped around the drum. I installed a new belt. If the bearing is worn out it is time for a new belt. The smooth side of the belt goes against the dryer drum. Now apply a generous amout of lubricant to the white plastic cradle which was installed on the back of the dryer and to the ball bearing area. Then the dryer drum may be set into place, that is the trailer hitch part into the white plastic cradle. Now the front of the dryer may be reinstalled. Push up on the inside of the dryer drum to line everything back up. Put the two screws back which hold the dryer front on. Be carefull not to drop them inside. Put the dryer belt back into place on its pullies. It goes on the inside of the left and right pullies and on the outside (bottom) of the pully of the dryer motor. Check for and undo any twists. Plug in and test the dryer. All should be well. Reinstall the rear vented cover. Replace the top, connecting the rear first. Make sure to reattach the green grounding wire. Then push the front of the top down onto its clips. You are done! This took me 1 hour and 10 minutes. It sounds like alot but you can do it! Empower yourself!
Putting it all back together was not too difficult. First install the new white plastic part of the bearing assmbly inside the dryer along with the metal part on the outside rear. The little metal ball bearing goes on the OUTSIDE between the little metal part and the rear wall of the dryer. Do not leave it out as it provides electrical grounding between the dryer drum and the body of the dryer. Next attach the new bearing part that looks like a trailer hitch to the rear of the dryer drum. This is the three screw part. Then lift the drum back into the dryer. Do not yet set the drum all the way in. The dryer belt must be looped around the drum. I installed a new belt. If the bearing is worn out it is time for a new belt. The smooth side of the belt goes against the dryer drum. Now apply a generous amout of lubricant to the white plastic cradle which was installed on the back of the dryer and to the ball bearing area. Then the dryer drum may be set into place, that is the trailer hitch part into the white plastic cradle. Now the front of the dryer may be reinstalled. Push up on the inside of the dryer drum to line everything back up. Put the two screws back which hold the dryer front on. Be carefull not to drop them inside. Put the dryer belt back into place on its pullies. It goes on the inside of the left and right pullies and on the outside (bottom) of the pully of the dryer motor. Check for and undo any twists. Plug in and test the dryer. All should be well. Reinstall the rear vented cover. Replace the top, connecting the rear first. Make sure to reattach the green grounding wire. Then push the front of the top down onto its clips. You are done! This took me 1 hour and 10 minutes. It sounds like alot but you can do it! Empower yourself!
Parts Used:
-
George from Bozeman, MT
-
Difficulty Level:Easy
-
Total Repair Time:1- 2 hours
-
Tools:Nutdriver, Screw drivers
1 person
found this instruction helpful.
Was this instruction helpful to you?
Thank you for voting!
Dryer was squealing ( Tennant Complaint)
Followed the video as my unit was exact model( Front Loader) Thank You for your quick ship to me here in Iowa as my repair was made in St. Louis. Parts came with in 2 days then drove to St. Louis with confidence. We purchased this set in 2003 and it is first repair on dryer. This in my rental unit. Thx
Parts Used:
-
John from DES MOINES, IA
-
Difficulty Level:Really Easy
-
Total Repair Time:1- 2 hours
-
Tools:Screw drivers, Socket set
1 person
found this instruction helpful.
Was this instruction helpful to you?
Thank you for voting!
The drum was not rotating smooth. It was noisy and the belt broke loose
-
Isaias from LAREDO, TX
-
Difficulty Level:Easy
-
Total Repair Time:1- 2 hours
-
Tools:Nutdriver, Screw drivers, Socket set
1 of 2 people
found this instruction helpful.
Was this instruction helpful to you?
Thank you for voting!
Appeared to be a failed belt
Appearances can be deceiving.....while dis-assembly was a piece of cake; the problem turned out to be failed welds on the dryer drum. REMEMBER this before you make a parts decision. Examine the problem.FIRST! (this comeing from a guy who used to Manage an appliance repair shop WAY back in the day....DUH!)Solution?....new dryer; repair cost too high. None the less...at least I have a spare belt !!!
Parts Used:
-
Marci A. from Neptune, NJ
-
Difficulty Level:Really Easy
-
Total Repair Time:15 - 30 mins
-
Tools:Screw drivers
1 of 2 people
found this instruction helpful.
Was this instruction helpful to you?
Thank you for voting!
dryer would dry for the first 5 min them make noise with no heat.
my experience was just like the other responses. top comes off, 2 screws and the front comes off and the screws to the solenoids come off. Replaced the solenoids and put everything back together.
Parts Used:
-
Matthew from lake villa, IL
-
Difficulty Level:Really Easy
-
Total Repair Time:Less than 15 mins
-
Tools:Screw drivers
1 of 2 people
found this instruction helpful.
Was this instruction helpful to you?
Thank you for voting!
Propane dryer would not ignite
Cover of the dryer pops off and hinges back. Use a flat screw driver to pop the clips on the front sides. Two phillips head screws hold the front panel on. Remove them then lift the panel off the clips at the bottom. Two phillips head hold the Ignition Coil bracket in place. Take note of the direction of the cable connection, it's not marked. Dryer would ignite intermittently. Clothes were not dry after 1 hour.
Parts Used:
-
chris from Hinesburg, VT
-
Difficulty Level:Really Easy
-
Total Repair Time:Less than 15 mins
-
Tools:Screw drivers
1 of 2 people
found this instruction helpful.
Was this instruction helpful to you?
Thank you for voting!
Dryer would run for several seconds and then stop. The indicicator lights would then flash.
I seen a post on your website referring to the exact problem I was having. One of your staff recommended changing the control thermistor, which I did following the U-Tube video link you supplied. The repair went well and the dryer now operates perfectly ! Thanks for the accurate and helpful info.
Parts Used:
-
Arthur from North Merrick, NY
-
Difficulty Level:Really Easy
-
Total Repair Time:30 - 60 mins
-
Tools:Screw drivers
1 of 2 people
found this instruction helpful.
Was this instruction helpful to you?
Thank you for voting!
Dryer made a loud squeaking noise was ready to get a new one
I first diagnosed the problem using a Google search. Amazing how many hits I got and after reading a few was pretty certain what the cause was and what parts I probably needed to make the repair.
Some of the articles I read had links or mentioned PartSelect, so I searched for my model # and found the parts I would probably need. Knowing that I could probably get the parts I needed I disassembled the dryer (pretty easy really) and removed the old suspect part. It was devoid of lubricant and the bearing and ball showed some wear so I ordered the Bearing Assembly suggested by PartSelect (the illustrations looked just like my old parts). I left the dryer disassembled while I waited for the part, figuring it would take a week or so to arrive.
Much to my surprise, the part arrived three days later and after cleaning the dryer innards of all collected lint I put it all back together in 30 minutes.
So for a little research, a $30 part, and about an hour of my time, I have a clean and quiet operating dryer. I see no reason I can't get another 10 or so years out of it.
I consider myself a reasonably handy guy but had never worked on a dryer before. I'll be unlikely to ever call a repairman without first doing some investigation and seeing if the parts are available. With the internet and PartSelect I think I could take on a lot of other repairs I'm not familiar with. Thanks for a great outcome this time around.
Kevin
Some of the articles I read had links or mentioned PartSelect, so I searched for my model # and found the parts I would probably need. Knowing that I could probably get the parts I needed I disassembled the dryer (pretty easy really) and removed the old suspect part. It was devoid of lubricant and the bearing and ball showed some wear so I ordered the Bearing Assembly suggested by PartSelect (the illustrations looked just like my old parts). I left the dryer disassembled while I waited for the part, figuring it would take a week or so to arrive.
Much to my surprise, the part arrived three days later and after cleaning the dryer innards of all collected lint I put it all back together in 30 minutes.
So for a little research, a $30 part, and about an hour of my time, I have a clean and quiet operating dryer. I see no reason I can't get another 10 or so years out of it.
I consider myself a reasonably handy guy but had never worked on a dryer before. I'll be unlikely to ever call a repairman without first doing some investigation and seeing if the parts are available. With the internet and PartSelect I think I could take on a lot of other repairs I'm not familiar with. Thanks for a great outcome this time around.
Kevin
Parts Used:
-
Kevin from Kennewick, WA
-
Difficulty Level:Easy
-
Total Repair Time:30 - 60 mins
-
Tools:Nutdriver, Screw drivers
1 of 2 people
found this instruction helpful.
Was this instruction helpful to you?
Thank you for voting!