




















3890ERS Jenn-Air Cooktop - Instructions
Keep searches simple. Use keywords, e.g. "leaking", "pump", "broken" or "fit".
Replacing the bulb in the freezer side
Removed the ice brucket,
Removed the light shield by releasing one screw using a nutdriver.
Replacing the bulb and reinstalled the light shield.
Your web site is one of the best and most helpfull service sites I ever used. Just wish that in the future you will ship parts overseas.
Removed the light shield by releasing one screw using a nutdriver.
Replacing the bulb and reinstalled the light shield.
Your web site is one of the best and most helpfull service sites I ever used. Just wish that in the future you will ship parts overseas.
Parts Used:

-
Yafa (and David) from Bothell, WA
-
Difficulty Level:Easy
-
Total Repair Time:Less than 15 mins
-
Tools:Nutdriver
5 of 11 people
found this instruction helpful.
Was this instruction helpful to you?
Thank you for voting!
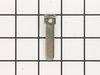
A local repair shop informed the individual that the burner unit could not be repaired and she would have to replace the cooktop..
After examining the burner unit I noticed that one of the male contact spades was burned and look deformed. After removing the spade I discovered that it had been originally manufactured incorrectly. I went on line to try and find the part. I found it at this site . I ordered 2 of the spades and replaced the deformed spade and another one that looked like it had gotten a little hot. She tried the unit and it worked perfectly. She had not used that burner unit for a very lengthy time. The investigation of the problem took a little time, but the repair went very fast. Moral is :" If a spade doesn't look right, it probably isn't", but either the individual spade or plug can be replaced. This site is now my "GO TO" place for parts.
Parts Used:
-
Sonny from MOUNT VERNON, GA
-
Difficulty Level:Very Easy
-
Total Repair Time:Less than 15 mins
-
Tools:Screw drivers, Socket set
2 of 2 people
found this instruction helpful.
Was this instruction helpful to you?
Thank you for voting!
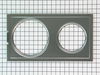
change the cartridge top to Stainless Steel
Changing the cartridge tops over to Stainless Steel was very easy and looks good,
Parts Used:
-
Sharon from REPUBLIC, WA
-
Difficulty Level:Really Easy
-
Total Repair Time:30 - 60 mins
-
Tools:Screw drivers, Socket set
2 of 2 people
found this instruction helpful.
Was this instruction helpful to you?
Thank you for voting!
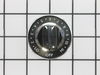
Numbers on surface burner knobs were illegibel.
I also sprayed them 3-times with a clear coat before installing. The clear coat I purchased at WalMart once I noticed it claimed to be safe for plastic. Avoid a clear lacquer based product.
Parts Used:
-
Wayne from NEENAH, WI
-
Difficulty Level:Very Easy
-
Total Repair Time:Less than 15 mins
2 of 3 people
found this instruction helpful.
Was this instruction helpful to you?
Thank you for voting!
Knobs were worn badly
Pulled off old knob, then pressed on the new one.
It was very easy, and the part was the correct one.
It was very easy, and the part was the correct one.
Parts Used:
-
Royce from Garland, TX
-
Difficulty Level:Really Easy
-
Total Repair Time:Less than 15 mins
2 of 3 people
found this instruction helpful.
Was this instruction helpful to you?
Thank you for voting!
Change the Oil/Grease Filter
It is so easy. Once I found the right size of filter from the website, I ordered it right away. It came in 3 days and I just need to take out the old one and insert the new one. No instruction is necessary. By the way, the price of the filter is one third of that from Jenn-air.
Parts Used:

-
Yong from Houston, TX
-
Difficulty Level:Really Easy
-
Total Repair Time:Less than 15 mins
2 of 3 people
found this instruction helpful.
Was this instruction helpful to you?
Thank you for voting!
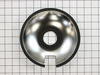
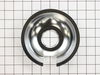
old part lasted more than 20 yrs so needed to replace
-
Anjali from TALLAHASSEE, FL
-
Difficulty Level:Very Easy
-
Total Repair Time:Less than 15 mins
1 person
found this instruction helpful.
Was this instruction helpful to you?
Thank you for voting!
All four knobs were stripped
We cleaned the rod on the stove and pushed the new knobs into place. This Jenn Air range was made in 1980. Nice to know Jenn Air is still making parts for their ranges. We also ordered new coil elements which fit perfectly size 6 inch and 8 inch.
Parts Used:
-
Christy from MOLALLA, OR
-
Difficulty Level:Very Easy
-
Total Repair Time:Less than 15 mins
1 person
found this instruction helpful.
Was this instruction helpful to you?
Thank you for voting!
Burner knobs were wearing out, metal rims were falling off.
Just slid off the old burner knobs, and pushed on the new ones. The most difficult part of the whole thing was just being sure that I ordered the correct knobs that used a D fitting. I ordered some a year ago that weren't the correct fitting.
Parts Used:
-
beatrice from TUCSON, AZ
-
Difficulty Level:Very Easy
-
Total Repair Time:Less than 15 mins
1 person
found this instruction helpful.
Was this instruction helpful to you?
Thank you for voting!
my old knobs were so worn that I couldn't see the numbers
I had tried several other "universal" brands from the home improvement center but nothing worked with my Jen-Aire. I finally ordered from PartSelect and they fit perfectly! My range-top looks brand new and finding and ordering the correct parts was amazingly easy. Thanks!
Parts Used:
-
Lynne from Weatherford, OK
-
Difficulty Level:Really Easy
-
Total Repair Time:Less than 15 mins
2 of 4 people
found this instruction helpful.
Was this instruction helpful to you?
Thank you for voting!
burner cartridge terminal broke due to electrical shock. circuit shortage caused the problem.
dissembled the burner, remove the broken blocpk and bad spade.rewiered and assembled the burner.
Parts Used:

-
Ge from Solon, OH
-
Difficulty Level:Really Easy
-
Total Repair Time:Less than 15 mins
-
Tools:Nutdriver, Screw drivers, Socket set
1 person
found this instruction helpful.
Was this instruction helpful to you?
Thank you for voting!
Elec. stove-top knobs (imprinted with HI to LO numbers 1 to 10)worn to non-readable.
Knobs sent fit the shafts, but due to molded internal stop wouldn't seat. Had to drill out the stop, and also file down the shafts a bit for knobs to seat acceptably closer to stove-top.
Parts Used:
-
Lenice from Stuart, FL
-
Difficulty Level:A Bit Difficult
-
Total Repair Time:30 - 60 mins
1 of 2 people
found this instruction helpful.
Was this instruction helpful to you?
Thank you for voting!
Burned out burner
Pulled out the old burner and plugged in the new!
Parts Used:
-
Esther from Alexandria, VA
-
Difficulty Level:Really Easy
-
Total Repair Time:Less than 15 mins
1 of 2 people
found this instruction helpful.
Was this instruction helpful to you?
Thank you for voting!
old nkobs old and discolored
-
WALTER from EL CAJON, CA
-
Difficulty Level:Really Easy
-
Total Repair Time:Less than 15 mins
1 of 2 people
found this instruction helpful.
Was this instruction helpful to you?
Thank you for voting!
knobs were getting hard to read.
Pulled old knobs off, pressed new ones on. Probably well under a minute for 6 knobs. Anyone with the IQ of a horseradish could have done it. But what was really great was the help and personality of the agent at the other end of the phone. Shipping was as promised, and the entire experience was delightful!
Parts Used:
-
Dave from Bloomingburg, NY
-
Difficulty Level:Really Easy
-
Total Repair Time:Less than 15 mins
1 of 2 people
found this instruction helpful.
Was this instruction helpful to you?
Thank you for voting!