




















3888VVA Magic Chef Range - Instructions
Keep searches simple. Use keywords, e.g. "leaking", "pump", "broken" or "fit".
original fixture required bulb - this fixture (all-in-one) was great
Pulled range out from cabinet-wall to get to back side, everthing was clearly exposed tlhen. Just a matter of installing new fixture, putting back on, reconnected power source - put range back in proper place.
Parts Used:

-
wesley from ODENVILLE, AL
-
Difficulty Level:Really Easy
-
Total Repair Time:30 - 60 mins
-
Tools:Pliers, Screw drivers
1 person
found this instruction helpful.
Was this instruction helpful to you?
Thank you for voting!
Bake element burned out
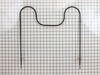
Very simple fix--unpugged two fittings in the back of oven plugged in the new element and it was done.The Best part was that the element burned out on a Sunday and I ordered the part that day and it shipped on Monday and received part on Wed AM.This is the second time I've had to replace the element and by ordering through Part Select I saved $24.00 versus buying it from an appliance store.
Don Samuelson
Don Samuelson
Parts Used:
-
Donald from Tomahawk, WI
-
Difficulty Level:Really Easy
-
Total Repair Time:15 - 30 mins
1 person
found this instruction helpful.
Was this instruction helpful to you?
Thank you for voting!
Bake Element broke
****Threw the breaker switch for the oven to the 'off' position****. Opened the oven. Unscrewed the phillips head screws at the back of the old element. Removed the connecting wire, taping them to the stove so that they wouldn't recede into the hole. Securely attached the connecting wires to the new element. Pushed the wires back into the holes in the stove. Removed the tape from the oven. Screwed the element into place. ****Threw the breaker switch back to the 'on' position****. Process took under 10 minutes.
DO NOT FORGET TO UNPLUG OR TURN OFF BREAKER BEFORE DOING ANYTHING WITH THE WIRES. Don't forget to turn it back on again when you are done.
DO NOT FORGET TO UNPLUG OR TURN OFF BREAKER BEFORE DOING ANYTHING WITH THE WIRES. Don't forget to turn it back on again when you are done.
Parts Used:
-
Joseph from Warwick, RI
-
Difficulty Level:Really Easy
-
Total Repair Time:Less than 15 mins
-
Tools:Screw drivers
1 person
found this instruction helpful.
Was this instruction helpful to you?
Thank you for voting!
Element burned in half
Took two screws out unplugged the element and plugged the new one in and replaced the screws and turned the breaker back on. Works great...Piece of cake..jk
Parts Used:
-
James from Allyn, WA
-
Difficulty Level:Really Easy
-
Total Repair Time:Less than 15 mins
-
Tools:Screw drivers
1 person
found this instruction helpful.
Was this instruction helpful to you?
Thank you for voting!
The bake oven element burned out
Removed two screws and disconnected the element. Reconnected the new element and reinstalled the screws
Parts Used:
-
Robert from LEXINGTON, MA
-
Difficulty Level:Very Easy
-
Total Repair Time:15 - 30 mins
-
Tools:Screw drivers
1 person
found this instruction helpful.
Was this instruction helpful to you?
Thank you for voting!
"F3" error message and no oven heat
Unplugged the range, removed screws holding the old sensor. When I pulled it out, the wire connecting to the sensor was completely broken through,therefore I could not just pull the wire to get to the connector. Unscrewed one side of back panel to access the connector. Pushed the connector and wire of the new sensor through the hole ( and behind the insulation), disconnected the old sensor and connected the new one. Re screwed the new connector in place plus rescrewed the back panel. Plugged the range in and - Viola! Everything now works like a charm and I have my oven back. Easy-Peasy. Oh - I am an older female with very limited DYI experience. I just saved myself $650.00!
Parts Used:

-
Pat from PAYSON, AZ
-
Difficulty Level:Very Easy
-
Total Repair Time:15 - 30 mins
-
Tools:Screw drivers
1 person
found this instruction helpful.
Was this instruction helpful to you?
Thank you for voting!
Oven door was locked, couldn't set oven temps
Got a bent metal coathook to temporarily release the oven door, removed the screws from the old probe, inserted the new one, and hooked it up, using the one of the plug adapters provided. Problem solved! The oven door latch was now disengaged, the oven would now accept temperature inputs, and the rear cooling fan (which wouldn't shut off) now turned off. That's a lot of things working better for less than $50!
Parts Used:
-
William from Nashville, TN
-
Difficulty Level:Easy
-
Total Repair Time:15 - 30 mins
-
Tools:Screw drivers
1 person
found this instruction helpful.
Was this instruction helpful to you?
Thank you for voting!
My original back leg broke because the floor is uneven. Had to pull it out several times.
Put the back of stove on blocks of wood to get high enough to screw the new leg in.
Parts Used:

-
Phyllis from BROWNVILLE, NY
-
Difficulty Level:Really Easy
-
Total Repair Time:Less than 15 mins
-
Tools:Wrench (Adjustable)
1 person
found this instruction helpful.
Was this instruction helpful to you?
Thank you for voting!
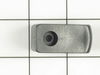
One of the broiler drawer guides broke
All I had to do was pull the drawer out and screw on the new part! Awesome experience...and it was so easy to find the part on the website, everything is very clear and with pictures to ensure where the part belongs...who could ask for more?
Parts Used:
-
Jeri from NEW RICHMOND, OH
-
Difficulty Level:Very Easy
-
Total Repair Time:Less than 15 mins
-
Tools:Screw drivers
1 person
found this instruction helpful.
Was this instruction helpful to you?
Thank you for voting!
Bake Element shorted out
I first shut off the breaker to the stove - safety first!
I used a phillips screw driver to remove the two screws that held the old element in. Then I pulled the old element out and used the pliers to remove the electrical connections. I put the new element in, made the electrical connections and secured it with the screws. After restoring powere via the breaker, we tested the stove and it worked. Just call me the Maytag Man!
I used a phillips screw driver to remove the two screws that held the old element in. Then I pulled the old element out and used the pliers to remove the electrical connections. I put the new element in, made the electrical connections and secured it with the screws. After restoring powere via the breaker, we tested the stove and it worked. Just call me the Maytag Man!
Parts Used:
-
Laurie from Clarence, NY
-
Difficulty Level:Really Easy
-
Total Repair Time:Less than 15 mins
-
Tools:Pliers, Screw drivers
1 person
found this instruction helpful.
Was this instruction helpful to you?
Thank you for voting!
bakeing element caught fire.
First I turned off power to the range at the fuse box (very important-The last time I didn't do this and ended up paying a repairman $150.00 to replace the damaged connectors). I removed the two screws that hold the element in place. I then pulled the element out about 3 inches and disconnected the two wires. I then connected the new element, pushed the element back in and replaced the screws. Turned the power back on and tested the element. The whole job took about 30 minutes because I had trouble disconnecting the old element. I used the flat end of the scrapper to push against the connector while I pulled the element out. Normally it would take only about 15 minutes.
Parts Used:
-
Leticia from Sunnyvale, CA
-
Difficulty Level:Really Easy
-
Total Repair Time:Less than 15 mins
1 person
found this instruction helpful.
Was this instruction helpful to you?
Thank you for voting!
Bake element burned out
Removed the failed bake element per the video linked in the Partselect email. Unlike the video on YouTube the PartSelect video shows that the bake element can easily be replaced through the oven door and it is not necessary to slide the range out and remove a rear panel.
Parts Used:
-
Richard from BOULDER, CO
-
Difficulty Level:Very Easy
-
Total Repair Time:Less than 15 mins
-
Tools:Pliers, Screw drivers
1 person
found this instruction helpful.
Was this instruction helpful to you?
Thank you for voting!
Old element caught fire, replaced with new one
Removed screws of old element pulled clips off replaced with new element very easy
Parts Used:
-
louis from CAHOKIA, IL
-
Difficulty Level:Very Easy
-
Total Repair Time:Less than 15 mins
-
Tools:Screw drivers
1 person
found this instruction helpful.
Was this instruction helpful to you?
Thank you for voting!
Oven would not hold temperature, not turn on, and would shut off during use.
Extremely simple repair to make. Move stove away from wall and disconnect power. Remove the oven racks. Remove the rear sheet metal panel covering the wiring harnesses. Caution: Sharp edges and corners on sheet metal.Sensor is located in upper left corner on rear oven wall. Using a long-shafted #2 Philips screwdriver, remove the two Philips head screws and gently pull the sensor 1" away from the oven wall. At this point, it will help to have an assist from someone while you are behind the range. Have the assistant gently tug on the sensor while you watch for wires moving on the rear of the range. After locating the sensor wires, gently disconnect the plastic connector clip. Note: plastic connectors become brittle with age and exposure to heat Move to front of range and gently remove sensor from rear wall by pulling the wiring through the oven wall. Before inserting the new sensor wire through the oven wall, "dry fit" the wiring connectors to see that the new sensor is a correct connection. Make connection, and secure the sensor to the rear oven wall with the two screws. Install racks, reinstall rear sheet metal panel, and connect the power. Set the oven baking temperature to a moderately low temp, 300 - 350 deg. to test the new sensor.
Parts Used:
-
John from Arvada, CO
-
Difficulty Level:Very Easy
-
Total Repair Time:Less than 15 mins
-
Tools:Nutdriver, Screw drivers
1 person
found this instruction helpful.
Was this instruction helpful to you?
Thank you for voting!
Element didn't heat at all
Removed 2 screws, disconnected wires, attached wires to new element, put screws back. Turned oven on. Perfect.
Parts Used:
-
Roger from PATERSON, NJ
-
Difficulty Level:Very Easy
-
Total Repair Time:Less than 15 mins
-
Tools:Pliers, Screw drivers
1 person
found this instruction helpful.
Was this instruction helpful to you?
Thank you for voting!