




















3888VRV-Z Magic Chef Range - Instructions
Keep searches simple. Use keywords, e.g. "leaking", "pump", "broken" or "fit".
No temperature control
Turned off breakers to oven. Removed two screws that held oven in cabinet. Removed oven door by opening slightly and pulling up on door. Pulled oven out 1/3 of way. Took out four screws on top of control panel. Took oven light switch off by unscrewing holding ring. Removed temp knob on right by pulling. Removed start / stop knob same way.Removed glass straight out. Removed four screws that held elecrtonic clock conrtol board. Unpluged three wire plug from right side and the nine wire plug from the left side. Worked board out at and angle. Went backwards to connect and replace board, screws and door.Slid oven back in and tested oven after turning breakers back on, worked like new.
Parts Used:

-
Max from Houston, TX
-
Difficulty Level:Easy
-
Total Repair Time:30 - 60 mins
-
Tools:Screw drivers
2 of 3 people
found this instruction helpful.
Was this instruction helpful to you?
Thank you for voting!
Oven Temperature was 50 degrees low
Took screws out of the back on the side the sensor was on, unplugged it & took out the two screws on the inside of the oven to release the sensor. Put new sensor in place with the two screws & used one of the adapters to plug in the new sensor. Put screws back in the back panel & turned on the oven which unfortunately is still 50 degrees low. Need a new clock with computer which is out of stock & unavailable. I was an electrician for 25 years so didn't experience any problems. It was a cheap thing to try.
Parts Used:
-
Eugene from Clinton, IA
-
Difficulty Level:Really Easy
-
Total Repair Time:15 - 30 mins
-
Tools:Screw drivers
2 of 3 people
found this instruction helpful.
Was this instruction helpful to you?
Thank you for voting!
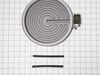
front burner would not heat
simply took off smooth surface top flipped it upsde down on a towel. unbolted the entire burner assembly. matched connections with the new burner with limit switch. replaced smooth surface top plugged it in. no problems. extremely easy fix no repair charges.
Parts Used:
-
Jack A from Biloxi, MS
-
Difficulty Level:Really Easy
-
Total Repair Time:Less than 15 mins
-
Tools:Socket set
2 of 3 people
found this instruction helpful.
Was this instruction helpful to you?
Thank you for voting!
I needed a broiler pan
I took the broiler pan out of the shipping container and put it in the oven.
Parts Used:
-
Rhoda P. from Secaucus, NJ
-
Difficulty Level:Really Easy
-
Total Repair Time:Less than 15 mins
4 of 9 people
found this instruction helpful.
Was this instruction helpful to you?
Thank you for voting!
snapped element
switch off the range. undo the two screws & unplug the two tabs. Replace with new element, connect two tabs, screw back in place. done!
recieved my replacement part the next day after ordering
recieved my replacement part the next day after ordering
Parts Used:
-
Paul from Yukon, OK
-
Difficulty Level:Easy
-
Total Repair Time:Less than 15 mins
-
Tools:Screw drivers
1 person
found this instruction helpful.
Was this instruction helpful to you?
Thank you for voting!
oven not heating to set temp. 100 degrees too cold
installed part,turned unit on-temp still cold. reset digital control, up 35 degrees, still cold. un-plugged unit,re-connect after 10 min. still cold.
Parts Used:
-
Robert from Funston, GA
-
Difficulty Level:Really Easy
-
Total Repair Time:Less than 15 mins
-
Tools:Screw drivers
2 of 4 people
found this instruction helpful.
Was this instruction helpful to you?
Thank you for voting!
Previous element burnt up
I let my husband to the work...But it was very easy. I could have done it! He removed the screws, pulled the wires off previous element. Reattached the wires to the new element and screwed the ends back in place.
Parts Used:
-
Betsy from Sun City, AZ
-
Difficulty Level:Really Easy
-
Total Repair Time:Less than 15 mins
-
Tools:Screw drivers
1 person
found this instruction helpful.
Was this instruction helpful to you?
Thank you for voting!
Element burned out.
First I removed the two screws that hold the element in place. I then pulled the element out aobut 3 inches and disconnected the wires.
Parts Used:
-
Raymond from Ottawa, OH
-
Difficulty Level:Really Easy
-
Total Repair Time:Less than 15 mins
-
Tools:Screw drivers
2 of 4 people
found this instruction helpful.
Was this instruction helpful to you?
Thank you for voting!
Oven temperature fluctuates
Replaced the thermostat according to existing videos and had to adjust the thermostat using instuctions in the user manual for model CWE4800ACB.
Parts Used:
-
Larry from SOLON, IA
-
Difficulty Level:Easy
-
Total Repair Time:30 - 60 mins
-
Tools:Screw drivers
1 person
found this instruction helpful.
Was this instruction helpful to you?
Thank you for voting!
F5 fault code kept appearing
I installed the new oven sensor but the problem continued. So I ordered a new relay board and installed it. Still no luck. So I pulled the new board back out and started trouble shooting it using my electronic background. I discovered the new board was using a pin for L2 that had no exit on the backplane, so I removed it and installed it where I believed it should go. Reinstalled the power relay board and presto. My oven is working lie a champ. Louis
Parts Used:
-
Louis Rodriguez from Granbury, TX
-
Difficulty Level:Very Difficult
-
Total Repair Time:More than 2 hours
-
Tools:Nutdriver, Screw drivers
1 person
found this instruction helpful.
Was this instruction helpful to you?
Thank you for voting!
Wife said stove was on fire - Oven element shorted.
Removed the old element by removing 2 screws and disconnecting two solderless connectors. One solderless connector was melted in two. I had to remove the rear panel and cut the old connector off and crimped on a new solderless connector. The time required was lengthened due to trip to the hardware store to get a new connector. While I was fixing the oven element my wife replaced the oven light.
Parts Used:

-
James from Hoyt Lakes, MN
-
Difficulty Level:Easy
-
Total Repair Time:30 - 60 mins
-
Tools:Screw drivers
1 person
found this instruction helpful.
Was this instruction helpful to you?
Thank you for voting!
original fixture required bulb - this fixture (all-in-one) was great
Pulled range out from cabinet-wall to get to back side, everthing was clearly exposed tlhen. Just a matter of installing new fixture, putting back on, reconnected power source - put range back in proper place.
Parts Used:

-
wesley from ODENVILLE, AL
-
Difficulty Level:Really Easy
-
Total Repair Time:30 - 60 mins
-
Tools:Pliers, Screw drivers
1 person
found this instruction helpful.
Was this instruction helpful to you?
Thank you for voting!
No problem installing the sensor
I removed the two mounting screws and pulled the harness through the opening unsnapped the sensor from the harness and installed the new sensor i didn't have to used the adapters the new sensor fitted
Parts Used:
-
tommy from FAYETTEVILLE, NC
-
Difficulty Level:Very Easy
-
Total Repair Time:Less than 15 mins
-
Tools:Screw drivers
1 person
found this instruction helpful.
Was this instruction helpful to you?
Thank you for voting!
Bake Element Melted
Unplugged stove, unscrewed element pulled element out about 3 inces and disconnected element. Took model of stove looked on line for part. PartSelect had the best price and easiest web site to order part. Ordered part about 4pm and received part in 2 days. Took element out of box plug into connections and screwed the element back in. Plugged stove in and worked perfect.
Parts Used:
-
Bert from S. Easton, MA
-
Difficulty Level:Easy
-
Total Repair Time:Less than 15 mins
-
Tools:Screw drivers
1 person
found this instruction helpful.
Was this instruction helpful to you?
Thank you for voting!
hot spot in center of bake element appeared suggesting failure was imminent
pulled breaker,removed oven door,removed 2 screws,pulled bake element out 3 inches,pulled connections off,pushed connectors on new element,pushed new element back and replaced screws,replaced oven door ,pushed breaker back and turned on oven and let it heat up to 350 degrees.
Total time 10 minutes,even a caveman could do it.
Total time 10 minutes,even a caveman could do it.
Parts Used:
-
burton from prides crossing, MA
-
Difficulty Level:Really Easy
-
Total Repair Time:Less than 15 mins
-
Tools:Screw drivers
1 person
found this instruction helpful.
Was this instruction helpful to you?
Thank you for voting!