




















3862XRA Magic Chef Range - Instructions
Keep searches simple. Use keywords, e.g. "leaking", "pump", "broken" or "fit".
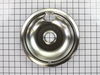
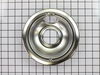
Store-bought drip bowls wouldn't fit.
My elements just plug in so all I had to do was pull them out and replace the drip bowls. They fit perfectly!
Parts Used:
-
Sharon from Yacolt, WA
-
Difficulty Level:Really Easy
-
Total Repair Time:Less than 15 mins
5 of 6 people
found this instruction helpful.
Was this instruction helpful to you?
Thank you for voting!
electric burner burned out
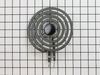
This is the second time PartSelect came through for me. If it hadn't been for you guys, I'd have had to buy a new Jenn-Air cooktop, because ours is nearly 30 years old. About two years ago, I bought a new two-burner cartridge, which installed without tools in about one minute. But a few weeks ago, we lost the burner in the other cartridge. I emailed PartSelect, and even though I gave them my obsolete model number, a helpful service rep managed to find me the part number of the correct burner, so I was able to place my order. Once the part arrived, there was no problem replacing the burner. This is a simple operation we've performed many times when we need to remove the burner for cleaning.
Parts Used:
-
Paul from Foley, AL
-
Difficulty Level:Really Easy
-
Total Repair Time:Less than 15 mins
6 of 9 people
found this instruction helpful.
Was this instruction helpful to you?
Thank you for voting!
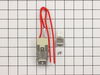
The heating element socket had crumbled with age.
Changing the socket with a new one simply required removing one screw and splicing the two existing wires to the pigtails on the new socket. It took longer to unpack the replacement part than actually doing the job.
Parts Used:
-
Edward from Webster, NY
-
Difficulty Level:Really Easy
-
Total Repair Time:Less than 15 mins
-
Tools:Pliers, Screw drivers
4 of 4 people
found this instruction helpful.
Was this instruction helpful to you?
Thank you for voting!
burner fell apart
Plugged in the new burner, which we received in one day.We were delighted with the quick service
Parts Used:
-
Barbara a from Huntington, NY
-
Difficulty Level:Really Easy
-
Total Repair Time:Less than 15 mins
5 of 7 people
found this instruction helpful.
Was this instruction helpful to you?
Thank you for voting!
power light on, but burner not getting hot
It was really easy. It took about 5 minutes to remove the screws holding the back in place. Another couple of minutes to remove the switch, and a few more minutes to change the wires over one at a time. Then 5 more minutes to put it all back together again, and plug it back in, and it just worked. Really simple.
Parts Used:

-
Aaron from Weymouth, MA
-
Difficulty Level:Really Easy
-
Total Repair Time:Less than 15 mins
-
Tools:Screw drivers
7 of 13 people
found this instruction helpful.
Was this instruction helpful to you?
Thank you for voting!
oven overheated F-2 error message
replaced Hi-Limit button by removing rear oven cover. Changing by removing screws than replacing with new button.................................. changed sensor by removing screws inside oven and replcing with new unit. changed connector behind rear cover.
Parts Used:


-
Russell from Juneau, AK
-
Difficulty Level:Easy
-
Total Repair Time:30 - 60 mins
-
Tools:Pliers, Screw drivers
6 of 11 people
found this instruction helpful.
Was this instruction helpful to you?
Thank you for voting!
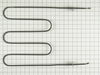
Broiler part wouldn't heat. Element internally broken
i removed the two screws that holds the element in. I pulled the element out and disconnected the wires and I had to adapt a double male adapter to the wire ends and plug the wires back onto the element. The old element had male spades and the new element had female spades.
Parts Used:
-
Richard from Perkinsville, VT
-
Difficulty Level:Really Easy
-
Total Repair Time:15 - 30 mins
-
Tools:Pliers, Screw drivers
5 of 8 people
found this instruction helpful.
Was this instruction helpful to you?
Thank you for voting!
Oven was not correctly heating to set temperature
Removed the approximatly 10 screws that hold on both the upper and lower pieces of sheet metal that cover the back of the oven. Removed the screw holding in the temp sensor. Unplugged and removed the old sensor. Plugged in and installed the new sensor (using one of the included adapter wires supplied with the sensor). Put the 2 pieces of sheet metal back on and plugged in the oven.
Parts Used:
-
Trace from Ofallon, MO
-
Difficulty Level:Really Easy
-
Total Repair Time:Less than 15 mins
-
Tools:Nutdriver
4 of 5 people
found this instruction helpful.
Was this instruction helpful to you?
Thank you for voting!
The drip bowls were all caked and corroded.
This wasn't a "repair", but I got an email asking for my story, so here it is. :-)
I followed the owner's manual instructions by pulling out the burner elements, lifting up the old drip bowls, setting in the new ones, replacing the elements.
I followed the owner's manual instructions by pulling out the burner elements, lifting up the old drip bowls, setting in the new ones, replacing the elements.
Parts Used:
-
Terry from Mountain City, TN
-
Difficulty Level:Really Easy
-
Total Repair Time:Less than 15 mins
4 of 5 people
found this instruction helpful.
Was this instruction helpful to you?
Thank you for voting!
Burner no longer worked.
First I removed a screw that held the element in place then disconnected the two wires . Then I just reattached the two wires put the screw back in place and was done in about 10 minutes. Fairly easy fix, I had this go out a few years ago and had a repairman fix it, and saw how easy it was, so this time I did it myself. Easy job!!
Parts Used:
-
Marcus from Emmett, KS
-
Difficulty Level:Easy
-
Total Repair Time:Less than 15 mins
-
Tools:Screw drivers
4 of 5 people
found this instruction helpful.
Was this instruction helpful to you?
Thank you for voting!
Door gasket was hard and brittle from baked-on grease - heat leaking around door
Waited for my husband to do it, but when he didn't, I tried it. Very simple! Just pulled the old gasket out of the pinch pin holes in the door, then replaced it. Tuck the one end into the hole at the bottom of the door, then match up the little pinch pins on the gasket with the holes in the door - matches up perfectly! Be sure to tuck in each of pinch pins till they sort of "snap" into each hole. Took me 5 minutes, tops. Works great now, no more lost heat around the edge of the door.
Parts Used:

-
Harlen from Spring Creek, NV
-
Difficulty Level:Really Easy
-
Total Repair Time:Less than 15 mins
4 of 5 people
found this instruction helpful.
Was this instruction helpful to you?
Thank you for voting!
Needed to replace the oven door gasket/seal
Removed door from oven by pulling up at the first stop point after opening the door. Removed the outer shell by removing 5 screws. Disassembled the inner door by removing 6 screws. Be careful with the insulation blanket (fits in a molded portion of the inner door). Glass windows can be removed (for cleaning) via a couple screws. Old gasket/seal is held in-place via spring-clips; just squeezed each clip, pushed each thru their respective holes, and pulled off the worn-out gasket. New gasket snapped in-place by pushing the clips thru the respective holes. Reverse the process to reassemble the door. You can do this job in 15-20 minutes. Took us longer because it took some elbow-grease (and patience) to clean the crud off the glass windows.
Parts Used:
-
Daniel from Katy, TX
-
Difficulty Level:Easy
-
Total Repair Time:30 - 60 mins
-
Tools:Pliers, Screw drivers
4 of 5 people
found this instruction helpful.
Was this instruction helpful to you?
Thank you for voting!
Oven erratic, not heating correctly, timer beeper sounding
The video indicating •unscrew old sensor, •pull wiring, •unplug old sensor, and •plug in replacement was good until I pulled the old one and saw wire nuts behind the small square hole! After some research, I learned that the nuts COULD come through that small hole with use of needle nose pliers. One of the wire nuts had the edges pinched off (chipped) in the process. Then I learned about ceramic wire nuts, which I'd never previously encountered. Very important if you don't want to melt your nuts! I cut and stripped the end of a disconnect plug to the stove wiring and now I have a plug in place; which, hopefully, I'll never need to use.
Parts Used:
-
Dave from SANTA BARBARA, CA
-
Difficulty Level:A Bit Difficult
-
Total Repair Time:30 - 60 mins
-
Tools:Pliers, Screw drivers
3 of 3 people
found this instruction helpful.
Was this instruction helpful to you?
Thank you for voting!
door seal contaminated by a boil-over, not flexible
From reading other reviews i thought I would have to dis-assemble the door but when I saw the new part I realized I would not have to, simply pop the beveled clips w/pocket knife and pop in the new seal clips. the ends tucked very nicely, an 80+ yr. old would have no trouble if they had their wits.
Parts Used:
-
Rob from Yakima, WA
-
Difficulty Level:Really Easy
-
Total Repair Time:Less than 15 mins
3 of 3 people
found this instruction helpful.
Was this instruction helpful to you?
Thank you for voting!
Broiler drawer front slide plastic guides broke so drawer sagged and was difficult to pull out.
Removed the single phillips screw that held each plastic slide guide to the stove, and replaced the part reusing the screws. Was so simple I didn't even have to swear. This was my mother-in-law's stove, and she was so happy to have it repaired she's fed me twice since.
Parts Used:
-
DOUGLAS from MESA, AZ
-
Difficulty Level:Really Easy
-
Total Repair Time:Less than 15 mins
-
Tools:Screw drivers
3 of 3 people
found this instruction helpful.
Was this instruction helpful to you?
Thank you for voting!