




















3862VVV Magic Chef Range - Instructions
Keep searches simple. Use keywords, e.g. "leaking", "pump", "broken" or "fit".
Oven sensor caused cooling fan to run continuously. Had to flip breaker to get it to turn off..
Left oven off. Located sensor in pdf manual. Unscrewed mount, pulled sensor out to access connector. Disconnected old sensor, checked continuity(resistance) on ohms with multimeter. No continuity; connected new sensor, screwed mount back into place, turned on oven and baked cookies to check operation & it worked perfectly.
Parts Used:

-
Aubrey from EADS, TN
-
Difficulty Level:Really Easy
-
Total Repair Time:Less than 15 mins
-
Tools:Screw drivers
5 of 5 people
found this instruction helpful.
Was this instruction helpful to you?
Thank you for voting!
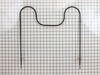
Bake Element Failed
Unplugged the stove. I removed the old element by removing the two screws holding it in, and plugged the stove back in. I ordered the part and it came in 2 days. Unpluged the stove again, connected the new element, and re-attached it via the two screws. Plugged it back in, and it worked great. Fantastic price and quick delivery. Only took about 5 minutes to fix, and I saved at least $100 by not having to call a service man.
Parts Used:
-
Douglas from Plymouth, WI
-
Difficulty Level:Really Easy
-
Total Repair Time:Less than 15 mins
-
Tools:Screw drivers
5 of 6 people
found this instruction helpful.
Was this instruction helpful to you?
Thank you for voting!
6" surface heating coil remained warm when "off"
Removed the large lower back panel of range (6-8 phillips screws) which holds upper control back panel in place. Removed upper control back panel (2 screws), exposing infinite switch electrical connections. At front face of control panel, removed (pulled off) control knob, exposing 2 phillips screws holding switch in place. (NOTE: A sleeve is on the switch arm or maybe remains inside the control knob). Look for this sleeve. Without it, the knob will NOT seize the switch rotary arm.
Removed each wire connection individually, one at a time, installing it in the proper position on the new switch.
Reverse all procedures to put things back together. A very simple, straight-forward operation.
Removed each wire connection individually, one at a time, installing it in the proper position on the new switch.
Reverse all procedures to put things back together. A very simple, straight-forward operation.
Parts Used:

-
William C. from Sealy, TX
-
Difficulty Level:Easy
-
Total Repair Time:30 - 60 mins
-
Tools:Screw drivers
8 of 15 people
found this instruction helpful.
Was this instruction helpful to you?
Thank you for voting!
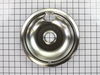
Store-bought drip bowls wouldn't fit.
My elements just plug in so all I had to do was pull them out and replace the drip bowls. They fit perfectly!
Parts Used:
-
Sharon from Yacolt, WA
-
Difficulty Level:Really Easy
-
Total Repair Time:Less than 15 mins
5 of 6 people
found this instruction helpful.
Was this instruction helpful to you?
Thank you for voting!
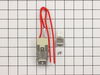
The heating element socket had crumbled with age.
Changing the socket with a new one simply required removing one screw and splicing the two existing wires to the pigtails on the new socket. It took longer to unpack the replacement part than actually doing the job.
Parts Used:
-
Edward from Webster, NY
-
Difficulty Level:Really Easy
-
Total Repair Time:Less than 15 mins
-
Tools:Pliers, Screw drivers
4 of 4 people
found this instruction helpful.
Was this instruction helpful to you?
Thank you for voting!
power light on, but burner not getting hot
It was really easy. It took about 5 minutes to remove the screws holding the back in place. Another couple of minutes to remove the switch, and a few more minutes to change the wires over one at a time. Then 5 more minutes to put it all back together again, and plug it back in, and it just worked. Really simple.
Parts Used:
-
Aaron from Weymouth, MA
-
Difficulty Level:Really Easy
-
Total Repair Time:Less than 15 mins
-
Tools:Screw drivers
7 of 13 people
found this instruction helpful.
Was this instruction helpful to you?
Thank you for voting!
broken door hinge
unplug unit remove rear panel screws lift up stove top remove top two screws remove panel remove two hinge screws remove replace hinge and follow in reverse order
Parts Used:

-
James from Elmont, NY
-
Difficulty Level:Easy
-
Total Repair Time:15 - 30 mins
-
Tools:Nutdriver, Screw drivers
7 of 14 people
found this instruction helpful.
Was this instruction helpful to you?
Thank you for voting!
Door hinges broke and stuck/broken light bulb
I killed power
Pulled the back panel
Pulled the door off
pulled light socket wires
reached in and bent in light socket tabs
knocked out light socket
slide in new socket
lifted top of stove (glass)
disconnected glass top wiring
pulled off glass top
pulled both side panels
removed both hinges,
installed new hinges
reinstalled side panels
reinstalled glass top,
reinstalled light socket wiring
installed back panel
installed door
restored power
Pulled the back panel
Pulled the door off
pulled light socket wires
reached in and bent in light socket tabs
knocked out light socket
slide in new socket
lifted top of stove (glass)
disconnected glass top wiring
pulled off glass top
pulled both side panels
removed both hinges,
installed new hinges
reinstalled side panels
reinstalled glass top,
reinstalled light socket wiring
installed back panel
installed door
restored power
Parts Used:

-
Kenneth from Zachary, LA
-
Difficulty Level:A Bit Difficult
-
Total Repair Time:30 - 60 mins
-
Tools:Nutdriver, Pliers, Screw drivers, Wrench (Adjustable)
9 of 20 people
found this instruction helpful.
Was this instruction helpful to you?
Thank you for voting!
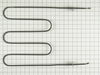
Broiler part wouldn't heat. Element internally broken
i removed the two screws that holds the element in. I pulled the element out and disconnected the wires and I had to adapt a double male adapter to the wire ends and plug the wires back onto the element. The old element had male spades and the new element had female spades.
Parts Used:
-
Richard from Perkinsville, VT
-
Difficulty Level:Really Easy
-
Total Repair Time:15 - 30 mins
-
Tools:Pliers, Screw drivers
5 of 8 people
found this instruction helpful.
Was this instruction helpful to you?
Thank you for voting!
oven overheated F-2 error message
replaced Hi-Limit button by removing rear oven cover. Changing by removing screws than replacing with new button.................................. changed sensor by removing screws inside oven and replcing with new unit. changed connector behind rear cover.
Parts Used:

-
Russell from Juneau, AK
-
Difficulty Level:Easy
-
Total Repair Time:30 - 60 mins
-
Tools:Pliers, Screw drivers
6 of 11 people
found this instruction helpful.
Was this instruction helpful to you?
Thank you for voting!
Oven was not correctly heating to set temperature
Removed the approximatly 10 screws that hold on both the upper and lower pieces of sheet metal that cover the back of the oven. Removed the screw holding in the temp sensor. Unplugged and removed the old sensor. Plugged in and installed the new sensor (using one of the included adapter wires supplied with the sensor). Put the 2 pieces of sheet metal back on and plugged in the oven.
Parts Used:
-
Trace from Ofallon, MO
-
Difficulty Level:Really Easy
-
Total Repair Time:Less than 15 mins
-
Tools:Nutdriver
4 of 5 people
found this instruction helpful.
Was this instruction helpful to you?
Thank you for voting!
Broken levelling leg

-
Linda from Oneida, NY
-
Difficulty Level:Really Easy
-
Total Repair Time:Less than 15 mins
5 of 8 people
found this instruction helpful.
Was this instruction helpful to you?
Thank you for voting!
The drip bowls were all caked and corroded.
This wasn't a "repair", but I got an email asking for my story, so here it is. :-)
I followed the owner's manual instructions by pulling out the burner elements, lifting up the old drip bowls, setting in the new ones, replacing the elements.
I followed the owner's manual instructions by pulling out the burner elements, lifting up the old drip bowls, setting in the new ones, replacing the elements.
Parts Used:
-
Terry from Mountain City, TN
-
Difficulty Level:Really Easy
-
Total Repair Time:Less than 15 mins
4 of 5 people
found this instruction helpful.
Was this instruction helpful to you?
Thank you for voting!
Burner no longer worked.
First I removed a screw that held the element in place then disconnected the two wires . Then I just reattached the two wires put the screw back in place and was done in about 10 minutes. Fairly easy fix, I had this go out a few years ago and had a repairman fix it, and saw how easy it was, so this time I did it myself. Easy job!!
Parts Used:
-
Marcus from Emmett, KS
-
Difficulty Level:Easy
-
Total Repair Time:Less than 15 mins
-
Tools:Screw drivers
4 of 5 people
found this instruction helpful.
Was this instruction helpful to you?
Thank you for voting!
Door gasket was hard and brittle from baked-on grease - heat leaking around door
Waited for my husband to do it, but when he didn't, I tried it. Very simple! Just pulled the old gasket out of the pinch pin holes in the door, then replaced it. Tuck the one end into the hole at the bottom of the door, then match up the little pinch pins on the gasket with the holes in the door - matches up perfectly! Be sure to tuck in each of pinch pins till they sort of "snap" into each hole. Took me 5 minutes, tops. Works great now, no more lost heat around the edge of the door.
Parts Used:

-
Harlen from Spring Creek, NV
-
Difficulty Level:Really Easy
-
Total Repair Time:Less than 15 mins
4 of 5 people
found this instruction helpful.
Was this instruction helpful to you?
Thank you for voting!