This 40-Watt light bulb is sold individually.
It is specially designed to withstand extreme temperatures, so this bulb is compatible with a variety of appliance types including refrigerators, ranges,...
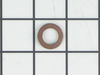
This evaporator fan motor grommet, or condenser fan grommet is built for refrigerators. It provides a cushion between the fan motor and the motor mounting bracket. It is made or round, black plastic a...
This part is the replacement snack pan slide rail for your refrigerator. It is made of white plastic and is approximately 16 inches by 2 inches. The crisper draw will slide in and out along this rail....
The interior light of your refrigerator is controlled by a switch that is activated when the door is opened and closed. If your refrigerator light will not turn on, there could be an issue with the sw...
This snack pan slide rail, also known as a drawer slide rail, is a genuine OEM replacement part for your refrigerator. This slide rail is white in color, and serves to help your snack pan slide in and...
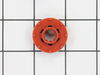
The condenser fan blade assembly helps to regulate the temperature in your refrigerator or freezer. This fan assembly has 4 blades, but other fans may have 3 blades, so be sure to check the number of ...
Let's solve your refrigerator issues with our Genuine GE Vegetable Pan Slide! This product is specially crafted for your fridge to secure and support your crisper drawer. It's designed to make sure th...
The lid bumper or evaporator fan motor bumper in your refrigerator prevents the fan motor from scraping against the side bracket. If your refrigerator/freezer is noisy, the bumper could be worn down o...
This condenser fan motor is made for a refrigerator. The motor powers your fan to circulate air to the condenser coil. The condenser coil removes heat from the refrigerant gas. The motor base measures...
$85.95
Special Order
Questions And Answers for 38187KBRARCC
Be the first to ask our experts a question about this model!
✖
Ask a Question
Ask our experts a question on this model and we'll respond as soon as we can.
I applied some tips learned by reading other reviews. So before I started I grabbed my trusty vise grip pliers and a small screw driver. I locked onto the switch actuator, the part that the refrigerator door pushes in, with the vise grips and pulled on it just hard enough to get the screw driver inserted in the right side to push in the catch clip so the switch could be pulled out further each time the catch clip was depressed to the next detent. Then I used the screw driver on the left site to encourage the switch past the detents on the left and very quickly the switch was out of the mount. The wires from the refrigerator pulled out with the old switch. I unplugged the old switch from the wires and plugged in the new switch and shoved the new switch back into the mount, wiggled it a couple of times to make sure it was secure and the job was done. Once I applied the vise gripes at first, the whole job took less than a minute.
First I removed the rear cover, located at the bottom of the refrigerator. Then I cleaned out the dirt & dust on and around the compressor. The relay has a cover, that is secured with a spring loaded clip. To release the clip, push in with your fingers, while disengaging the end clip with a screwdriver. Once one side is off the other lifts off. Remove cove exposing the relay. There is one wire terminated, with a spade clip, remove it. With a strait blade screwdriver, pry the relay off the 2 post it slides on to. (Don't be surprised if it breaks into pieces, as they are sometimes brittle. ) Slide the new relay onto the 2 posts, replace the wire onto the right terminal, and replace the relay cover & clip. Replace the rear cover. Plug in and test.
Had to remove inside panels to expose coils in freezer. Used hair dryer and towels to de-ice. Reading online learned about defrost heater (long thin glass tube with wire coil in it I could not see b/c up under the inside of the coils). Who would have guessed freezers have heaters in them!! And learned the defrost timer (inside the fridge) is just a continuous clock turning on and off the defrost heater. Anyways I used a screwdriver to turn the timer to defrost mode and by disconnecting the wires from each end of the heater and measuring the voltage, I found 70 volts there. Hmmm. I didn't know what was the right volt amount. Reading online I also found out the defrost Thermostat is basically a temp actuated on/off switch for that heater, so that while the timer is sending *120* volts to the heater (which gets red hot by the way) the therm switches the heater off when the temp gets high in the freezer. I eyeballed the therm ( it looks like a little can) and I saw that it was coming apart. The key at this moment is you can cut out and bypass the therm to see if the heater works. If it does you know the therm is the bad boy. But only do this as a momentary test or the heater will probably set your fridge on fire after a while!
Always remember to unplug the fridge when you are messing with the wires! And dry it up inside before putting your hands and tools in there!
So I ordered a therm using the model # of the fridge. Had to cut the old out and strip / wire nut the new one in.
Took too long b/c I was hung up on the heater being bad (after all it didn't heat up when I put the timer in defrost) and not knowing about the rights volts to the heater.