














363595 Refrigerator - Overview
Models starting with 363595
Click on the best match to narrow your results.
- 36359522994 Kenmore Refrigerator
- 36359522996 Kenmore Refrigerator
- 36359522997 Kenmore Refrigerator
- 36359527994 Kenmore Refrigerator
- 36359527996 Kenmore Refrigerator
- 36359527997 Kenmore Refrigerator
- 36359551990 Kenmore Refrigerator
- 36359551991 Kenmore Refrigerator
- 36359551994 Kenmore Refrigerator
- 36359551996 Kenmore Refrigerator
- 36359552990 Kenmore Refrigerator
- 36359552991 Kenmore Refrigerator
- 36359552994 Kenmore Refrigerator
- 36359552996 Kenmore Refrigerator
- 36359557990 Kenmore Refrigerator
- 36359557991 Kenmore Refrigerator
- 36359557994 Kenmore Refrigerator
- 36359557996 Kenmore Refrigerator
- 36359572990 Kenmore Refrigerator
- 36359572991 Kenmore Refrigerator
- 36359572994 Kenmore Refrigerator
- 36359572996 Kenmore Refrigerator
- 36359572997 Kenmore Refrigerator
- 36359575990 Kenmore Refrigerator
- 36359575991 General Electric Refrigerator (REFRIGERATOR)
- 36359575994 Kenmore Refrigerator
- 36359575996 Kenmore Refrigerator
- 36359575997 Kenmore Refrigerator
- 36359577990 Kenmore Refrigerator
- 36359577991 Kenmore Refrigerator
- 36359577994 Kenmore Refrigerator
- 36359577996 Kenmore Refrigerator
Keep searches simple, eg. "belt" or "pump".

Refrigerator Ice and Water Filter
PartSelect #: PS8746144
Manufacturer #: MWFP
This ice and water filter helps reduce impurities in select side by side and bottom freezer refrigerators. Replace it about every six months, or when water flow slows, ice production drops, or the fil...
$94.45
Special Order

Union Connector - 5/16 Inch to 5/16 Inch
PartSelect #: PS758446
Manufacturer #: WR02X11330
Quick connector for plastic water line - 5/16" to 5/16"
$23.79
Special Order

Light Bulb - 40W
PartSelect #: PS217532
Manufacturer #: 40A15
This 40-Watt light bulb is sold individually.
It is specially designed to withstand extreme temperatures, so this bulb is compatible with a variety of appliance types including refrigerators, ranges,...
$19.10
Special Order

Evaporator/Condensor Fan Grommet
PartSelect #: PS284555
Manufacturer #: WR02X10098
This evaporator fan motor grommet, or condenser fan grommet is built for refrigerators. It provides a cushion between the fan motor and the motor mounting bracket. It is made or round, black plastic a...
$17.70
Special Order

Bottom Hinge Assembly
PartSelect #: PS290199
Manufacturer #: WR13X10020
Comes with both cam risers. This hinge kit is suitable for the bottom of either the freezer door or the refrigerator door of some refrigerators.
$79.98
Special Order

LIGHT SWITCH
PartSelect #: PS16554876
Manufacturer #: WR23X37285
The interior light of your refrigerator is controlled by a switch that is activated when the door is opened and closed. If your refrigerator light will not turn on, there could be an issue with the sw...
No Longer Available

Dual Inlet Water Valve
PartSelect #: PS901314
Manufacturer #: WR57X10051
This valve comes with 1/4" compression inlet.
NOTE: This part comes with new quick connections. To install - cut retaining nuts off of existing plastic water lines and gently push them into new valv...
No Longer Available

Plastic Tubing - 5/16 Inch
PartSelect #: PS292878
Manufacturer #: WR17X2891
This part is the replacement water line for your refrigerator. It is a long plastic tube, which is 5/16 of an inch in diameter. If your refrigerator is leaking, or will not dispense water or ice, you ...
$47.57
Special Order

Ice Maker
PartSelect #: PS1993870
Manufacturer #: WR30X10093
This ice maker assembly is used to make ice in your refrigerator. The ice maker receives water from the water inlet valve and will freeze until ice cubes are formed. Once the water has been frozen the...
$267.74
Special Order

Drawer Slide Rail - Right Side
PartSelect #: PS306944
Manufacturer #: WR72X240
This replacement drawer slide rail is for the right-hand side of your refrigerator. You will need a Phillips screwdriver to complete this repair.
$104.10
Special Order

Hinge Cam Riser
PartSelect #: PS284596
Manufacturer #: WR02X10140
This part helps with the closing of the door and helps keep it in position.
$20.24
Special Order

Dispenser Door Assembly or Flapper
PartSelect #: PS964304
Manufacturer #: WR17X11653
This ice dispenser door flap, also known as a damper door, is designed to seal the ice chute in compatible refrigerator models, preventing warm air from entering the freezer compartment. Constructed f...
$29.12
Special Order
Common Symptoms of models starting with 363595
[Viewing 23 of 23]Leaking
Fixed by
these parts
these parts


Show All
Ice maker not making ice
Fixed by
these parts
these parts


Show All
Not dispensing water
Fixed by
these parts
these parts
Show All
Fridge too warm
Fixed by
these parts
these parts


Show All
Light not working
Fixed by
these parts
these parts


Show All
Door won’t open or close
Fixed by
these parts
these parts


Show All
Noisy
Fixed by
these parts
these parts


Show All
Freezer not defrosting
Fixed by
these parts
these parts
Show All
Freezer section too warm
Fixed by
these parts
these parts
Show All
Ice maker won’t dispense ice
Fixed by
these parts
these parts

Show All
Door Sweating
Fixed by
these parts
these parts
Show All
Frost buildup
Fixed by
these parts
these parts
Show All
Fridge and Freezer are too warm
Fixed by
these parts
these parts
Show All
Fridge runs too long
Fixed by
these parts
these parts
Show All
Ice maker dispenses too little ice
Fixed by
these parts
these parts
Show All
Freezer too cold
Fixed by
these parts
these parts
Show All
Clicking sound
Fixed by
these parts
these parts
Show All
Will Not Start
Fixed by
these parts
these parts

Show All
Too warm
Fixed by
these parts
these parts
Show All
Ice maker dispenses too much ice
Fixed by
these parts
these parts
Show All
Fridge too cold
Fixed by
these parts
these parts
Show All
Won’t start
Fixed by
these parts
these parts
Show All
Touchpad does not respond
Fixed by
these parts
these parts
Show All
Keep searches simple. Use keywords, e.g. "leaking", "pump", "broken" or "fit".
Leaking water valve
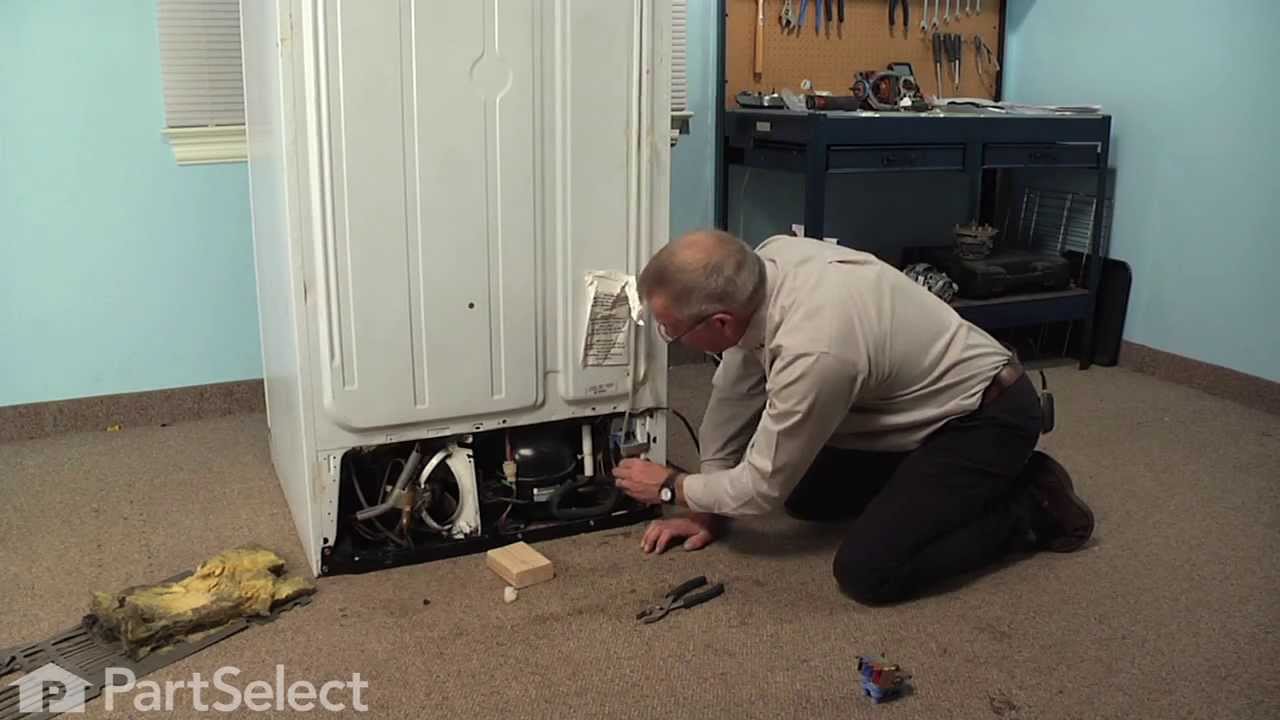
Removed black cardboard covering on back of refrig with nut driver (6 screws), turned off water supply to pump, removed cooper waterline to pump with adjustable wrench, removed 1 screw holding pump to refrigerator, removed plastic waterline from pump by turning hose counter clockwise. Inserter plastic water line in new pump by screwing line in clockwise, pushed orange plastic stop around waterline into pump, connected cooper water line to pump first wrapping threads on pump with teflon plumbers tape, reinstalled pump to refrig and cardboard back on refrig with 6 screws.
One side note:.
This is the second pump which has burst at the blue plastic seam in seven years.
One side note:.
This is the second pump which has burst at the blue plastic seam in seven years.
Parts Used:

-
James from Centerville, OH
-
Difficulty Level:Easy
-
Total Repair Time:Less than 15 mins
-
Tools:Nutdriver, Socket set, Wrench (Adjustable)
8478 of 12456 people
found this instruction helpful.
Was this instruction helpful to you?
Thank you for voting!
Freezer was still simi-cold but refrigerator was not.
Called a friend that lead me down the right path so i did a search for the part's and found this site. The trouble shooting that outher's had done was the same as mine, I descovered that the coil's in the freezer had frozen up complety. They are located behind a plasic cover in the freezer area, it had frozen up due to the Defrost heater element being defective, when i took it out it was black and burnt looking,It is located at the bottom edge of the coils,2 bolt's and a plug in on each side. That is probally the only part i needed but i went ahead and replaced the sensor and timer also.The sensor wires in the freezer( located on the very top of the coils) had to be cut and the new ones spliced in, only 2 wires and easy access. I also put shrink wrap on the splices to protect them from mosisture. The timer was located in the fridge area by the temp. control knobs. 2 small bolts and a plug in was all on it. It's been 5 day's and so far so good. The worst part was defrosting the frozen coils. This was done with the wife's hair dryer and a couple towel's to soak up the water. Don't just let the water go down the drain hole because the tray that catches it will not hold all the water from the frozen coil's. Just a reminder, don't forget to unplug the unit when working on it. Hope this help's and was very easy install, Cost about $125 in part's and a couple hours of labor(did a good cleaning while it was eampty for the repair) Good luck.
Parts Used:


-
Richard from West Alton, MO
-
Difficulty Level:Easy
-
Total Repair Time:30 - 60 mins
-
Tools:Nutdriver, Screw drivers, Socket set
448 of 491 people
found this instruction helpful.
Was this instruction helpful to you?
Thank you for voting!
Cracked housing on the vaave
1. Turn off water supply, and electrical ( unplug it) to fridge.
2. Remove water line to valve. Watch for water to pour out of the line. Have a towel handy.
3. Remove the cardboard cover on the bottom of the fridge.
4. Remove the screws that hold the valve in place.
5. Remove the valve, be careful the waterlines are still attached.
6. Place a towel under valve to catch any water that leaks out from water lines.
7. Remove electrical lines, make sure to mark which went where. One is for the ice, and one is for the water. Make sure the power is off, there is 120 volts present at those connections.
- now my waterlines attached using a compression type fitting. The new valve I got used just a push in type of attachment. But, easy enough I just removed the pieces for the compression and the waterlines pushed right in and worked fine.
- the mounting harness for the valve was alittle different but the parts I need were in the right location and she fit in fine.
8. Attach water lines. They are different sizes so you can't get those mixed up.
9. Attach electrical lines.
- the new valve came with adaptors for my electrical connection. Just snapped them on and kept on going.
10. turn on watersupply for fridge. Plug it back in.
11. Test for leaks, and proper operation. ie. When you push the water does the water valve open?
12. Unplug fridge
13. Now is a good time to clean out any dust or dirt that has accumallated in under around your fridge.
14. reassemble, valve, then cover. move fridge back into place.
15. Plug fridge back in.
16. Take a clean glass.
17. Fill with water from the front.
18. Take full glass of water and go watch tv. You've earned it, and saved yourself probably $100.00 in labor costs. Good Job.
2. Remove water line to valve. Watch for water to pour out of the line. Have a towel handy.
3. Remove the cardboard cover on the bottom of the fridge.
4. Remove the screws that hold the valve in place.
5. Remove the valve, be careful the waterlines are still attached.
6. Place a towel under valve to catch any water that leaks out from water lines.
7. Remove electrical lines, make sure to mark which went where. One is for the ice, and one is for the water. Make sure the power is off, there is 120 volts present at those connections.
- now my waterlines attached using a compression type fitting. The new valve I got used just a push in type of attachment. But, easy enough I just removed the pieces for the compression and the waterlines pushed right in and worked fine.
- the mounting harness for the valve was alittle different but the parts I need were in the right location and she fit in fine.
8. Attach water lines. They are different sizes so you can't get those mixed up.
9. Attach electrical lines.
- the new valve came with adaptors for my electrical connection. Just snapped them on and kept on going.
10. turn on watersupply for fridge. Plug it back in.
11. Test for leaks, and proper operation. ie. When you push the water does the water valve open?
12. Unplug fridge
13. Now is a good time to clean out any dust or dirt that has accumallated in under around your fridge.
14. reassemble, valve, then cover. move fridge back into place.
15. Plug fridge back in.
16. Take a clean glass.
17. Fill with water from the front.
18. Take full glass of water and go watch tv. You've earned it, and saved yourself probably $100.00 in labor costs. Good Job.
Parts Used:
-
anthony from thornton, CO
-
Difficulty Level:Really Easy
-
Total Repair Time:15 - 30 mins
-
Tools:Screw drivers, Wrench (Adjustable)
288 of 308 people
found this instruction helpful.
Was this instruction helpful to you?
Thank you for voting!